Download
1 / 37
370 likes | 561 Vues
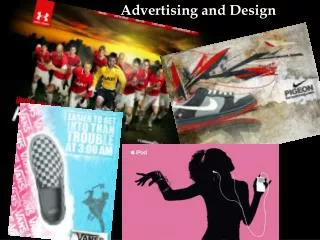
Advertising Design- Chapter 10. Successful Advertising Attracts attention Communicates a message Persuades an audience Design not for Art sake but for Business Sake But can it be art and still do its job?. The Design Process. Define the problem Research the project

E N D
Advertising Design- Chapter 10 • Successful Advertising • Attracts attention • Communicates a message • Persuades an audience • Design not for Art sake but for Business Sake • But can it be art and still do its job?
The Design Process • Define the problem • Research the project • Create thumbnails and roughs • Prepare comprehensives • Review and refine the design
Defining the problem • What does the client want? • Print or digital media? • Budget? • Timeframe? • Target market?
Researching the Project • Research to understand the client and the project • Research sources: - Internet - Company salespeople/showroom - Visit competitors and compare products and services
Creating Thumbnails and Roughs • Thumbnails • Small, fast sketches used to explore solutions • Simple, with little detail, and rarely use color
Creating Thumbnails and Roughs • Roughs • Tighter, more visually refined • Manually or on the computer, with required or potential formats, layouts, typography, and color for each idea
Preparing Comprehensives • An accurate reproduction of potential solutions to the client’s problem • Often created on the computer, with type, photography, and illustrations in position to show the client what each idea looks like • Also known as “comps”
Reviewing and Refining • Comps submitted to client • Client and Designer work together to choose which idea will work best • Sometimes ideas are combined • Process continues until client is satisfied
Review the Fundamentalsof Design • Design elements • Line, Shape, Value, Color, Texture, Space • Design principles • Balance, Proximity, Alignment, Unity, Emphasis, Rhythm
Guide the user through the design How do we as humans organize concepts? Gestalt Principles- Visual Grouping Similarity Proximity Continuity Page Design- Showing Relationships
Visual Grouping- Similarity • Shape, size, color or orientation • Color is a powerful tool • Emotional power and meaning • Contrast or differences • Draw attention • Show hierarchical relationships
Visual Grouping- Proximity • We associate elements that are close together to stronger relationships • Unity and Balance • Using Grids • Blank or White Space ABRS CDTV
Visual Grouping- Continuity • We prefer continuous and unbroken lines. • Mentally fill in missing pieces • By using this in design can get viewer actively involved • Guide viewers to elements • Figure and Ground
Figure and Ground • Figure- focus of attention • Ground- background
Designing Content Elements • Using Photographs Effectively • Tell story or relevant to text • Attention grabbing • Clear, sharp, look good • Well cropped and focused • Do you have permission to use it?
Designing Content Elements • Using Photographs Effectively cont. • Cropping • Focus • Sizing • Proper to placement and layout • Placing • Lead to the rest of the content
Designing Content Elements • Typography – Visual Design of Text • Communicate thru font • Mood and tone • Coherence of style • Professional…Fun…Elegant
Designing Content Elements • Text Design • Emphasize headings • Text to background contrast • Use Sans-Serif fonts, not Serif. • Larger Type Size • Shorter Lines • NO ALL CAPS • Avoid excessive italics • Use plenty of blank space around text
Creating Focused, Effective Brochures • Planning- audience, tone, objective • Subdivide topic- logical • Research topic • Write first draft of text • Revise text • Identify needed graphic elements • Polish and edit- details! • Test
Basic Brochure Design • How to fold the paper? • Make the cover interesting- Top 3rd • Use reader friendly type • Use easy to read text formats • Flush left text • Use type devices for emphasis • Don’t be afraid of white space • Consider using spot color
InDesign : An Overview • Adobe InDesign • User interface resembles Photoshop/Illustrator • Advanced type controls • Can import layered Photoshop/Illustrator files • Export directly to Adobe PDF documents • Preview separations and create special effects
Shapes • Made up of two parts: Stroke and Fill • Strokes available in any thickness • Fill is the color that goes in the shape • Can create rectangles, squares, ellipses, circles, and polygons
Powerful Typographic Controls • Major strength of page layout software • Working with type involves skill in the use of type styles, sizes and spacing • Type Styles • Serif or Sans Serif • Italic, Square serif, Script, Blackletter and Miscellaneous • Working with Type • Type families and styles
Working with Type • Type family: consists of all the styles of type from the same design • Type size measured in points • Leading is the vertical space between lines of type • Line length is the horizontal measurement of a line of type • Alignment set left, right, centered or justified
Working with Type • Different styles and alignment affect the look of the design piece
Electronic Publishing and Printing • Computers connected to thousands of printers outputting more paperwork than ever before • Difficult to store, retrieve information • Environmental concerns • 1992 Adobe Solution: first version of the Portable Document Format (PDF)
An Adobe Solution • Create a paperless office; exchange and store all information electronically • Electronic mail distribution networks • PDFs not popular at first • Today, PDFs used worldwide, using Adobe Acrobat software
The Importance of the Portable Document Format • Adobe creates PDF format to control internal company paperwork • Cross platform compatible; Documents look and print the same way on any computer using any operating system • PDF format is device-independent
What Are PDFs? • Based on PostScript page description language • Describes to an output device how a page should look so it can print accurately • Advantage of PDF over Postscript; translation process built-in to its creation, prints more consistently on different printers
Production: Tools and Process- Ch 11 • Vector Graphics • Bitmap Graphics (raster) • RIP( raster image processing) turning vector info into raster.
Image Capture Scanned Images: image’s values and color are converted to a series of dots Number of dots per inch describes the resolution (quality) of an image Dots measured in lines per inch (LPI), with small dots in lighter areas, larger dots in dark areas Need to recreate LPI dots digitally
Image Capture Dots per inch (DPI): generally created by printing devices Pixels per inch (PPI): generally describes dots on a computer monitor Spots per inch (SPI): technique spreads dots of equal size over the image Scanners use DPI or PPI; Imagesetters/Platesetters convert image to LPI or SPI
Resolution and Image Quality Resolution measured in both LPI and SPI More lines or spots means higher resolution and higher image quality Newspapers: Low res, 45-95 LPI/SPI Catalogs: Average res, 100-133 LPI/SPI Annual Reports: High res, 150-200 LPI/SPI
Are you ready to RIP? • Keep electronic files clean. Delete it, don’t cover it (with a white box) • Avoid putting files into files into files (nesting) • When using multiple programs, assemble all in final output program. • Do all image modifications before importing • Avoid large scaling of graphics • Scan an image at the approximate size you need for final publication.
File formats • TIFF (tagged image file format)- bitmaps • EPS (encapsulated PostScript)- object oriented for storing graphics • JPEG (Joint Photographic Experts Group)- compressed file format • GIF (graphics interchange format)- no compatible with page layout • PICT- mac file
Compression • Lossless- less compression but preserve original file • Lossy- high compression but lose some info (JPEG- high frequency)
Preparing Electronic Files • Assemble files in page layout program • Bring all your images • Select automatic trapping option in layout program and ask to check • All files must be CMYK if you are doing full color output • In Photoshop, check color picker for an alert symbol (will not print) • Include all original scans and vector graphics • Be sure all documents are linked. • Supply all fonts • Organize and label all the files on a disk