Download

1 / 56
580 likes | 1.34k Vues
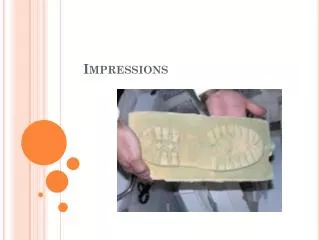
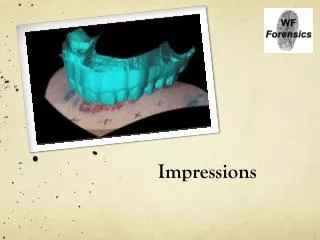
Preliminary Edentulous Impressions. Preliminary Edentulous Impressions. Preliminary impressions needed for diagnostic casts for making custom trays. Custom Tray. Required to accurately register moveable mucosa Create seal for retention. Stock Trays.

E N D
Preliminary Edentulous Impressions • Preliminary impressions needed for diagnostic casts for making custom trays
Custom Tray • Required to accurately register moveable mucosa • Create seal for retention
Stock Trays • Stock trays can result in distortion and shortening of the final denture flange
Alginate Syringe Technique • Irreversible hydrocolloid • Ensures capture of critical anatomy - sometimes missed with just a tray
Border Molding • Minimizes distortion of the movable vestibular tissues • Displacement could lead to dislodgment during function
Irreversible Hydrocolloid Storage • Pre-weighed pouches • Easier dispensing • Minimizes contamination • Bulk material • Store in cool dry airtight containers
Irreversible Hydrocolloid Storage • Deteriorates if: • Stored above 54°C • Repeated openings • Deterioration results in: • Thin mixtures • Reduced strength • Permanent deformation
Tray Selection • 5 mm of clearance with soft tissues • Hydrocolloid requires bulk for accuracy, strength and stability
Tray Selection • Maxillary trays should extend slightly beyond vibrating line • Mandibular trays should cover the retromolar pads
Tray Selection • Sto-K edentulous trays • Short flanges, so don’t distort vestibule
Tray Modification • Trays can be modified with compound to extend the tray if desired
Irreversible Hydrocolloid Syringe Technique • Critical anatomy registration • Retromylohyoid area • Hamular notches • Retrozygomal area
Patient Preparation • Practice placing tray • Rotate into place
Patient Preparation • Dry the mucosa • Dry the maxilla with folded gauze • Pack 3 gauze in mandible • Don’t let patient close
Mark Vibrating Line • Prior to making preliminary & final impressions • Fovea should not be used
Vibrating Line • If denture terminates anteriorly, poor seal • If terminates posteriorly, soft palate movement may cause it to dislodge • Denture may be unretentive and/or uncomfortable
Locate & Mark the Hamular Notch • Posterior border of a complete denture • Between the bony tuberosity & hamulus
Locate & Mark Hamular Notch • Denture border must terminate on soft displaceable tissue • Provides comfort and retention • Notch may be posterior to depression in soft tissue
Locate & Mark the Hamular Notch • Use the head of a mirror, to palpate the notch • Mark with an indelible marker
Locate Posterior Border of Hard Palate • Ensure the denture terminates posteriorly by palpating
Indelible Marks Prior to Impression • Transfer to the impression and cast when it is poured • Eliminates error • Tissue should be relatively dry to be most effective
Syringe Preparation • 12 cc disposable syringe • Cut off the tip where it begins to curve • 5 mm orifice
Plunger Preparation • Vaseline plunger • Ease of extruding material • Use: • Uncontaminated bowl, spatula • Regular set alginate
Measuring Powder • Fluff (shake) the powder, measure, tap and flatten the scoop with powder • Use three scoops for syringe impressions
Mixing • Assistant mixes for at least 45 seconds • Smooth creamy homologous mixture that glistens • Not granular or lumpy
Syringe Loading • The assistant loads the syringe nearly full from the back and inserts plunger
Syringe Technique • Syringe a broad rope into the vestibule • Begin at the posterior • Move quickly toward anterior • Fill the vestibule to labial frenum
Cheek Retraction • Use a mirror, instead of a finger • Provides better visibility, more maneuverability
Maxillary Impressions • Begin opposite the tuberosity • Inject until alginate is seen in the hamular notch before moving forward
Mandibular Impressions • Start with the buccal vestibule adjacent retromolar pad • Move forward to the labial frenum • Repeat on the opposite side
Lingual Vestibule • Roll syringe tip under tongue • Inject into retromylohyoid space until alginate appears between tongue & ridge • Move anteriorly, filling to lingual frenum • Repeat on the opposite side
Deep Palatal Vaults • Material can be syringed into the palate • Smooth with a finger, or voids may occur
Partially Edentulous • Syringe a small amount of hydrocolloid on the occlusal surfaces • Force into the occlusal surfaces with finger
Preliminary Impressions • The assistant loads the tray while the clinician is syringing • Place the anterior portion of the tray first, then seat the posterior of the tray
Preliminary Impressions • Less gagging if the patient is lying down • Tongue position avoids gagging • Mold the vestibular area • Pull on the cheeks and lips to activate muscles and frena
Finger Sweep at Posterior • If excess material at border • Use finger or cotton swab
Preliminary Impressions • Support the tray during setting - do not leave the patient • Movement causes distortion
Preliminary Impressions • Break peripheral seal • Drops of water • Pull up cheek and let air in • Wiggle tray until hear seal break
Preliminary Impressions • Once seal broken, remove quickly (to avoid permanent deformation) • Evaluate impression • Pour within 12 minutes
Preliminary Impressions • Rinse thoroughly with water • Gently shake to remove excess water
Preliminary Impressions • Spray with disinfectant to coat all surfaces, and seal in a bag for ten minutes
Syringe Technique Problems • Vestibular material may not join the tray material • Saliva contamination • Insufficient material
Syringe Technique Problems • Omitting plunger lubrication may make it difficult to express the alginate • Trapping tongue under the tray will result in underextension of the lingual vestibule
Problems with Syringe Technique • Severe gaggers poor tolerance for intraoral motion • Use traditional technique
Pouring a Model • Weighing powder, measure water • Vacuum mix (less time, stronger cast) • Use a two pour technique