Mastering Advanced Web Intelligence Reporting: Key Skills for Effective Data Analysis
Enhance your enterprise reporting skills with our advanced Web Intelligence class. Participants will learn to add prompts to filters, manage columns and rows (adding, removing, moving, swapping), use sections and sorts, handle multiple queries, merge dimensions, and create complex formulas and variables. This course builds on foundational knowledge acquired in the introductory class, ensuring a comprehensive understanding of advanced reporting techniques and empowering users to improve their reporting accuracy and efficiency.

Mastering Advanced Web Intelligence Reporting: Key Skills for Effective Data Analysis
E N D
Presentation Transcript
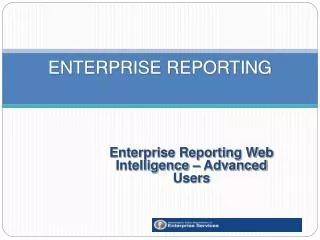
ENTERPRISE REPORTING Enterprise Reporting Web Intelligence – Advanced Users
Class Objectives At the conclusion of class participants should know how to: • Add Prompts to Filters • Add and Remove Columns/Rows, Move or Swap Columns/Rows, Replace Columns or Rows • Use Sections, Breaks and Sorts • Work with Multiple Queries • Merge Dimensions • Create Formulas and Variables
Introduction • Your name? • Your agency? • Any experience with AFRS? • Any experience with Enterprise Reporting (ER) Financial Reports? • Have you attended the ER Intro to Web Intelligence (AFRS Financial Queries) class? • How do you expect to use ER Web Intelligence?
Inventory of training materials • ER Web Intelligence – Advanced Users training PowerPoint • Course evaluation: please use this to note any issues or suggestions; this provides helpful feedback for improving future classes.
Remember ER Intro to WebI class? • Here are what we’ve learned in ER Intro to WebI (AFRS Financial Queries) class ER WebI Intro • How to Login • Create Queries • Save Queries • Modify Queries • How to Log off Here are what we’ll learn today… ER WebI Advanced • Add Prompts to Filters • Work with Columns/Rows • Use Sections, Breaks and Sorts • Work with Multiple Queries • Merge Dimensions • Create Formulas and Variables
ER WebI Logon InformationWeb Access (via ER Financial Report Home site) • Click “Click here to access the Web Intelligence Tool”
Chapter 5 – What are Prompts? • Prompt is a filter that allow the user to refresh data with the value specified by the prompt • Allow multiple users to use the same query but view different results based on the prompt values entered • A prompt can be used to limit data to certain time periods • A prompt can be used to limit data to a coding element values • A query can contain multiple prompts
Chapter 5 – Prompt (cont..)Illustration: Prompt on Fiscal Month In this example, “Prompt” filter is used to prompt user to enter a fiscal month with each refresh
Chapter 5 – Prompt (cont..) How to create Prompt? Step 1 – Start with the following query from the “AFRS 2011” universe • Result Objects = Select Agency, Fiscal Month, Subobject, Subsubobject, and Amount • Query Filters = Setup • Agency equal to 105 • Object equal to E • GL Account equal to 6510 • Fiscal Month equal to 01
Chapter 5 – Prompt (cont..) Add Prompt • Step 2 – While in [Edit Query] mode, Add Prompt by the “Fiscal Month” dimension • Click on the arrow to the right of the Value entry text box. • SelectPrompt
Chapter 5 – Prompt (cont..) Run Query to use Prompt • Step 3 – Run Query • Click Run Query
Chapter 5 – Prompt (cont..) Using Prompt Step 4 – When the query has run or refreshed, the following Prompts screen will display, prompting the user to select a Fiscal Month. • Select a fiscal month from the Fiscal Month list • Click arrow right
Chapter 5 – Prompt (cont..) Run Query to pull data based on prompt value (fiscal month in this example) • ClickRun Query
Chapter 5 – Prompt (cont..) Exercise 1 – Adding Prompts to Filters • Go to Public Folder\@Helpdesk Web Intelligence to copy “Exercise 1 – Chapter 5 – Prompt_(Shell)” and paste into your “My Favorites”. [This WebI document has been created for your use in this Exercise 1] • Add prompts to Vendor Num filter • Click on Run Query to run the query • Enter a ten-digit statewide vendor number • The following are examples of statewide vendor number: • SWV0007149 Qwest Comm. Inc • SWV0010342 Verizon Wireless • Save As “Exercise 1 – Chapter 5 – Prompt_(Finished)”
Chapter 6 – Working with Columns/Rows • As a default, the tool generates a new report as a vertical table • A vertical table includes the data for all the objects specified in Results Objects panel of the Query View window • You can edit the table contents – Working with Columns/Rows • Adding columns • Adding rows • Removing columns • Removing rows
Chapter 6 – Working with Tables – Add Column (new data) to existing WebI Report • Click “Edit Report” • Make a mental Note: Program was not originally selected in the Result Objects and therefore is not available in the Data section. • Need to switch to “Edit Query” to select Program data.
Chapter 6 – Working with Tables (Cont..) Modify query • Click on “Edit Query”
Chapter 6 – Working with Tables (Cont..) Click and Drag • Click “Program” from the data section and drag to drop it in the “Result Objects”
Chapter 6 – Working with Tables (Cont..) Rerun query • Click “Run Query”
Chapter 6 – Working with Tables (Cont..) Drag and Drop here to insert a cell • Note: “Program” is now shown in Data section • Click on “Program” and then drag it to the report table (to the right of Subsubobject for this example) • Note: To add a column, drop where the verbiage to display is “Drop here to insert a cell”
Chapter 6 – Working with Tables (Cont..) Program added
Chapter 6 – Working with Tables (Cont..) Remove Column • Select column • Right click • Select Remove • Chose Remove Column • Another way to remove column: highlight column & press [Delete] key – this option only delete the data and not the entire column and its content.
Chapter 6 – Working with Tables (Cont..) Move Fiscal Month column • Drag the Fiscal Month to be after the Subobject until the verbiage, “Drop here to insert a cell” appears
Chapter 6 – Working with Tables (Cont..) Replace Fiscal Month column with Program column • Drag the “Program” to be after the “Fiscal Month” until the verbiage, “Drop here to replace a cell”, appears(Note: It’s a Replace if drag from Data section; It’s a swap if drag within the report).
Chapter 6 – Working with Tables (Cont..) Format Numbers To format numbers • Right-click amount column • Choose Format Number
Chapter 6 – Working with Tables(Cont..) Number Format dialog box displayed • Select the desired Format Type • Select desired Properties • Click OK
Chapter 6 – Working with Tables (Cont..) Reformatted Results
Chapter 6 – Working with Tables (Cont..) Utilizing Report Filters Filter allows users to limit data on report (i.e. filter by Program)
Chapter 6 – Working with Tables (Cont..) Show/Hide Filter Pane – to limit data • Clickon the “Show/Hide Filter Pane”
Chapter 6 – Working with Tables (Cont..) Filter Pane • Clickon the “Program” dimension from the Data section and drag it into the Filter Pane. • Release
Chapter 6 – Working with Tables (Cont..) Use Filter Editor to limit data displayed • Clickon the “Value (s) from list” to display the list of values that are available in the report. • Select one of the Programs to limit the report • Click arrow right • ClickOK
Chapter 6 – Working with Tables (Cont..) Filtered Results: Data Display is limited by Program
Chapter 6 – Working with Tables (Cont..) Another way to limit data - Add Filter Another way to filter by Program is using Add Filter • Highlight “Program” data • Click “Add filter” from the toolbar
Chapter 6 – Working with Tables (Cont..) Select data to limit from List of Programs in Filter • Select a “Program” from the list of Values • Click “OK”
Chapter 6 – Working with Tables (Cont..) Filtered Results: Data display is Limited by Program
Chapter 6 – Working with Tables (Cont..) Crosstab For this example, create a program crosstab • Click and dragthe “Program” dimension to the top edge of the table until the verbiage, “Drop here to create a crosstab” appear • Release • Crosstab displays values across the top axis and on the left axis. • Body of the report displays values corresponding to the intersection of the dimensions.
Chapter 6 – Working with Tables (Cont..) Crosstab Created
Chapter 6 – Working with Tables (Cont..) Exercise 2 – Work with Columns/Rows • Modify “Exercise 1 – chapter 5 – Prompt_(Finished)” • From Edit Report mode, Remove “Project”, “Subproject”, “Project Phase”, “Account”, “Expenditure Authority Index”, “Program Index”, “Subobject”, “Subsubobject”, and “Organization Index” from query result • From Edit Query mode, Add “IRS Box”, “OMWBE Pay Flag”, “Tax Type”, Pay Process Type”, and “Warrant Register Num” • Click [Run Query] • From Edit Report mode, right click on “Biennium” column to “Remove” and “Remove column” • From Edit Report mode, click data within the “Fiscal Month” and drag it out of the report.
Chapter 6 – Working with Tables (Cont..) Exercise 2 – Work with Columns/Rows (continued) • From Edit Report mode, drag “IRS Box”, “OMWBE Pay Flag”, and “Tax Type” into the report, placing all in front of Process Date column. • From Edit Report mode and in the Data section, drag into report “Pay Process Type” and insert after the “Amount” column and “Warrant Register Num” and insert before the “Amount” column. • Move “Warrant Register Num” to the left of the “Amount” • Move “Pay Process Type” to the right of the “Amount” • ClickRefresh Data
Chapter 6 – Working with Tables (Cont..) Exercise 2 – Work with Columns/Rows (continued)
Chapter 7 – Use Sections, Breaks and Sorts • Sections are a way to group related data together • Breaks are a way to divide a large dataset into a smaller dataset • Sorts are a way to organize data on a report
Chapter 7 – Sections in reports • Sections group relateddata together • Facilitates navigation from one section to another • No grand total for all sections • Data for each section is a separate block
Chapter 7 – Sections (Cont..) Set as Section • Right click on “Program” andselect “Set as Section”
Chapter 7 – Sections (Cont..) Section Created (group of related data to Program in this example)
Chapter 7 – Sections (Cont..) Using Map to Navigate within Section (group of related data) • Click “Map” tab
Chapter 7 – Sections (Cont..) Expand Map • Expandthe “+” next to Report 1
Chapter 7 – Sections (Cont..) Navigate Section to Section • Click on the section to navigate directly to.
Chapter 7 – Breaks in reports • A break divides a large table into smaller sub-tables • Based on a selected dimension value • Subtotals by a specified value is available • Grand total for all values is available • Data remains in one block • Automatic sort is in ascending order • Can change the sort order
Chapter 7 – Breaks in reports (Cont..) Set as Break • Clickon Program andselect“Insert/Remove Break”
Chapter 7 – Breaks in reports (Cont..) Break created