SCIENTIFIC POSTER DESIGN AND ORGANIZATION
230 likes | 462 Vues
SCIENTIFIC POSTER DESIGN AND ORGANIZATION. By Lauren and Jessica. WHAT IS A (SOCIAL) SCIENTIFIC POSTER?. A scientific poster is a large document that communicates your research through a combination of text, table/charts, and images.

SCIENTIFIC POSTER DESIGN AND ORGANIZATION
E N D
Presentation Transcript
SCIENTIFIC POSTER DESIGN AND ORGANIZATION By Lauren and Jessica
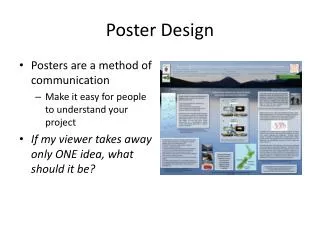
WHAT IS A (SOCIAL) SCIENTIFIC POSTER? • A scientific poster is a large document that communicates your research through a combination of text, table/charts, and images. • A poster (vs. a talk) enables you to more personally interact with people who are interested in your research but, at the same time, does not require your presence. What are the advantages and disadvantages of this medium?
EXAMPLE OF POSTERS • http://www.flickr.com/groups/368476@N21/pool/ • www.phdposters.com/gallery.php • Find an example of a poster that works well– what makes this poster effective? • Find an example of one that does not work as well– what makes this poster ineffective? • Special bonus game (!!!)
MECHANICS: SET UP YOUR SLIDE To begin a poster, make a new slide and set your dimensions in Page Setup. Make your slide 36”x48” (or 48”x36”).
MECHANICS: HOW TO SET UP YOUR SLIDE 1. Open PowerPoint, select Blank Documents, and then PowerPoint Presentation; then select Blank. 2. In the top menu click on View and then Slide. (Normal view is unnecessary because the poster consists of a single slide.) 3. Go File > Page Setup…, then enter the width and height (36” x 48”) of the poster in inches. You will see an error message saying the page is larger than the printable size—that is fine, just click out of it.
MECHANICS: MAKE TEXT BOXES All textual info can be made in a text box. You can alter size and shape, and drag the boxes around the page by its edges. The Formatting palette is the most useful. (View> Formatting Palette). The font should be large enough for people to read (between 18 and 48 pt.) and the text should be as concise as possible. You don’t want a lot of text.
AVOIDING COMMON TEXT MISTAKES • Make sure to keep the visual effect in mind– the poster should not be too dense (neither with images nor text). • Title should be in sentence case (not titlecase), and not too long. • Use italics or bold instead of underlining key text. • Don’t use dark backgrounds. • Use alignment tool, don’t align by sight. (show example)
AVOIDING COMMON IMAGE MISTAKES • Your poster will be very large, so use high-resolution images. A web image is only 72 dpi. Your images need to be at least 300 dpi. Take your own photos, or scan a hard copy. • It is always best to use your own photos! (Make sure your camera is set to take high-res pictures) • Cite your sources—do not plagiarize images. There are several places to find open-source images: • Fotopedia • Flickr (and look for creative commons licenses) • You can make charts and graphs in PPT or Excel. • Create your own graphs using “shapes” in the PPT menu • Or present your data in Excel (save graph as image).
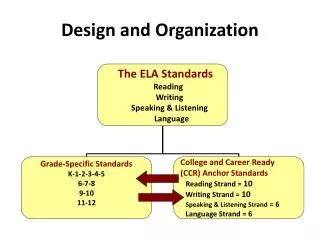
General Organization • Introduction / Thesis • Background • Methods • Results • Conclusions • Sources
Introduction / Thesis • Introduction should (very) briefly present the topic. • The most important aspect of your introduction is to present your thesis (statement of problem or research question). • Thesis should be direct and succinct.
Background • Why does the problem matter? • Has anyone else looked at this problem? • What are some of the related findings? • Be sure to cite references.
Methods and Data • How are you answering your question, testing your hypothesis, or fulfilling your statement of purpose? • What data did you use for your study? • What are the methods you are using to analyze your data? • What are the drawbacks?
Results • What did you find? • This should be purely descriptive. • Pictures and charts are particularly important for this part. • You still want to describe your images. • Aside from thesis, this is the most important part.
Conclusions • Wrap it up • Do you accept or reject your hypothesis? • How do you answer your question?
Sources • You must cite the sources of any images or sources you reference. • Posters are like papers and plagiarism rules apply. • Follow standard in-line citation procedures. For details see http://abacus.bates.edu/~ganderso/biology/resources/writing/HTWcitations.html.
Things To Keep in Mind • You have no more than 10 minutes of someone’s attention • The more pictures the better • The less text the better • Leave lots of white space • Have a border