Download
1 / 7
70 likes | 90 Vues
Learn how to schedule a screening at a Quest Diagnostics Patient Service Center (PSC) by logging in or registering on MyQuestForHealth.com, selecting a location, date, and time, verifying details, and confirming your appointment. Easily manage appointments on the dashboard.

E N D
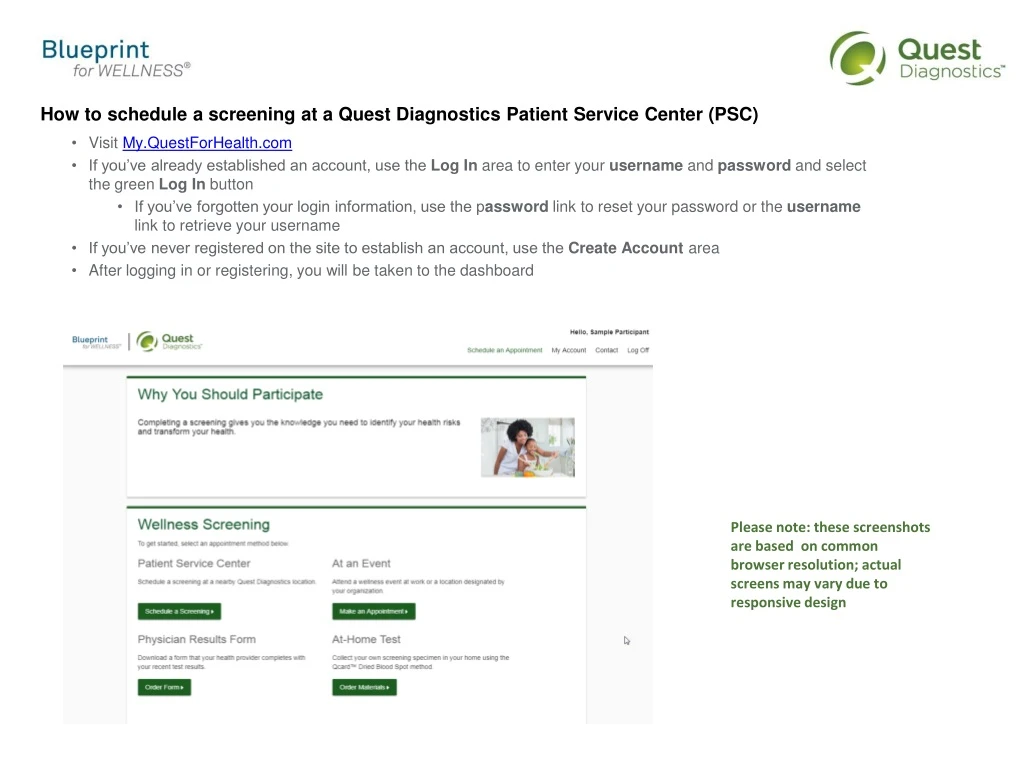
How to schedule a screening at a Quest Diagnostics Patient Service Center (PSC) • Visit My.QuestForHealth.com • If you’ve already established an account, use the Log In area to enter your username and password and select the green Log In button • If you’ve forgotten your login information, use the password link to reset your password or the username link to retrieve your username • If you’ve never registered on the site to establish an account, use the Create Account area • After logging in or registering, you will be taken to the dashboard Please note: these screenshots are based on common browser resolution; actual screens may vary due to responsive design
To schedule a screening at a PSC, in the Wellness Screening section, under Patient Service Center, select the green Schedule a Screening button
Select the Quest Diagnostics PSC location where you’d like to complete your screening • Note: To search for PSC locations in other areas than your home zip code, simply change the zip code • Select the Continue button
The first available date will populate in the Date field; you can click the calendar icon to choose a different date • Select the Time you would like to complete your screening • select the Continue button
Verify that all the appointment details shown on the screen are accurate • select the Confirmbutton • NOTE: Your appointment is not scheduled until you select the green Confirm button
Once your appointment has been scheduled you will arrive at the Confirmation screen • You can download your Order Requisition by selecting Print Order Requisition on the left side of the screen • select the green Back to Dashboard link to return to the dashboard
On the dashboard, you will be able to see your scheduled appointment • You can select the green Download to Calendar link to add the appointment to your calendar • If needed, you can also use the green buttons to cancel or reschedule your appointment • selecting the Need more appointment information? link will take you back to the appointment confirmation page