Student Registration
Student Registration. Search for, Register, and Drop Classes. Login. 1. Type in User ID and PIN in the fields. 2. Click on Login. Main Menu. 1. Click on Student. 2. Select Registration. Registration Options.

Student Registration
E N D
Presentation Transcript
Student Registration Search for, Register, and Drop Classes
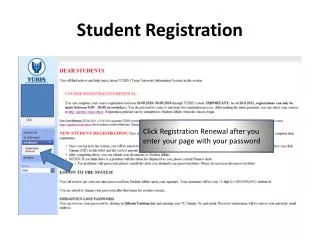
Login 1. Type in User ID and PIN in the fields. 2. Click on Login.
Main Menu 1. Click on Student. 2. Select Registration.
Registration Options Choose “Add or Drop Classes” to search and register for classes. Choose “Look Up Classes” to search for classes.
Select Term 1. Use drop down arrow to select term you are registering for. 2. Click Submit.
Class Search & Registration *CRN=Class Reference Number (Every class has a unique identifier that is used for registration.) 1. If you looked up the classes’ CRN before, you can enter them in the blank fields and click on Submit Changes. 2. If you do not know the CRN, click on Class Search.
Look up Class CRNs Scroll down to select subject as applicable.
Look up Class CRNs Once Subject is selected, click on Course Search.
Class Section Details 1. Scroll down to find the class you are interested in. 2. Click on View Section button next to your class to see details and CRNs.
Select a Section 1. Check the Select box for the section you wish to register for. 2. Click on Register.
Registered Courses 1. The course you just registered for will appear on the Add or Drop Classes Screen. Repeat steps for registering for more classes.
Registering for Corequisites 1. Enter CRNs in the blank fields next to each other. 2. Click on Submit Changes.
Dropping Classes 1. Click on Student. 2. Select Registration. 2. Select Add or Drop Classes.
Registration Term 1. If it is not set, use the drop down arrow to select term. 2. Click on Submit.
Dropping a Class 1. Use Action’s drop down arrow to choose: “Dropped Self-Service”. 2. Submit your changes.