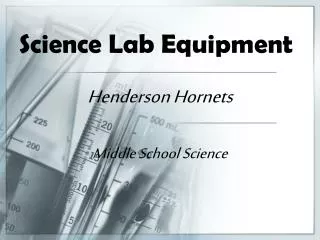
Science Lab Equipment
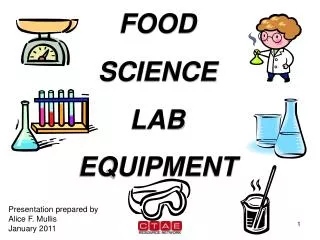
Science Lab Equipment. Henderson Hornets Middle School Science. Objectives. Identify common lab equipment State the functions of common lab equipment Demonstrate the proper uses of common lab equipment. Bunsen Burner. How to use it: We will NOT! Instead, we USE a HOT PLATE.

Science Lab Equipment
E N D
Presentation Transcript
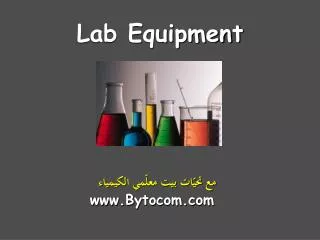
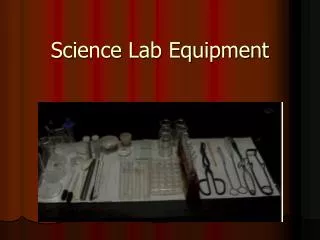
Science Lab Equipment Henderson Hornets Middle School Science
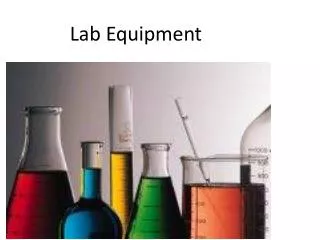
Objectives • Identify common lab equipment • State the functions of common lab equipment • Demonstrate the proper uses of common lab equipment
Bunsen Burner • How to use it: We will NOT! Instead, we USE a HOT PLATE • What it does: Produce a flame to heat glassware and other objects. • Safety concerns: Open flame
Hot Plate • What it Does: Produces heat like a stove burner • How to use it: Connect only when given permission. Always ask for the temperature setting. • Safety Concerns: Never touch the plate with your hand. Don’t reach across the hot plate.
Hot Mitt/Gloves • What it Does: Protects hands against hot containers • How to use it: Put • on hands and be sure to get a good grip • Safety Concerns: Glassware may slip out of your hands.
Thermometer • What it Does: Takes temperature of liquids • How to use it: Place in container with liquid. Do not let the thermometer rest on the bottom of container • Safety Concerns: If broken, hard to clean up Glass breakage
Beakers • What it Does: Holds liquids. Comes in different sizes • How to use it: Use a graduatedcylinderto fill with the right amount of liquid. Use it to heat, stir, or mix substances. • Safety Concerns: Breakable,Check for chips or cracks before using it
Beaker Tongs • What it does: Use to lift hot beakers • How to use it: Use the rubber ends to wrap around a hot beaker and lift • Safety Concerns: Not very easy to use so be careful when using. Grasp near top of beaker
Stirring rod • What it does: Stirs substances • How to use it: Gently stir the substances. • Safety Concerns: Made of glass, do not use if chipped or broken.
Flasks • What it Does: Holds and measures larger and amounts of liquids.Good for swirling liquids • How to use it:Read the meniscus when used to measure. Fill with care. • Safety concerns: Glass breakage
Rubber Stopper • What it does: Seals glassware • How to use it: Choose the correct size for the glassware you’re using and push in • Safety Concerns: If you push too • hard, it can break glassware
Graduated Cylinder • What it does: Measures liquid very precisely • How to use it: Fill the liquid to the proper volume. Always read the bottom of the meniscus • Safety Concerns:Use a bumper on glass one to protect from breakage.
Pipette • What it does: Measures small amounts liquid very precisely • How to use it: Squeeze the bulb to suction liquid and then let go. Fill the liquid to the proper volume. • Safety Concerns: Do not point at anyone
Dropper • What it does: Dispenses small amounts of liquid • How to use it: Squeeze the bulb to suction liquid • Release one drop at a time • Safety Concerns: Do not point at anyone. Can break if glass.
Test Tube • What it does: Holds small amounts of liquid • How to use it: Measure the liquid with a pipette or graduated cylinder to measure liquid and then pour it in. Release one drop at a time. • Safety Concerns: Glass breakage, Do not use if chipped
Test Tube Rack • What it does: Holds test tubes upright • How to use it: Put test tube in opening. • Safety Concerns: Keep it balanced so that it does not tip over.
Test Tube Holder • What it does: Holds test tube for heating • How to use it: Squeeze handles to open and release to grasp test tube. • Safety Concerns: Don’t squeeze while holding a test tube or the test tube will fall through.
Mortar and Pestle • What it does: Grinds chunks of substances into powder. • How to use it: Place substance into the mortar and use the pestle to grind it down to a powder. • Safety Concerns: May break
Ring Stand • What it does: Used to hold ring and clamps • Useful when heat substances with a Bunsen burner • How to use it: Place • on table and connect ring • or clamp • Safety Concerns: May tip over.
Ring/Clamp • What it does: Hold beakers, test tubes, or thermometers when heating substances with a Bunsen burner. • How to use it: Attach to ring stand • Safety Concerns: May cause apparatus to tip • over. Don’t over tighten.
Funnel • What it does: Helps to pour liquid into small • openings • How to use it: Place • the funnel tip into the container’s opening. • Slowly pour liquid • Safety Concerns: Don’t pour liquid all at once or it may spill over.
Petri Dish • What it does: Holds specimen while viewing under a dissecting microscope. Used to grow bacteria • How to use it: Place the specimen in the bottom and place the lid on top. Put agar into bottom and swab sample then cover with lid • Safety Concerns: Breakage if glass.Plastic can break easily
Watch Glass • What it does: Holds specimen for viewing • under dissecting microscope • How to use it: Place specimen in glass and put under microscope • Safety Concerns: Don’t touch specimen to microscope lens Glass breakage
Dissecting Pan • What it does: Holds specimen for observation and dissecting • How to use it: Place specimen pan. You may use pins to hold down the specimen • Safety Concerns: Don’t drop on you foot, it is • heavy.
Dissecting Pin • What it does: Holds specimen for observation and dissecting • How to use it: Place specimen pan You may use dissecting pins to hold down the specimen • Safety Concerns: Sharp object. Be careful not to poke yourself.
Probe • What it does: Separates tissue during dissection. Use as a pointer during dissection. • How to use it: While holding tissue, use probe • to break through tissue • Safety Concerns: Sharp object Be careful not to poke yourself.
Scalpel • What it does: Cuts tissue during dissection. • How to use it: While holding specimen, use scalpel to cut through tissue. Cut through a little at a time so you don’t go deeper than you need to • Safety Concerns: Sharp object, cut away from yourself. Be careful not to cut yourself.
Scissors • What it does: Cuts specimen or other things in the lab • How to use it: More useful to use during dissecting than the scalped • Safety Concerns: Sharp object. Cut away from yourself. Be careful not to cut yourself.
Forceps • What it does: Picks up small objects. Used to hold tissue or specimen when dissecting. • How to use it: Squeeze sides to hold or pick up item. • Safety Concerns: Sharp object, Be careful not to cut yourself
Microscope • What it does: Magnifies objects • How to use it: Turn on light and then adjust • using the coarse and fine adjustment knobs • Safety Concerns: Hold with base and arm when transferring. Will break if dropped. Electrical safety.
Slide • What it does: Holds specimen you want to view under the microscope • How to use it: Place specimen in the middle. • You may need to add a drop of distilled water • Safety Concerns: Glass breakage. Don’t crack with objectives.
Cover Slip • What it does: Covers specimen on slide. Flattens object so you can see better. • How to use it: Place lightly onto specimen on the slide • Safety Concerns: It is very thin and you may cut yourself
Triple Beam Balance • What it does: Masses substances and objects • How to use it: • Place substance or object on pan and adjust riders until balanced • Safety Concerns: Don’t drop it. Balance before use.
Meter Stick and Meter Tape • What it does:Measures distance. • How to use it:For the meter tape, work with a partner, one holds the tape down and the other extends the tape to measure longer distances • Safety Concerns: Don’t get the meter tape tangled. Don’t hit your partner accidently.
Stopwatch • What it does: Measures time • How to use it: Reset before you use. Push start and stop as accurately as possible • Safety Concerns: Don’t drop swing around, you might hit someone
Spring Scale • What it does: Measures force in Newtons • How to use it: Place the hook at the end of an object and slowly pull. • Safety Concerns: Don’t drop it. Balance before use
Insect Traps • What it does: Captures insects • How to use it: Set up as directed to trap live insects. • Safety Concerns: Open carefully so insects don’t escape
Collecting Nets • What it does: Used to collect insects and fish or other aquatic organisms. • How to use it: Quickly swipe net to capture organisms. • Safety Concerns: Don’t fall when using be careful not to tear, they are delicate.
Summary • Knowing the names and uses of common lab equipment will make doing labs much easier • Knowing how to properly use equipment also makes for a safe environment in the lab • Safety for yourself and your classmates are the MOST IMPORTANT things in a lab