Download
1 / 25
260 likes | 388 Vues
Photo Story Activity . Find someone in the room you DO NOT KNOW Sit down with them and find out their name, what they teach and 3 interesting facts about them When you are done---come get your picture taken. Digital Storytelling. How to get your kids to SHOW you what they have learned….

E N D
Photo Story Activity • Find someone in the room you DO NOT KNOW • Sit down with them and find out their name, what they teach and 3 interesting facts about them • When you are done---come get your picture taken
Digital Storytelling How to get your kids to SHOW you what they have learned….
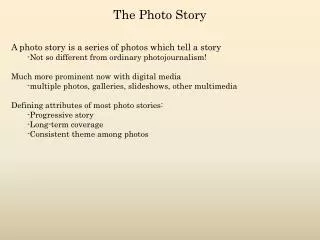
Digital Storytelling • We all have stories about the events, people, and places in our lives. • It is a fantastic way to engage students and get them to show what they know by telling a story • Increases interest in writing / storytelling • What our students are saying should always be more important than how they are saying it. • Educational Uses • http://www.storycenter.org/momquicktime.html
What we will be doing today(complements of my 3rd graders) Note: This video will not play from the web Use this LINK to view
Step OneFind your pictures • Create a folder on your H: ALL files will live here. • Create a word document for all your citations. • GOOD PLACES TO LOOK FOR IMAGES: • www.unitedstreaming.com • www.google.com (image tag) • http://www.loc.gov/rr/print/catalog.html (Library of Congress) • http://digitalgallery.nypl.org/nypldigital/index.cfm (NY Public Library Images) • http://accuweather.ap.org/cgi-bin/apl.pl (AP Multimedia Archive--NOTE this is through Power library and can only be accessed at home with passcode –see librarians) • http://www.kitzu.org/ (online kits) Note: The links H: and word document will not work from the web based presentation
Saving your pictures • You need to be sure you are saving the PICTURE FILE. • Picture files have the extension jpg, jpeg, bmp, png, jiff • NOTE .htm or .html is NOT a file extension for a picture file
How to copy / save • FROM UNITED STREAMING • Log onto United Streaming • Search for images • Open image • Choose size (small or medium) • Save in your folder—DON’T FORGET TO COPY CITATION • FROM A WEBSITE • Find an image • Open the image –NOT THE THUMBNAIL • Point to the image and RIGHT CLICK: Save as • Check to be sure the file you are saving has the correct file extention .jpg, .jpeg, .bmp, .gif, etc…. NOT HTML • Note: Be sure you copy the citation for EACH picture file used
Create your Photo Story Launch the program Opens the welcome screen. Choose begin a new story. Upload your pictures Photo Story imports multiple pictures at a time in alphabetical order. Be sure to name or number them appropriately before importing to save you time in arranging them in the timeline.
Adding More Pictures Your pictures appear in the timeline at the bottom of the page. You may add more photos at anytime using the Import Pictures button. They will be added to the end of the timeline.
Arranging your Pictures The Drag & Drop Method 1. Select the photo you want to move by clicking on it in the timeline. 2. While holding down the mouse button, drag the image to it’s desired position in the timeline. 3. Drop the image onto the timeline. The photo now appears in it’s new location. • The Arrange Buttons Method • Select the photo you want to move by clicking on it in the timeline. • Using the buttons to the right of the timeline, move the image back and forth until it is in the desired position.
Deleting Images • Highlight the photo that you wish to delete. • Below the arrange buttons, you will find a button marked with an X. This is the Delete button. • With the unwanted photo highlighted, click the Delete button • You can also click the Delete key on the computer keyboard . NOTE: When a photo is removed from the timeline, the attached files (such as narration or music files) are also removed
Cropping Pictures • Click on the photo in the timeline that you wish to crop • Click the Edit button. • In the new window, make sure that the Rotate and Crop tab is selected. • Click the checkbox beside Crop. • Using the handles (little dots along the edges) resize.
Adding Titles • In Photo Story you can add a title page to the beginning of your story, or you can add titles to each photo in the story. • when you add text to a photo, that photo becomes static in your story and does not contain any panning or zooming. • To add motion to a static photo, you must customize the motion for that photo.
Titles (con’t) You can edit Text Font Alignment
Narrate Your Pictures record stop Re-record • The next step is telling your story • FIRST-test your mic • Click on the red RECORD button to start recording • Click on the square STOP button to stop recording • You can rerecord at any time NOTE you are recording the slide that is highlighted Test mic
Creating Background Music • The next step is to add music to create the mood. • You have 2 choices • Select Music • Create Music
Create Music EASY OPTION • Built in • Safe to use • Lots of options
Select Music MUST HAVE MUSIC ON YOUR COMPUTER • Find it • Download it To your folder • Upload it
Preview your work On the Narrate your pictures and customize motion window as well as on the Add background music window there are Preview buttons.
Saving / Publishing Your Photo Story One of the most important steps in is choosing how the world will see it. The quality of your output depends on the choice you make.
Save Options Higher quality options • *Save your story for playback on your computer. WHAT WE WILL USE Lower quality options • Send the story in an e-mail message. If possible, Photo Story compresses your story to be one megabyte (MB) or less. • Save your story for playback on a Pocket PC with Windows Media Player 10 Mobile. Can be played on Windows pocket pcs. • Save your story for playback on a Smartphone with Windows Media Player 10 Mobile. Builds a story using a profile that is appropriate for your device. • Save your story for playback on a Portable Media Center. Builds a story using a profile that is appropriate for your device.
Steps to save & viewyour MOVIE • Click the Browse button to select WHERE you want Photo Story to save your project. • The Save As window opens. Navigate to the FOLDER we created. • Name the project (NO CHARACTERS OR SPACES). • Click the Save button-- Back in the Save your story window, click the Next button. • The Building your Story window opens and begins to put your story together. • When complete, the next window gives you the opportunity to view your story or • create another story. • When View your Story is selected Windows Media Player opens to play your story.
SAVE YOUR PROJECT • The Save Project button saves your story as a .wp3 file. • This is a working file that can be opened in Photo Story 3 and can be edited • Especially important for students so they can make changes • SAVE IN YOUR FOLDER
Advanced Options • Red Eye • Correcting Contrast and Color Level • Customizing Motion • Adding Transitions • Adding Effects See me to help add these to your project
More Resources • http://umtechresources.wikispaces.com/Photo_Story • http://www.coe.uh.edu/digital-storytelling/ • mhtml:http://www.coe.uh.edu/digital-storytelling/DS-web.mht!DS-web_files/frame.htm • http://www.teachingteachers.com/ • www.discoveryeducatornetwork.com Contact me if you have more questions khokanson@umasd.org