Download

1 / 13
150 likes | 808 Vues
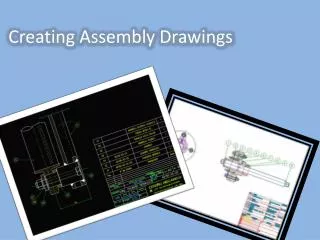
Solidworks Lesson 6 - Assembly Drawings . Introduction to Robotics. Mechanical Drawings.

E N D
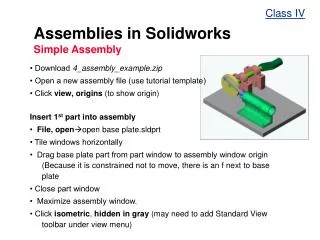
Solidworks Lesson 6 - Assembly Drawings Introduction to Robotics
Mechanical Drawings So far we have been dealing with creating parts and assemblies in SolidWorks, however, when you go to get a part machined, you will need to create a mechanical drawing of each of your parts (and assemblies). Mechanical drawings are important because they allow those who are technically trained to reconstruct your 3D geometry from 2D drawings.
Drawings in Solidworks Fortunately, SolidWorks makes it very easy for us to create drawings from a part or assembly file. In fact, if built properly, SolidWorks will also dimension the entire part and assembly for us…something that saves a lot of time!
Drawings in Solidworks Rather than start a new part from scratch, lets open the same assembly that we have been using for the past several lectures:
Drawings in Solidworks Once we open the assembly, we can click on the following button which will automatically create a drawing file from our assembly:
Drawing Format At first you see several different formats that are set up for you. Choose A-Landscape.
Drawings in Solidworks However, before we can begin placing views, it is important to set our projection style to Third Angle (in order to have the projections behave as we expect) To do this, right click anywhere on the sheet and click on Properties (or you can right click on the sheet in the Feature Manager)
Drawings in Solidworks This will open the Sheet Properties window:
Drawings in Solidworks Open up the palette on the RIGHT side menu Click and HOLD the view you want and drag it into the drawing field. Choose the ISOMETRIC view and drag it to the drawing field.
Drawings in Solidworks Once you have placed a view into the drawing field you can access any type of annotations by either clicking on the appropriate button on the dynamic toolbar or RIGHT clicking on the design.
Drawings in Solidworks Let’s add a bill of materials. Right click on design, choose TABLES, then bill of materials. Property Manager will open, click OK Now click the design, then AUTOBALLOON on the toolbar. Click OK in property manager.
Drawings in Solidworks Now add a FRONT VIEW from the palette and click OK in property manager. Then click the design and then AUTOBALLOON again. You will notice the #4 part is now being shown.
Drawings in Solidworks Use SolidWorks to create PART drawings for each part you created. Turn in your assembly bill of materials as well as each individual part drawing stapled together.