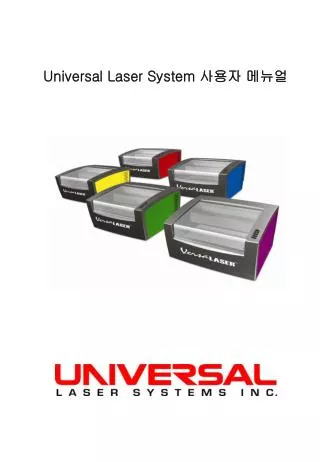
Universal Laser System 사용자 메뉴얼
Universal Laser System 사용자 메뉴얼. Universal Lager System 작업 순서도. 1. Optics lens 청소. 항상 장비를 가동하기 전에는 청소를 해 주어야 한다 . 청소가 안되었을 경우 랜즈 손상의 결과가 나타날 수 있다 . 청소가 되지 않았을 경우 작업 결과물의 상태가 좋지 못하다. 청소방법 및 청소목록 - 랜즈 클리너를 면봉에 뿌린 후 살살 문질러 청소한다 . a. Focus Lens b. 장비 왼쪽에 위치한 Mirror.

Universal Laser System 사용자 메뉴얼
E N D
Presentation Transcript
Universal Lager System 작업 순서도 1. Optics lens 청소 항상 장비를 가동하기 전에는 청소를 해 주어야 한다. 청소가 안되었을 경우 랜즈 손상의 결과가 나타날 수 있다. 청소가 되지 않았을 경우 작업 결과물의 상태가 좋지 못하다. 청소방법 및 청소목록 - 랜즈 클리너를 면봉에 뿌린 후 살살 문질러 청소한다. a. Focus Lens b. 장비 왼쪽에 위치한 Mirror. c. 장비 왼쪽에 위치한 Beam Window. d. X-Axis Bearing a. Focus Lens b. 장비 왼쪽에 위치한 Mirror. c. 장비 왼쪽에 위치한 Beam Window. d. X-Axis Bearing 850-0001-0 Cleaner - Lens 851-0002-0 Applicators - Cotton Tipped 851-0001-0 Tissue - Lens Cleaning
Universal Lager System 작업 순서도 2. Optics lens focus 처음 장비를 가동하기 전 반드시 Optics Focus를 맞추어야 한다. 아래의 그림과 같이 Focus tool을 이용하여 맞춘다. 맞추는 방법은 Cutting table의 Calibration을 클릭하면 Z-axis를 움직일 수 있는 화면이 나타난다. 그곳에서 Z-axis를 위,아래로 움직이며 그림과 같이 맞추면 된다. System 화면에서 Auto-Z를 채크 하면 한번 맞춘 값이 변화하지 않는다. Auto-Z을 채크했을 경우 재료의 두깨만 입력하면 Z-axis가 자동적으로 움직이므로 Optics Focus를 맞출 필요는 없다.
Universal Lager System 작업 순서도 3. Rotary Optics lens focus • Rotary 설치가 끝나고 장비를 가동하기 전에 Lens Focus를 맞추어야 한다. • 그림 1과 같이 사물 위에 Focus tool을 올려놓고 Focus를 맞추어야 한다. • Focus Lens를 사물의 위치로 배치를 하기 위하여 그림 3에 Y-Position 상, 하, 좌, 우 버튼을 클릭하여 이동 시킨다. • b. 그곳에서 Z-Position을 위,아래로 움직여 그림과 같이 맞추면 된다. • 맞추는 방법은 그림3에 Z-Position 의 상,하 버튼을 클릭하여 맞춘다. • c. 사물을 Rotary에 고정하는 방법은 그림 2와 같이 하면된다. • 화살표 1번은 위, 아래로 움직인다. 사물이 정확한 위치에 놓고 아래로 내리면 위치가 고정된다. • 화살표 2, 3번은 좌,우로 움직이며 사물의 크기에 따라 이동시켜 1차 고정을 한다. • * System 화면에서 Auto-Z를 채크하면 안된다. 그림 1 그림 2 그림 3
Universal Lager System 작업 순서도 4. 소모품 및 파트 리스트(사진) 145-0027-3 Beam Window – VersaLASER 145-0056-0 Mirror Assembly #2 VersaLASER 145-0058-0 Lens Assembly 2.0 VersaLASER 143-0007-0 Bearing - X or Y (VLS) Set of 4 143-0008-0 Gear - X Axis VLS 143-0009-0 Idler - X Axis VLS 143-0018-0 Gear - Y Axis VLS 591-0003-2 Belt Kit (10.6 ft) (for 16x12 & 18x12 field) 143-0017-0 Idler - Y Axis VLS 591-0003-4 Belt - Y (4.25 feet) (For 18 inchY or X axis) 591-0003-7 Belt - Y (3.25 feet) (For 12 inchY-axis)
Universal Lager System 작업 순서도 5. 부품 리스트(데이터시트)