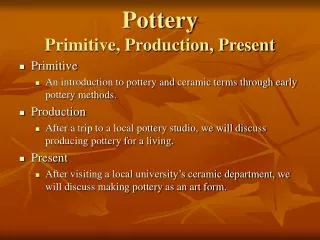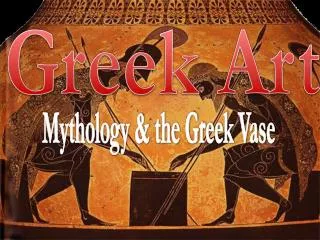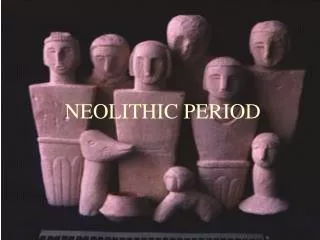
Pottery:
Pottery:. A Brief Overview. “Pottery”. Pottery is the material from which the pottery ware is made. M ajor types include earthenware, stoneware and porcelain. We’re working with earthenware for this project.


Pottery:
E N D
Presentation Transcript
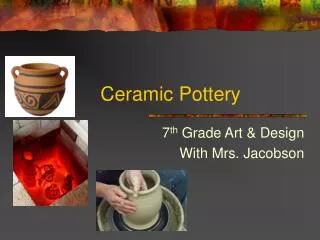
Pottery: A Brief Overview
“Pottery” • Pottery is the material from which the potteryware is made. • Major types include earthenware, stoneware and porcelain. • We’re working with earthenware for this project. • The place where such wares are made is also called a pottery (plural "potteries"). • Pottery also refers to the art or craft of the potter or the manufacture of pottery.
Pottery Process • Prior to some shaping processes, clay must be prepared. • Air trapped within the clay body needs to be removed. This is called de-airing and can be accomplished by a machine called a vacuum pug or manually by wedging. Wedging can also help produce an even moisture content. • Once a clay body has been kneaded and de-aired or wedged, it is shaped by a variety of techniquesand then dried. • It is then heated to high temperatures in a kiln which removes all the water from the clay, which induces reactions that lead to permanent changes including increasing their strength and hardening and setting their shape. • A clay body can be decorated before or after firing.
Physical Stages of Clay • Clay ware takes on varying physical characteristics during the making of pottery: • Plastic refers to clay at its most soft and malleable stage. • Greenwarerefers to unfired objects. • Leather-hard refers to a clay body that has been dried partially. Clay bodies at this stage are very firm and only slightly pliable. Trimming and handle attachment often occurs at the leather-hard state. • Bone-dry refers to clay bodies when they reach a moisture content at or near 0%. The final stage of greenware dried to a completely dry state and ready to be fired. In this stage, the clay is very fragile, non-plastic and porous.
Firing • Biscuit or Bisque refers to the clay after the object is shaped to the desired form and fired in the kiln for the first time. This firing chemically changes the clay body - permanently hardening the wares, and changing the colour of the clay. • Glost fired is the final stage of some pottery making. A glaze may be applied to the bisque form and the object can be decorated in several ways. After this the object is "glost fired", which causes the glaze material to melt, then adhere to the object creating a glass like coating that makes the piece water tight. • Earthenwares are normally fired at temperatures in the range of about 1,000°C (1,830 °F) to 1,200 °C (2,190 °F)!!!
Kilns A large kiln at a pottery in Bardon Mill, UK.
Firing Mound The pottery firing process in Kalabougou, Mali, using a firing mound.
Shaping Methods • Hand building: • This is the earliest forming method. Wares can be constructed by hand from coils of clay, combining flat slabs of clay, or pinching solid balls of clay or some combination of these. Parts of hand-built vessels are often joined together with the aid of slip, an aqueous suspension of clay body and water. • There are many more shaping methods, but these are the main techniques we will be using for this project.
Slip Joints • The welding together of two pieces of plastic clay. • Slip is clay and water mixed into a whipping cream consistency. • Steps: • Score both inner surfaces • Apply slip • Press together • Wedge together with tool • Joining properly the first time will save you work in the long run
Other Building Techniques • Throw – an experienced thrower will pull up and shape several different forms (pots, bottles, vases, cups, bowls) from a ball of clay spinning on a potter’s wheel. • Model – fashioning or shaping by adding to or taking away – just make sure it’s hollow with and air hole! Using a newspaper core is a good solution, because it will burn up in the kiln. • Sculpting – shaping by removal only (like carving) • Cast – liquid clay (casting slip) is poured into a plaster mold, left to sit for a few minutes, then the excess poured out. The clay sets and the vessel is removed from the mold. This process allows for mass production of identical pieces.
Texture! • The possibilities for creating texture are endless, but here are some ideas: • Toy car wheels • Sea shells • Bark • Combs/brushes • Forks • Rope • Doilies • Stamps • Knits • Lace • Cookie cutters • Spoon handles • Jewellery • Pie-edge crimper • Corrugated cardboard • Leaves • Seed pods • Piece of cement
Tips • Don’t work too heavily, too long – the clay will dry and crack! • Keep unused clay covered when not in use • Don’t use too much water – clay can get soggy, slump and sag. • Don’t let any part get too thin or it will break off • Don’t let the clay get too thick – no more than half an inch • If it is thick, make it hollow with an air hole or it’ll blow up in the kiln! • After drying and firing, your piece will have shrunk about 10-15%
Glazing • A glaze is a glass forming paint. • BUT!!! – their colors do not mix like paints because they are chemicals that react in the kiln. Mixing can have some unpredictable results in color. • It can be applied by dipping, pouring, brushing, sponging, and spraying/spattering the glaze on. • BUT!!!! – you must ensure that the parts of the bisque ware that come into contact with the shelf of the kiln are waxed prior to applying the glaze, otherwise your piece will adhere to the shelf! • Wash the tools used to apply the wax immediately! Otherwise it will ruin them.
Glazing Tips • Wear gloves to protect your hands. • Wear a smock or grubby clothes – the glazes can stain clothes! • Wait until first coat of glaze is dry before applying another color to avoid unintentional mixing. • Pastel results: • You can try underglazing with a color first and then white over top to created a lighter, more subdued effect. • Crisscrossing two different glazes i.e. like plaid, can have an interesting effect where they meet. • Wax can be used for a decorative effect as well – where the wax is applied the glaze will not stick allowing the natural color of the clay to show through.
References • The information in the PowerPoint was adapted from Wikipedia and two handouts from Maureen Girvan titled “Clay”. • Verna Allison • Laura Wright • And all the ladies at Delburne Pottery Club