Download
1 / 82
2.24k likes | 5.82k Vues
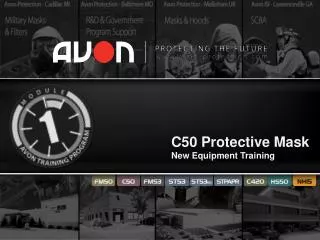
C50 Protective Mask New Equipment Training. Avon Protection Systems, Inc. - Our History. Avon Rubber p.l.c , our UK parent company, has manufactured high-performance rubber products since 1885.

E N D
C50 Protective Mask New Equipment Training
Avon Protection Systems, Inc. - Our History • Avon Rubber p.l.c, our UK parent company, has manufactured high-performance rubber products since 1885. • Established in Wiltshire, England, Avon Rubber (trading as AVON on the London Stock Exchange) is a worldwide provider of superior respiratory protection, dairy and defense industry products. • In response to its award of the JSGPM program by the US Department of Defense, Avon divested of the automotive, aerosol gaskets and product mixing business units to focus primarily on the Respiratory Protection and Dairy products.
1911 Our Mask Pedigree • GSR Mk IV 1st Gulf War Falklands Conflict • 1943 • 1939 WW1 WW2 • 1980 • Anti-Gas MK.I • GSR Mk V WW2 • S10 GSR JSGPM/M50 FM53 C50 2007
JSGPM/M50 • Improved vision • Improved comfort • Improved fit • Improved protection factor • Improved communications • Improved compatibility Replaces 3 legacy masks MCU2P M17 M40 “One mask for all DOD users and missions”
50 Series - Timeline of Key Program Events • JSGPM/M50 Mission: • Provide Face, Eye and Respiratory Protection from Battlefield Concentrations of CB Agents, Toxins, Toxic Industrial Materials and Radioactive Particulate Matter • User Groups -All Services - Replaces Current M40/M42 and MCU-2/P Series Protective Masks • Current Status: • In Full Rate Production • 300,000 systems delivered to date (>50,000 C50’s) • Product fielded to US Armed Forces in NA, Guam, Turkey, South Korea, UK • Mask Capacity currently @ 300,000 units/year C50 is the NIOSH approved variant
NIOSH Protection Factor Triangle Triangle of Respiratory Protection
Comfort Harness • Low profile brow pads eliminate pressure points • Lycra material for comfort • Machine washable • User Benefits • Delivers easy donning and secure fit to head • Discomfort from helmet integration resolved PRODUCT FEATURES • Fewer Replacement Parts • Speak through exhale valve • No speech diaphragm • No nosecup check valves • Common inlet/outlet valves • Unique 1-piece Visor • Flexible, distortion free Polyurethane visor • No yellowing / aging issues • Triple bonded, will not delaminate • Scratch resistant, self healing PRODUCT FEATURES • User Benefits • Mask can be folded in half for quick storage • Distortion-free vision for weapons sighting • Visor profile integrates with all ballistic helmets
Simple Outserts • Increased ballistic protection • Distortion free • Additional scratch resistance • Flexible, lightweight • Various light filters • User Benefits • User can fit and remove outsert unaided • ‘Rip Away’ cover if user is sprayed with paint/dirt • Flexible visor allows user to fold mask for storage • Fail Safe Drinking • Highest flow rates • Triple valve system • Fits canteens and bladders • User Benefits • Easy drinking while on the move • Mask operable if external drinks tube damaged • Mouthpiece stows away when not in use PRODUCT FEATURES • Communications Port • Unique integrated connector • Designed for voice amplifierand radios • User benefits • Clear communication for crowd control and team instructions. • Available comms lead works with existing 2 way radios • Filter Options • LH & RH 40mm filter mounts • Accepts traditional and conformal filters • User Benefits • Easily configured for LH or RH wearers • Lower inventory cost • Close fit conformal filters protrude less
Suit / Hood Interface • Integrated beard for compatibility with suits • No second skin required • User Benefits • Excellent fit with NFPA suits • Added throat protection • 3 Mask Sizes Available • Fits 2% - 98% of population • Butyl/Silicone faceblank material blend • Don in <9 seconds from carrier • User Benefits • High levels of comfort, no need to over-tighten • Only 2 straps to adjust • Pliable mask accommodates all face shapes PRODUCT FEATURES • Low Cost of Ownership • Common inlet/outlet valve • Minimum replacement parts • Validated for >10 years • User Benefits • Lower inventory cost • Requires only basic user maintenance • Common parts with FM53
Summary Product Improvements over legacy masks • Lighter in weight • Improved vision • Superior cheek-to-stock • Voice clarity w/projection unit • Easy to clean and maintain • Twin filter capability • CBRN F12B and CTF12 filters • Chlorobutyl/Silicon rubber blend
Front Module AssemblyIdentifying Features – Comms Port & Drink System Drink Lever (open) Drink Lever (closed) Storage mode Operational mode
Consist of: Basic components of Mask Assembly Accessory Items Additional items for purchase with the C50 Repair Parts C50 Training Modules
Basic Components • The base C50 system consists of: • Twin port mask • Black storage bag with poly bag inner liner • Full instruction manual • NIOSH certification matrix
CBRNF12 and CBRNF12B Universal 40mm thread filter for protection against common CBRN threats. Must be sold with a CBRN mask NIOSH APROVED FILTERS C50 FILTERS CTF12 40mm thread filter for protection against biological, CS and CN non-lethal munitions
VISION CORRECTION • Easily fits all 50 series masks without modification • Flexible design allows mask to fold for storage • Avon provides lens fitting service • Fully adjustable internal positioning • Accepts -8 to +10 Diopter lenses VISION
COMMUNICATIONS • All 50 series masks supplied with integrated communication port Voice Projection Unit (VPU) • Provides ability to easily communicate while wearing mask, key to mission success • Team Leaders typically direct team and crowds with VPU • Comms lead allows attachment to external radios COMMUNICATIONS Communications Lead Microphone Assembly
A range of personal • wear carriers is available • Mask Carrier • Premium Mask Carrier CARRIERS
drink lever AVON HYDRATION • Provides hydration during extended wear • Developed to meet US DOD specifications • Canteen Cap Assembly is a NIOSH approved accessory (drinking in a hot zone not permitted) • CBRN hydration bladder provides higher flows and volume of liquid drink coupler Hydration System HYDRATION Canteen Cap Assembly
C50 Replacement parts • Mouthpiece • Rotates into mouth by turning lever on front of mask • Cuts to length for user comfort • Remove for PortaCount testing • Filter Gasket • Seal filter to mask • Must be inspected regularly for damage • Now in Grey (Previously black) • Front module Cover • Protects outlet valve • Acts as dead space • Enhance passive communication • Cover for comms connector
C50 Replacement Parts Inlet/Outlet Disk Valves • An Inlet Disk Valve is used to help control the management of airflow through the mask during the breathing cycle. • The valve closes on exhalation stopping back flow of air through the filter. Head Harness Assembly • Stretchable and breathable fabric adjust to head form • Washable up to 10 times • Once adjusted to wearer, bottom two strap only require adjustment during donning • Low profile brow pad prevent hot spots during helmet use
OUTSERTS Clear outsertfor increased ballistic protection, prevents wear to primary polyurethane visor • Outserts provide additional eye protection • Simple to use • Users can fit and remove outsert quickly while wearing a mask Blueblocker outsert for specialist users. Removes blue light wavelengths for sharper weapons sighting (ideal for snipers) Sunlight outsert for eye protection in extreme environments. Hides wearer eyes to provide psychological advantage in threat scenario VISION
C50 Protective Mask Initial Sizing and Fitting
Warnings, Cautions & Notes WARNING WARNING User’s safety depends on properly sized and fitted mask assembly. Before putting on and adjusting mask assembly, users shall remove all hairpins, combs, hair knots, buns, or braids that will interfere with mask assembly seal. Users must be clean-shaven to prevent mask assembly leaks. DO NOT wear contact lenses (soft or hard) while wearing CB Protective Masks. Inadequate oxygen supply to the corneal surface, exposure to dust, dirt, and smoke/gas may cause serious vision loss or eye damage. Users requiring vision correction are provided optical inserts for their protective masks. NOTE Masks are to be cleaned as often as is required. However, MASK MUST BE CLEANED AND SANITIZED BEFORE TRANSFERRING TO ANOTHER USER. Initial sizing and fitting should only be accomplished by trained personnel and is conducted without the hood installed.
C50 Facepiece Sizes • The mask is available In 3 sizes to fit most of the adult population • Twin port filter mount accommodates left and right hand shooter • Size is molded into mask above visor • Typical sizing % for a team are listed below:
Sizing Gauge Familiarization Sizes User Diagram *Directions on the reverse side Eye Location Guide
Sizing Procedures w/Sizing Gauge Note: It maybe more convenient to size and fit using a sizing set consisting of 1 of each size C50. Once correct size is determined, a new mask can be issued • Place the gauge to the face diagonally along the line from the point of the chin to the widest point of the cheekbone. • Read the size of the mask where it touches the cheekbone. • If between two sizes pick the larger size • Have the user don the selected mask, and assist in correctly tightening the straps
Sizing Procedures w/Sizing Gauge Cont. Note: ensure the your eyes are at the same level as the users. • Using the eye locator on the gauge, locate the bottom edge of the guide on the rubber lip at the bottom of the eye lens. Locate the “Top of Lens” mark with the top of the eye lens. • If the pupils are within the “correct size” zone the mask is properly sized. • If the pupils are in the “too small” zone, select a larger mask. Repeat the last three steps. • If the pupils are in the “too big” zone, select a smaller mask. Repeat the last three steps.
Visually assess the size of the user and select the most likely size mask Have the wearer hold the selected size mask on their face with the chin positively located in the chip cup Pull the head harness over the head and tighten the cheek, brow and temple straps Check to see that the center of the pupils is slightly above the centerline of the visor If the eyes appear to be too high, the mask is too small; if they are too low, the mask is too big Alternate Sizing Procedures
The mask should make firm contact with the face around the entire perimeter of the facepiece The distance between the edge of the mask and the lobe of the ear is typically in the range of .5 to 1.5 inches If the distance is less, then the mask is probably too large and gaps at the forehead and chin may be observed If the distance is greater, then the mask is too small and may appear to be perched on the face Remove the initial mask and issue the warfighter the selected mask size Alternate Sizing Procedures
Remove the mask and issue the correct size to the user. Clean the sizing masks for next fitting Assist the user in donning the correct size mask by: Open a CBRN F12B or CTF 12 Filter and install Ensure microphone is installed if required Install optical correction if required AVON recommends that canteen caps be changed to the Avon canteen cap at this time. Fitting Procedures
Installation Reach inside facepiece and hold nosecup away from vision correction assembly Place the vision correction support frame on the stand-off and push it down Flex the facepiece in the temple strap area on the left or right sides mask; gently push the support frame-mounting tabs into the vision correction support frame receptacle Vision Correction Assembly Receptacle Mounting Tabs Stand Off Support Frame
Don the mask; eyes should be centered, if not determine which direction the adjustment should be made – up or down Doff the mask Loosen the spectacle frame assembly cam lock Slide frame assembly up or down to adjust Lock in place with cam lock Re-check to ensure the stand-off is still in place Don and recheck adjustment Vision Correction Adjustment Cam Lock
Mask Fitting Procedures • Loosen all of the head harness straps completely • Ensure temple strap pivoting buckles remain open • Pull harness over front of mask • Have the user hold hair away from the face • Place chin in the chin cup of mask and have user hold assembly tightly against the face • Grasp harness tab and pull over the head • Pull all the way down • Adjust harness so that temple straps are parallel to the ground
Tighten cheek straps one at a time until snug against face Adjust brow straps one at a time until tight and secure in the brow strap covers Adjust temple straps one at a time until snug Close pivoting buckle clamp plate securing the temple straps in place Fitting Procedures
Check position of temple and cheek straps Temple straps should not be cutting top of ears Temple straps should be parallel to the ground Cheek straps should not be cutting bottom of ears Checking Mask for Fit • NOTE • Once the mask is adjusted correctly, DO NOT ADJUST the brow and temple straps again. The mask is now fitted and adjusted correctly. Only the cheek straps need to be loosened or tightened when donning or doffing the mask
Checking Mask for Fit • Recheck that the eyes are centered • Straps do not cut into ears • Mask assembly pressure • Bottom of mask assembly does not cut into the throat • Skin in front of ear is not wrinkled • Nosecup does not obscure vision • Edges are flat against the face and not rolled under
Have user place palm over outlet valve and blow outward with large breath Them place the palm over the inlet hole of the filter and breath in. Mask should collapse against the face and remain there while holding the breath. If it does, fit is correct. If it fails check the following and repeat the negative after each one Negative Pressure Test After Initial Fitting
Check for hair, clothing, or other matter interfering with seal Ensure headharness is pulled down as far as possible Ensure edges are flat against the skin Have warfighter feel for air leaks by feeling for incoming air Adjust straps as required To correct leaks around throat area lift up on mask If still does not seal try another size or different mask Negative Pressure Test Failure checks
Size the internal drink tube Turn the drink lever upwards to reposition the internal drink tube towards lips If it is too long, doff the mask and pull the internal drink tube out Cut internal drink tube behind the first barb Reinstall internal drink tube Repeat to achieve the proper fit NOTE Ensure not to cut the internal drink tube too short or the warfighter will not be able drink while wearing the mask Fitting Procedures
Once all three steps are complete, the mask must be fit tested. This is done using the TSI Portacount Test System Before either of the tests begin, the mask must be set up properly. Fit Testing
Fit and Leak Test Theories • Just because a mask is worn does not mean that the user is breathing clean air. If the mask is donned improperly or it is not functioning correctly, articles can enter the mask through various leak paths. • When a leak exists within the mask system, the user is not properly protected. • These tests ensure that the user is wearing the mask properly and that the mask is functioning properly. • Mask fit testing is performed by sampling the air inside the mask and comparing this to the amount of particles contained in the air outside the mask.
Preparation of the TSI Portacount CAUTION NO SMOKING/DIPPING WITHIN 30 MIN. OF TESTING WITH THE PORTACOUNT. NO SMOKING AROUND THE PORTACOUNT.
Preparing the Mask: Visually inspect the inside and outside of the mask Attach modified drink tube sampling adapter to the drink tube coupler. Have user don the C50 Turn the drink tube lever to the ON position Caution: All water or foreign material must be expelled from the mask drink tube before the sample tube can be connected. BLOW SERVERAL TIMES TO CLEAR. If obstruction cannot be removed, the mask should be returned for maintenance. Preparation of the TSI Portacount
C50 Protective Mask Maintenance & Removal of Components
WARNING If you have not used your mask for 30 days or more, perform all Maintenance prior to using your mask. DO NOT use tissue paper or a paper towel to remove dirt or moisture from front module cover, outlet disk valve, or outlet valve seat. Paper may break up and lodge in outlet valve area causing leakage. It is important to properly clean your mask. A dirty mask will compromise its ability to provide maximum protection. CAUTION DO NOT use high pressure water to clean mask, it may damage components. Care must be taken not to scratch the visor and outserts when handling the mask assembly. NOTES If components identified in maintenance are not present, notify next higher level maintenance WARNINGS, CAUTIONS and NOTES
No maintenance requirement above field level Cornerstone of maintenance on masks is operator PMCS Field semiannual PMCS validates performance of operator PMCS Special tools are not required for maintenance Every component is listed in the PMCS table C50 Mask Maintenance Concept
Removal Grasp the top and bottom of the outsert with both hands and gently rotate the bottom of the outsert up and away from the facepiece assembly Installation Align the locking tabs on the ends of the outsert with the outsertreceptacles Gently rotate the outsert down pushing the locking tabs into the outsert receptacles Clear/Sunlight/Laser Outserts
Outlet Valve Cover Removal • Remove drink tube coupler from receptacle • Unwrap external drink tube • Turn the drink tube lever to a horizontal position • Grasp outlet valve cover from underneath the communications port and lift Installation • Turn drink tube lever to clear the outlet valve cover • Align the outlet valve cover over the communications port • Gently snap into place • Close communications port door by pushing on the raised tab until it clicks • Reinstall drink components
Removal Remove the outlet valve cover Pinch center of the outlet disk valve between the thumb and middle finger, and pull gently away from the mounting post Installation Visually inspect the disk Align over the valve mounting post Gently press the center of the disk until fully seated on the mounting post Replace outlet valve cover Outlet Disk Valve