Download
1 / 64
640 likes | 720 Vues
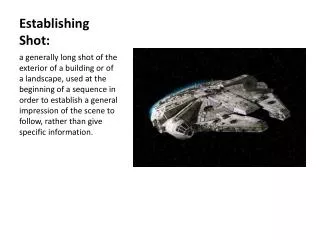
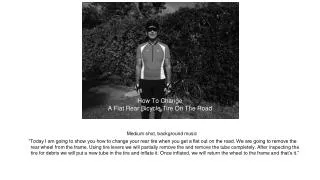
How To Change A Flat Rear Bicycle Tire On The Road. Medium shot, background music

E N D
How To Change A Flat Rear Bicycle Tire On The Road Medium shot, background music “Today I am going to show you how to change your rear tire when you get a flat out on the road. We are going to remove the rear wheel from the frame. Using tire levers we will partially remove the and remove the tube completely. After inspecting the tire for debris we will put a new tube in the tire and inflate it. Once inflated, we will return the wheel to the frame and that’s it.”
Medium Shot, background music “First thing after you notice you have a flat is to safely pull off to the side of the road out of traffic and away from other cyclists. Remember to always bring a tire repair kit with you on your rides.”
Close shot of mini pump, Bkgnd music starts to fade out “There are a lot of different pumps available, just make sure that it matches your valve stem type. I have presta values, which almost all road bicycles have, so I have a presta pump. I like this mini pump because it fits in my jersey”
Close Shot of tire levers “These tire levers are used for slipping the bead of the tire off of the rim. You can use more or less. Most of the time I only use one but always bring two in case one breaks.”
Close shot of a new prestabicycle tube “It is much faster to change out a damaged tube with a new one than trying to patch a hole. Most riders also carry a patch kit in case they get a sceond flat. If you get a third flat get out your cell phone and call for a ride.”
Close shot of brake caliper release lever “In order for the wheel to slip out of the frame, we first need to open up the brake calipers by switching the quick release level to the open position.”
Medium shot of cyclist indicating chain position on the cassette “Usually the chain is somewhere in the middle of the cassette.”
Close shot of cyclist indicating best chain position on the cassette for removing the rear wheel “We need to position the chain all the down to the smallest cog. This is the easiest way to remove the wheel without having to fight the chain’s alignment.”
Close shot of cyclist shifting the rear shift lever to allow the chain to drop down to the smallest cog “In order to get the chain into the smallest cog we need to keep pressing the down shift lever until it stops. This positions the rear derailleur to line up with the smallest cog.”
Close shot of cyclist rotating the pedals and crank to drop the chain into the smallest cog “With the derailleur in the correct position we need to rotate chain using the pedal and crank so it drops on to the smallest cog.”
Close shot of cyclist indicating new chain position on the cassette for removing the rear wheel “The chain is now in the smallest cog.”
Close shot of cyclist pointing to quick release skewer lever in the closed position “There are some commuter bikes that do not have quick release skewer levers on the wheel hubs like this one. The level is in the closed position. Make sure to pack a small adjustable wrench so you can remove your wheels.”
Close shot of quick release skewer lever in the open position for removing the rear wheel “Flipping the lever to the open position releases the pressure holding the hub to the frame and allows us to be able to remove the rear wheel.”
Close shot of chain around cassette cog and path through jockey wheels and wheel removal The chain travels around the cog and through the jockey wheels of the derailleur. Pull the jockey wheels back out of the way so the wheel and tire can slide forward and out.”
Medium close shot of rear wheel free from frame “The rear wheel is now free from the frame and we can get about changing our flat.”
Close shot of tire lever inserted between the tire bead and wheel rim “Take one of the tire levers and hook inside of the wheel rim and secure the lever to a spoke to keep it in place.”
Close shot of second tire lever inserted between the tire bead and wheel rim “Take another tire lever and hook inside of the wheel rim as well. When you flip the second lever down a section to the tire bead will be outside of the rim.”
Medium close shot of second tire lever sliding around wheel rim, releasing tire bead “Start sliding one of the tire levers around the rim moving the tire bead to the outside as you go.”
Medium shot cyclist removing tube from tire “Once you have made your way all the way around the rim you can remove the tube.”
Medium close shot of tire inspection for cuts or debris that caused flat “Inspect the tire for debris that could have caused the flat and remove any that you find.”
Medium close shot of cyclist running fingers inside tire for debris that caused flat “After you have inspected the outside, run your fingers around the inside a couple of times to feel if there is any debris caught in the tire. If you find any you need to remove it as well.”
Medium close shot of cyclist unscrewing valve on tube “Unscrew the valve of the new tube so you can put a little air in it to give it shape. It is a lot easier to place inside the tire this way.”
Medium shot of cyclist slightly inflating tube to insert back in rim “Some cyclists use a few strokes of a pump to slightly inflate the tube but blowing it up works just fine.”
Medium close shot of cyclist inserting valve through valve hole in wheel rim “Screw the valve closed and insert the tube valve into the valve hole in the rim keeping it pointed at the center of the wheel.”
Close shot of tube being slipped inside of the tire bead “Start slipping the tube inside the tire and on to the rim.”
Close shot of tube being worked into the tire and onto the rim “Continue to work your way around the rim inserting the tube as you go.”
Medium shot of tube being worked into the tire and onto the rim
Medium shot of tire bead being slipped back over the rim of the wheel at the valve “Once the tube is inside the tire it is time to slip the tire bead back to the inside of the rim.”
Medium close shot of tire bead being slipped back over the rim of the wheel
Continuation of medium shot of tire bead being slipped back over the rim of the wheel “Do not use tire levels, it is too easy to pinch the tube.”
Close shot of completion of tire bead being slipped back over the rim of the wheel “This is the hard part. You have to slowly work the last part of the bead over the rim. Use your hands only and slowly the bead will slip over the rim.”
Close shot of tire being checked for seat to rim and no pinching of tube “Check to make sure that the tube is not sneaking out on either side of the rim and that the tire is centered on the rim.”
Medium close shot of presta valve being opened to be pumped up “Open the tube valve back up and you’re ready to pump it up.”
Medium close shot of pump pressed firmly against prestavalve and pumped “Press the pump head firmly on the valve and while supporting the valve start pumping to inflate the tube.”
Medium close shot of prestavalve being closed “Check to see that the tire is firm by pressing on the tread with your thumb and then close the valve.”
Medium shot of cyclist pointing to rear dropouts reattached the rear wheel
Close shot of cyclist pointing to rear dropouts to reattached the rear wheel “We need to slip the wheel back into the frame at these slots called rear dropouts.”
Medium close shot jockey wheels being pulled out of the way to allow the wheel to slide into the rear dropouts “We need to pull the derailleur jockey wheels back out of the way so the wheel can slide back into the rear dropouts.”
Medium close cyclist pulling rear wheel by the quick release lever al the way into the rear dropouts “You can get better leverage if you hold your bike upright and brace the wheel against your thighs.”
Close shot quick release lever in the closed position “Once the wheel is in position, close the quick release lever locking the wheel in place.”
Close shot rear wheel in frame showing that the wheel is center “Looking at your bike from the rear the wheel should be centered in the frame. If it is not loosen the quick release lever and adjust the alignment and then close the lever again.”
Medium close shot indicating the chain is in the smallest cog “The chain is in the smallest cog where we left it so now it is time to return to an easier gear by moving the chain up the cassette.”
Medium close shot of cyclist shifting the rear shift lever to allow the chain to climb up to a larger cog “Move the other shift level up a few times to position the derailleur higher up the cassette.”
Medium close shot of cyclist rotating the pedals and crank moving the chain up to a larger cog “We are going to move the chain up to match the derailleur by rotating the pedals and crank like we did when we started.”
Medium close shot indicating the chain is in the larger cog “The chain is now in the cog we flatted in or close.”
Close shot rear brake caliper being closed “Close the quick release on the rear.”
Medium close shot of cyclist with tire changing kit, background music fades up “Put away your tools and punctured tube and you’re ready to catch up to your friends.”
Following sequence is speeded up as review Close shot of brake caliper release lever
Close shot of cyclist shifting the rear shift lever to allow the chain to drop down to the smallest cog