Download

1 / 30
300 likes | 447 Vues
Introduction to Operating Systems. Lesson 4 Microsoft Windows XP. Objectives. Describe the improvements of Windows XP Professional over earlier versions of the operating system. Install Windows XP Professional successfully from CD-ROM. Use the functions of the operating system.

E N D
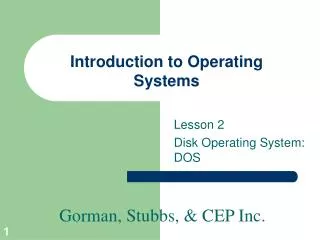
Introduction to Operating Systems Lesson 4 Microsoft Windows XP
Objectives • Describe the improvements of Windows XP Professional over earlier versions of the operating system. • Install Windows XP Professional successfully from CD-ROM. • Use the functions of the operating system. • Manage folders and files. • Use the Windows XP unique features to customize the use of your operating system. Lesson 4 – Microsoft Windows XP
Improvements in Windows XP • More behind-the-scenes security • More reliable • Latest version of Internet Explorer • Increased support for audio and video files • Increased hardware support • Cosmetic changes Lesson 4 – Microsoft Windows XP
Pre-installation of Windows XP • Make sure you have the necessary hardware requirements. • Make sure your hardware is on the Hardware Compatibility List (HCL). • Select a file system for the installation partition. • Identify whether you want to do an upgrade or a clean install. Lesson 4 – Microsoft Windows XP
Hardware Requirements Lesson 4 – Microsoft Windows XP
Logging On to the Computer • You must have a user account in order to use XP. • Click on your icon and type your username and password in the dialog box. Lesson 4 – Microsoft Windows XP
Basic Functions of XP • Desktop • Mouse • Taskbar • Start button • Windows • Help and Support Lesson 4 – Microsoft Windows XP
Desktop • Main workspace in XP • Contains small pictures called icons • Can customize the desktop color and create shortcuts and toolbars Lesson 4 – Microsoft Windows XP
Mouse • Tool used to navigate the desktop and other programs • Left mouse button is used to select (click once) or open (double-click) items • Right mouse button activates context menus • You can configure the mouse: • Buttons • Pointers • Speed Lesson 4 – Microsoft Windows XP
Taskbar and Start button • The taskbar is the gray rectangular bar at the bottom of the desktop. • Can be customized with your favorite icons • Can be moved to any area of the desktop • The Start button contains the icons to open programs, documents, XP tools, and the Shut Down command. • Can be modified to work as XP or Windows classic • Can add shortcuts to the Start menu, change the look of the icons, and select different default E-mail and Internet programs Lesson 4 – Microsoft Windows XP
Windows • Area or workspace you see when you open a program or application • Contains: • Title bar • Minimize, Restore, and Close buttons • Scroll Bars • Can be resized Lesson 4 – Microsoft Windows XP
Help and Support • Provides on-screen information about the program you are using • Utilizes features of previous versions of Windows as well as online help features Lesson 4 – Microsoft Windows XP
File Management • My Computer • Customizing • Folders • Working with files and folders • Windows Explorer • WordPad Lesson 4 – Microsoft Windows XP
My Computer • Represents your computer with its hardware devices and document folders. • You can customize the My Computer window: • Change the view of icons • Change the arrangement of icons Lesson 4 – Microsoft Windows XP
Folders • Folders are a storage space for files. • Subfolders are folders within a folder. • The parent folder is the main folder that contains subfolders. • You can change the manner in which folders, files, icons, and windows operate through Folder Options, found under the Tools menu. Lesson 4 – Microsoft Windows XP
Working with Files and Folders • The Cut command moves a file. • The Copy command duplicates a file. • The Paste command places a cut or copied file in a new location. • The Rename command changes the name of a file or folder. Lesson 4 – Microsoft Windows XP
Working with Files and Folders(continued) • The Delete command places it in the Recycle Bin when deleting from the hard drive and removes it completely from the floppy drive. • Copy Disk will copy the contents of a floppy to another floppy. • Finding Files is accomplished with the Search command. Lesson 4 – Microsoft Windows XP
Windows Explorer • Another method for viewing files and performing file management tasks • Split into 2 panes: • Folders • Contents • You can copy, move, rename, and delete files and folders as you did in My Computer. Lesson 4 – Microsoft Windows XP
Word Processing • WordPad is used for word processing. • The feature called Word Wrap automatically moves your insertion point to the next line. • The Backspace and Delete keys are used for editing text. Lesson 4 – Microsoft Windows XP
Unique Features of Windows XP • Creating shortcuts • Using the Control Panel • Hardware troubleshooters • Disk maintenance • Creating user accounts Lesson 4 – Microsoft Windows XP
Creating Shortcuts • A shortcut is a quick way to open a file without going to its original location. • Two ways to create shortcuts: • Use My Computer or Windows Explorer to find a file icon, right-click and select Copy, and then right-click on the desktop and Paste Shortcut. • Right-click and drag a file icon from My Computer or Windows Explorer and select Create Shortcut Here from the context menu. • Create shortcuts in the Start menu by dragging an icon from My Computer or Windows Explorer and dropping it in the correct place on the Start menu. Lesson 4 – Microsoft Windows XP
Control Panel • Contains categories of options to customize the workings of Windows XP: • Appearance and Themes • Network and Internet Connections • Add or Remove Programs • Sounds, Speech, and Audio Devices • Performance and Maintenance • Printer and Other Hardware • User Accounts • Date, Time, Language, and Regional options • Accessibility Options Lesson 4 – Microsoft Windows XP
Hardware Troubleshooters • Available in Help and Support if you have a problem with a hardware device • Can help with • Hardware problems • Networking problems • System setup problems • Printing problems • Adding new hardware problems Lesson 4 – Microsoft Windows XP
System Maintenance • Disk Cleanup – Removes unnecessary files safely from the machine. • Check Disk – Locates problem areas on the hard disk and attempt to repair them. • Disk Defragmenter – Improves the performance of the drive by placing pieces of files closer together. • Task Scheduler – Schedules maintenance tasks to run automatically. Lesson 4 – Microsoft Windows XP
User Accounts • The administrator has all rights and privileges to the machine: set up and manage other computers, create users, and apply permissions. • Limited User – Provides the user with limited access to the machine. • Guest – Provides access to the machine for anyone that does not have an account. Lesson 4 – Microsoft Windows XP
Summary • There are many improvements in Windows XP over earlier versions of the software including stability, improved device recognition, and increased security. • When you install Windows XP, preparation will help you avoid potential problems during the installation process. • The desktop is your main workspace. It contains icons, application windows, desktop components, and the taskbar. Lesson 4 – Microsoft Windows XP
Summary (continued) • Your mouse is the tool you will use to open files, programs, and menus. • The taskbar displays any programs that you have minimized for quick access between applications. • A window is the area or workspace you see when you open a program or application. • The My Computer window contains an icon for all of your disk drives. It provides an access point to create folders, move, copy, delete, and rename files. Lesson 4 – Microsoft Windows XP
Summary (continued) • The Recycle Bin is an area on the hard drive that holds files and folders deleted from C:. • In Windows, you can search for files by the filename, the date, the type of file, or by the file size. Windows Explorer is another method of viewing files and performing file management tasks. • Windows XP comes with a small word-processing program called WordPad. Lesson 4 – Microsoft Windows XP
Summary (continued) • A shortcut is simply a quick way to open a file or program without having to go to the original location. • The Control Panel is an area that allows you to configure the operating system as you would like it to work. Lesson 4 – Microsoft Windows XP
Summary (continued) • Windows has built-in tools to help you maintain and improve your system’s performance including Disk Cleanup, Check Disk, and Disk Defragmenter. • The administrator can create new accounts and assign permissions to those users. Lesson 4 – Microsoft Windows XP