Download
1 / 24
270 likes | 598 Vues
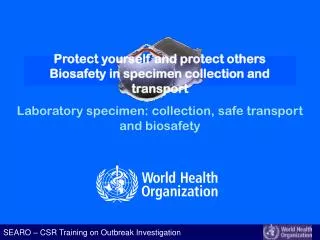
Protect yourself and protect others Biosafety in specimen collection and transport. Laboratory specimen: collection, safe transport and biosafety. Learning Objectives. At the end of the presentation, participants should be able to: Identify principles in biosafety Practice hand hygiene

E N D
Protect yourself and protect othersBiosafety in specimen collection and transport Laboratory specimen: collection, safe transport and biosafety
Learning Objectives • At the end of the presentation, participants should be able to: • Identify principles in biosafety • Practice hand hygiene • Identify protective equipment to use for different routes of infection • Describe safe disposal of some hazardous wastes
Biosafety: protect the patient • First Rule: single use equipment • Disinfect • Work in a clean, dedicated area
Biosafety: protect yourself Use personal protective equipment • disposable gloves • laboratory coats / gown • mask • protective eyewear / face shields if procedure is likely to generate aerosols
Personal Protection: Gloves • Whenever possible, suitable gloves should be worn when handling biohazardous materials • not a substitute for regular and proper hand hygiene
Personal Protection: Hand hygiene Alcohol based hand rubs are gold standard in health care settings (if hands not visibly soiled) Photos: WHO
Personal Protection: Hand hygiene Alcohol based hand rubs must complement with hand washing with normal soap Photos: WHO
Biosafety: protect others, protect the environment • Package samples appropriately for transport • Decontaminate spills - 10% bleach • Disinfect working areas – 1% household bleach • Soak contaminated non-disposable equipment/ material – 1% household bleach for 5 minutes • Place waste in leak-proof bags • Ensure safe final management of waste • Protect cleaning personnel – coat, gloves
Spill clean-up procedure • Wear gloves and other PPEs as indicated • Cover the spill with a cloth or paper towels • Pour an appropriate disinfectant over the cloth • Apply the disinfectant concentrically • After about 30 min, clear away the materials. • If with broken glass collect and deposit into a puncture-resistant container • Clean and disinfect the area of the spillage • Dispose of contaminated materials • Report the incident
Disinfecting water using a 1% stock solution • What you need: • (4 pcs) plastic water containers (>= 10-litre) • 1% chlorine stock solution • (1 pc)) 5-ml syringe • Comparator or test strip • (40 litres) of water (10 litres in each container)
Disinfecting water using a 1% stock solution • Process of disinfection: • Prepare 1% chlorine stock solution • Fill the containers with 10 litres of water each • Using a syringe, add progressively greater doses of 1% chlorine solution e.g., • 1st container – 1 ml • 2nd container – 1.5 ml • 3rd container – 2 ml • 4th container – 5 ml • Let it stand for 30 minutes and measure residual free chlorine concentration with test trip • Choose the sample with 0.4 – 0.5 mg/litre of free residual chlorine
Preparation of 1%, 0.5% and 0.05% chlorine stock solution Mix the required amount of one of the given chemical products with clean water, making up to the total amount of stock solution (1 litre, 10 litres) in an airtight, opaque and non-metallic container.
Some tips • Handle the dry product with care. Avoid shaking and exposure to high temperatures or flames. • Avoid direct contact with the chemical product. • Use clean water in preparing the stock solution. • Use non-metallic containers in preparing and storing the solution. • Prepare and store stock solution in a well ventilated area. • Avoid inhaling vapours and dust when opening or handling the containers. • Solutions must be prepared daily and protected from heat, light and moisture.
Dispose sharp material in bio-hazard sharps containers • If no sharps container: improvise one and collect sharps immediately to prevent needle-stick injury • Have first aid kit readily accessible • Do not reuse contaminated equipment
Items Requiring Disposal Infectious blood, body fluids, leftover biological samples Disposable needles and syringes* Disposable or non-reusable protective clothing* Disposable or non-reusable gloves Used laboratory supplies* Used disinfectants * Incineration recommended
Building an Incinerator • Cut out one end of a 220 liter drum • Cut out 3 half-moon openings • Cut 4 side holes and insert metal rods to form an X • Cut away half of other end of drum to form lid • Insert first end cut as a waste platform
How to burn waste in an Incinerator • Place waste on platform inside of the drum • Soak waste in one liter of fuel • Light the fire carefully • Watch the fire and frequently mix the waste with the metal bars to be sure all of the waste is burned • When the fire has gone out, empty the ashes into a pit Note: You must replace the incinerator if large holes burn through the sides.
Disposal Using a Pit • Can be used for disposal of: • Liquids, if no isolation latrine or toilet is available • All other flammable items such as clothing • Building a Pit: • Locate pit far from foot traffic flow • Dig 2 meters deep, wide enough to hold all contaminated waste material
How to Burn Waste in a Pit • Place disinfected waste in the pit • Pour fuel over waste • Carefully start fire • Observe burning process • Repeat fire if waste remains after burning • Cover ashes with soil • Bury a nearly full pit with ½ meter of soil • Dig a new pit for more waste
Disposal Safety Precautions • Use safe handling practices for infectious material • Locate disposal site on health facility grounds, away from traffic flow and public view • Maintain disposal site security by roping off, posting signs, and stationing a guard • Do not leave unburned waste in an incinerator or pit