Download
1 / 16
160 likes | 261 Vues
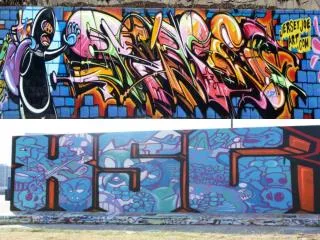
Create a 3-D sculpture out of clay featuring your name or chosen word with a minimum of 4 different characters. Color the sculpture to enhance its representation. Follow clay terms for scoring, hollowing, and drying stages. Apply 9 principles of 3-D design for added interest.

E N D
Requirements: • You are to create a 3-D Sculpture out of clay that has your name or other approved word. It must be a minimum of 4 different characters • You will need to color the sculpture in someway that helps to add to the feel or representation of the word. • You should be able to validate your design to anyone who asks about it and why you did what you did.
Clay Terms: • Green Clay-Soft clay. Easy to work with. Great to make changes in this stage. Store clay in plastic bags to keep moisture in. • Slip - Clay and water mixed together to form a paste • Scoring- Roughing up the surface of clay so it does not separate from another piece of clay.(Score and Slip both sides) • Leatherhard clay- Semi hard clay, can leave a thumbprint but cannot easily move it. Can still make changes to the clay, but only with tools. Hollow clay out in this stage. Store in the cupboards overnight to change green ware into leather hard or use a hair drier for a few minutes.
Clay Terms: • Bone Dry - Clay ready to be fired. Will be white/gray in color. Do not handle in this stage, clay is very brittle. Put in back room right away. • Bisque Ware - Physically changed clay. Fired to 1800 degrees in a kiln. Sounds like glass when tapped. Can never be turned back to green ware. • Kiln - Machine used to heat clay. Can reach 2000 plus degrees. • Firing - Process of heating clay.
Clay Terms: • Hollowing tools - Used to make clay hollow. It is very important to make the clay about a 1/2 an inch thick(size of a playing die) all the way through with free air flow. No air pockets or there will be explosions. • Extruder - Used to push out coils or tubes of clay. • Slab Roller - Used to roll out even flat sheets of clay • Canvas Board - Board covered in canvas to keep clay from sticking to the table.
WORK ON YOUR PIECE FRONT SIDE FIRST! • TRACE YOUR LETTERS ON THE CLAY • CARVE ABOUT 1/2 WAY THROUGH THE CLAY. • MAKE SURE TO HAVE THE LETTERS OVERLAP EACH OTHER. • WHEN FINISHED WITH FRONT……… LEATHERHARD THE CLAY AND REPEAT WITH BACK
Stages of clay (Drying): • Plastic bags and a damp paper towel keep your clay in a green stage. • The cabinets out of a bag will turn your clay leather hard clay overnight or blow dry the clay for 2-5 minutes • The cages, kiln room, or any open air will dry you project out to bone dry clay in a couple of days. • You will need to rewrap your clay in wet towels and a bag for a full 24hrs to get the clay from bone dry to leather hard/green ware.
The Golden Rules of Clay Clay must be thoroughly covered up with a plastic bag to keep it from drying out. This applies to works in progress and moist clay. Clay dust can be harmful if you are exposed to it for long periods of time, so keep your area clean, clay scraps off the floor and clean with water and a sponge. Clay can be no thicker then ½ inch. In order for clay to stick together it MUST be scored and slipped together while the clay is moist or leather hard. Trapped air can cause clay to explode. So hollow out sculptural forms and put needle holes from the bottom so air can escape. Always handle your project with two hands at all times. In other words BE CAREFUL itユs your hard work. Never lift pots by the rim. NEVER HANDLE ANOTHER PERSONS WORK EVEN IF IT LOOKS COOL!
In order to make the sculpture more interesting you need to apply the: • 9 Principles of 3-D design to the sculpture • Focal Point- center of interest • Color- use of color to show an artistic trait • Repetition- repeating technique to show interest • Different Sizes- pieces of your work used to show scale • Texture/Pattern- pattern to lead the eye/texture to want to touch • Negative Spaces/Holes- allows access to other side of 3-D work • Hollows- allows access to inside of sculpture • Additions/Movement interesting changes to the structure within the 3-D work • Interest on all Sides