Download
1 / 6
60 likes | 162 Vues
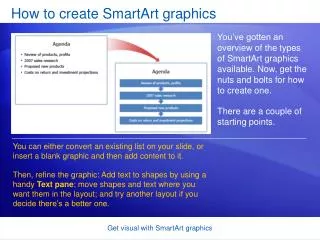
Learn how to create detailed and clear graphics using various tools like Paint, Adobe Photoshop, and Microsoft Office, to aid in understanding different topics. Includes examples of diagrams for essays, fire alarms, keyboards, check registers, and formula icons.

E N D
Assignment 6Using Tools to Create New Graphics Kelley Ann Bowman chsgirl1@vt.edu March 12, 2010
Topic 1 Expository Essay Parts of an essay • I drew this graphic in the Paint program. While it will satisfy the presentation need, I prefer the graphic labeled old, because it is more detailed. • This graphic will show the parts of an essay to include the introduction, body, and the conclusion. Old
Topic 2 Responding to a Fire Alarm • Emergency exit building diagram - This graphic was taken with a FugiFilm FinePix S5100 camera. • The graphic was cropped through Microsoft Office Picture Manager. I used Adobe Photoshop to change the color, removed lens blur, and added the text. This graphic is much easier to view and does not look distorted. • This graphic simulates the diagram in the classroom and will help the learner associate between this graphic and the diagram in each room. Old
Topic 3 Alphanumeric Keys • I created this graphic by taking a keyboard in my classroom and scanning it on a Ricoh Aficio MP5000 copier. This sends a PDF file to my email. I opened the PDF file and did a snapshot of the area that I wanted to use as my graphic. I then altered the graphic through Microsoft Office Picture Manager. • The keyboard graphic will show the learner a similar keyboard that he or she is currently using and the keys that will be used in the assignment.
Topic 4Checking Account • Check register – I initially had to make this. I did a print screen and then pasted it to paint. I printed it and then took the picture with the FugiFilm FinePix S5100. I then opened the graphic in Microsoft Office Picture Manager and cropped the image to erase any unnecessary background. • The graphic will show the learner what a check register will look like with both debit and credit entries. Old
Topic 5AutoSum Formula • AutoSum icon – I initially inserted this symbol into a Microsoft Office Word document. I then enlarged the graphic and scanned to my computer via Ricoh Aficio MP5000 copier. I did a snapshot of the PDF and saved it as a picture. The graphic was then edited through Adobe Photoshop. I added the shrink wrap effect, and the graphic is now much clearer. • This graphic will be the exact icon that the learner will see on the toolbar in Microsoft Excel. This will help the learner locate the icon more easily. Old