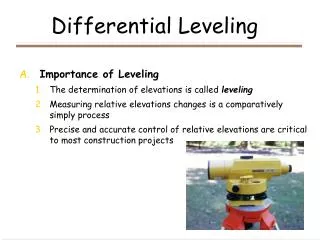
Precise Digital Leveling
Precise Digital Leveling. Section 3 Collimation Check and Field Notes. Collimation Check C-Check Peg Test. Collimation Check.


Precise Digital Leveling
E N D
Presentation Transcript
Precise Digital Leveling Section 3 Collimation Check and Field Notes
Collimation Check • Allow instrument and rods to acclimate prior to performing the collimation and/or leveling (allow equipment to adjust to the working environment for 10 minutes or more) • Perform Collimation Check on level ground at the work site in the work environment • Perform a Collimation Check at the beginning of every day that geodetic leveling is performed or when the level is jarred or any time there is a question about the instrument
Collimation Check (continued) • Perform a Collimation Check whenever the ambient temperature changes more than 10 degrees Celsius during the course of leveling during the day • Remove parallax and sharply focus the instrument and ensure all circular levels are in adjustment • Apply collimation to all future measurements (also note in digital data files that this correction has been applied to all measurements) • Record collimation (arc-seconds) on Backup Recording Sheet
Collimation Check - Kukkamaki Method A x B x Rod B Rod A Instrument Position 2 Instrument Position 1 10 m 20 m 10 m
Collimation Check - Kukkamaki Method A x B x Rod B Rod A Instrument Position 1 10 m
Collimation Check - Kukkamaki Method A x B x Rod B Rod A Instrument Position 1 10 m
Collimation Check - Kukkamaki Method A x B x Rod B Rod A Instrument Position 2 20 m
Collimation Check - Kukkamaki Method A x B x Rod B Rod A Instrument Position 2 40 m
Collimation Check – FÖrstner Method A x x B Rod A Rod B Instrument Position 2 Instrument Position 1 1/3 1/3 1/3 15 m 15 m 15 m
Collimation Check – FÖrstner Method A x x B Rod A Rod B Instrument Position 1 15 m
Collimation Check – FÖrstner Method A x x B Rod A Rod B Instrument Position 1 30 m
Collimation Check – FÖrstner Method A x x B Rod A Rod B Instrument Position 2 15 m
Collimation Check – FÖrstner Method A x x B Rod A Rod B Instrument Position 2 30 m
Instrument Specific Digital Level User Guides Leica DNA03 Example
Instrument Specific Digital Level User Guides Topcon DL101C Example
Instrument Specific Digital Level User Guides Trimble/Zeiss DiNi 12 Example
Instrument Specific Digital Level User Guides Trimble DiNi “03” Example
Required Leveling Notes • Entered at the beginning of the day • Or for change in observer, or instrumentation • Entered at the beginning of a section • Temperature readings inserted after each set-up • For recording gradient temperatures • Entered at the end of a section • Entered at the end of day • Or for change of observer or equipment
Required LEVEL NOTES Beginning of Day or Change in Observer/Instrument Type Date (mmddyy) Observer’s Number (1, 2, 3, etc – observer specific for project) Instrument Type (DNA03, DL101C, DINI12, etc) Temperature Code (0 for Celsius or 1 for Fahrenheit) Equipment Used Instrument Serial Number (like 90810) Collimation Check Error in Arc Seconds Rod 1 Serial Number (like 25458) Rod 2 Serial Number (like 25534)
Required Notes Entered Per Section Start of Leveling Section Start Time (hhmm, 24 hour local) Rod on Mark (1 or 2) Starting Temperature at Instrument Wind and Sun Code Temperature Gradient (Recorded in instrument only - after each complete BF setup) Info 1 Lower Probe (decimal or no decimal by instrument type) Info 2 Upper Probe (decimal or no decimal by instrument type)
Required Notes at End of Leveling Section Ending Time (hhmm, 24 hour local) Rod on Mark (1 or 2 – should be the same as starting) Ending Temperature at Instrument Wind & Sun Code (00 = Calm/Cloudy; 02 = Calm/Sunny, etc.) Wind Code: 0 – Calm Wind speed averaged less than 6 mph during section 1 – Breezy Wind speed averaged 6 to 15 mph during section 2 – Windy Wind speed averaged greater than 15 mph during section Sun Code: 0 – Cloudy Less than 25% of setups are performed in sunny conditions 1 – Partly Cloudy 25 to 75% of setups are performed in sunny conditions 2 – Sunny More than 75 % of setups are performed in sunny conditions 9999 End of Day or Change of Observer or Change of Equipment
Sample Backup Recording Sheet
F = -13.23456 m B = +13.23750 m + 0.00294 m Allowable Section Closure 1st Order, Class II 4√1.47782 = 4.86262 mm 2nd Order, Class I 6√1.47782 = 7.29393 mm
Leica DNA03 GSI Format (Last four columns on right deleted from view)
Trimble DiNi T12 Raw Data (First column on left deleted)