Virtual Experience Platform Attendee Guide
Welcome to the Virtual Experience Platform! This attendee guide (Version 5.0) provides essential information for successfully navigating your virtual environment. From the registration process to exploring the lobby, rooms, and engaging with content, this guide covers everything you need to know. Discover how to interact with sessions and connect with other attendees. Get tips on personalizing your experience and accessing valuable resources. Dive into your virtual adventure with confidence!

Virtual Experience Platform Attendee Guide
E N D
Presentation Transcript
Virtual Experience PlatformAttendee Guide Version 5.0
Contents Registration … 2 - 4 Lobby/Campus View…5 - 6 Rooms & Spaces…7 - 11 Interacting with Content…12 - 14 Tracks & Sessions…15 – 16 Connecting with Others … 17 – 20 More Help … 21
Registration The first page you will see when navigating through your virtual experience, is the Promotion Splash Page. Whether you are new to the experience or returning, you will be required to start from this page. Here you will find important information relating to the virtual experience before logging in.
Registration You will be required to complete the Registration form before gaining access to the virtual experience. You will see mandatory fields, out indicated by the asterisks, that will need to be completed. You may also sign up for Tracks and Sessions, and choose from a provided list of preference words to ensure that the most relevant content is delivered to you when experiencing the virtual environment.
Registration - Thank You If you complete the Registration process and the virtual experience you wish to attend is not yet live, then you will see the Thank You Page. Here you can download additional items, such as calendar reminders for live day activities. Once the virtual experience goes live, you will not see this page. You will instead be taken directly into the environment.
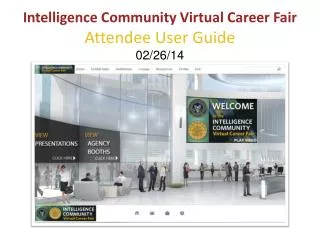
Lobby or Campus View Once logged in, you will be transported to the main Lobby/Campus of your virtual experience. Here you will find access to all areas of the environment via the Toolbar on the bottom of the screen. You may also navigate through the virtual experience by clicking on the promotions in theJumboTron screen at the back of the campus or lobby, or on the Toolbar Promo in the lower right (at the right side of the Toolbar). The JumboTron and Toolbar Promos can be clicked and will link you to various content items or virtual rooms in the environment.
Lobby or Campus View Recommendations Recommendations are content items the Virtual Experience Platform presents based on what is likely going to be of interest to you. The Recommendations are directly affected by the preference words chosen during the Registration process. In addition, by clicking on the wrench/star icon below the Toolbar, you are able to modify your Preferences by checking the boxes next to preference words. Making changes to your Preferences will automatically change the Recommendations to reflect the content you would like to be presented. Please note: the content shown in Recommendations is available elsewhere in the environment. You can always use the Search area at the top of the screen, too.
Rooms and Spaces Auditoriums You may visit the Auditorium to access presentations, videos or other content. The Content Screen in the Auditorium you visit will automatically open when you arrive. You can close the Content Screen by clicking on the “X” in the red circle on the upper right. Bringing the Content Screen back is easy: just click on the screen in any virtual room (usually featuring a company logo or other graphic) and it will reopen. See the section on Interacting with Content for more information on Content Screens. Content not currently available will have calendar reminders available for download, and often will feature a countdown timer indicating when it will be live. If there is more than one Auditorium in the virtual experience you are visiting, clicking the Auditorium icon on the Toolbar will send you to the virtual experience Map so you can choose which you would like to visit.
Rooms and Spaces Exhibit Halls Navigate to the Exhibit Halls to explore different Booths and access content. You may hover your mouse over a Booth to see its name and read information about the Booth. You can also navigate directly to a Booth from the Map or by using Search. Clicking on a Booth from this view will take you to the Booth so you can access content via its Content Screens. See the section on Interacting with Content for more information on Content Screens. Many booths have multiple Content Screens, so be sure to explore all the content at each Booth.
Rooms and Spaces Booths After clicking on a Booth, you will see all availableContent Screens. Clicking on the Content Screens (not the Booth logo) will open the corresponding Content Screen. See the section on Interacting with Content for more information on Content Screens. Above the Booth to the right is a button to access Booth Information and view a list of any available Representatives. You can chat or message Booth Representatives by clicking on the corresponding icons you’ll see next to each person. See the section on Interacting with Others for more information on chatting and messaging in the Virtual Experience Platform.
Rooms and Spaces Lounges Lounges can be accessed by clicking on the Map icon on the Toolbar. You will see Lounges shown in the Map and in the list on the left hand side. Clicking on either the word Lounges in the list or on the Lounges icon on the Map will show you the list of Lounges available and you can visit the one you like by clicking on the name of the corresponding Lounge on the list. Once in a Lounge you can view content via the Content Screen located in each Lounge. Simply click on the Content Screen to activate it. See the section on Interacting with Content for more information on Content Screens. There may also be one or more Public Chats taking place in the Lounge. If there are Public Chat forums available in that space you can click the Public Chat icon in the upper right of your screen to see them. If the virtual experience organizer has authorized it, a Public Chat may event open automatically when you arrive. You can join any Public Chat you like.
Rooms and Spaces Meeting Rooms Meeting Rooms can be accessed by clicking on the Meeting Rooms icon on the Toolbar. You will see Meeting Rooms shown in the Map and in the list on the left hand side. This will bring up the virtual experience Map, which will show you the list of Meeting Rooms available and you can visit the one you like by clicking on the name of the corresponding Meeting Room on the list. Once in a Meeting Room you can view content via the Content Screen located in each Meeting Room. Simply click on the Content Screen to activate it. See the section on Interacting with Content for more information on Content Screens. There may also be one or more Public Chats taking place in the Meeting Room. If there are Public Chat forums available in that space you can click the Public Chat icon in the upper right of your screen to see them. If the virtual experience organizer has authorized it, a Public Chat may event open automatically when you arrive. You can join any Public Chat you like.
Interacting with Content Content Screen Content Menu screens are where content is made available. Here you can explore a wide variety of content from the owner of this Content Screen. Content may be filtered using the controls at the top. Each content item in the list can be expanded by using the toggle button beneath its description. From here, content can be shared, ranked, added to your Virtual Briefcase or Playlist, or viewed. URL links will open a new tab in your browser. Content items with a checked box next them are items you have previously viewed (you can always view them again, of course!).
Interacting with Content Video Player After clicking a video to play, the video will begin playing. You have options to Fast Forward, Rewind, move the Time Indicator, and Pause and Play. You also have the option to view more info on the video with the “i” icon, add the video to your Playlist, share the video with anyone with a valid email address, dim the background with the light bulb icon, go into full-screen mode, or adjust volume. Closing the video player will return you to the Content Screen you were just visiting (or to Recommendations, if that’s where you began watching the video from).
Interacting with Content Playlist Your Playlist will always be accessible to you throughout the virtual experience you are participating in. You can save your rich media content (usually videos) for viewing later by clicking the “Add to Playlist” icon next to a video in a Content Screen or in Recommendations. The Playlist is activated via the Playlist icon on the Toolbar (it looks like a little sheet of paper, and is located next to the Virtual Briefcase). When you click on your Playlist, a view like the one above appears. Here you can preview, view, share or delete the content.
Tracks and Sessions Tracks Tracks and Sessions are available for specific categorized information or content. You can sign up for them during the Registration process or later when you’re in the virtual experience. Once in the virtual experience, you can access Tracks and Sessions by clicking the corresponding icon on the Toolbar. You can view All Tracks, or add specific tracks to “My Tracks” – here’s how: Click on a Track to view the Sessions associated with it. Explore each Session’s content by utilizing the icons at the bottom of each Session description. Use the “+” sign to add a Session to your list. It will then show up under “My Tracks”. If a Session is already live, you can go directly to it by using the “doorway” icon at the bottom of the Session description. (continued on next page)
Tracks and Sessions Sessions Sessions feature subsets of content within their respective Tracks. There can be more than one Session per Track. Each Session will direct you to a Virtual Room or Booth where the content or live presentation is taking place. From this view, you may access all content available. Session content can be time bracketed, and available only during certain times. If a Session has not started, you will be offered a calendar reminder to download to remind you of its starting time.
Connecting with Others Chat Roster The Chat Roster is available by clicking on the tab on the left of the viewing window or by accessing the Social Collaboration Network icons on the Toolbar. These icons are located directly to the left of the Toolbar Promo. They include the Recommendations, Playlist, Messages, Chat and Public Chat icons. When you open the Social Collaboration Network interface, you can access your Profile, others on the Roster list, or your Colleague list. Adding other attendees as Colleagues is easy. Just click the “+” sign next to their name, and they’ll receive a notification, which they can approve. Other attendees do not have to be Colleagues in order for you to chat with or message them. But having Colleagues makes it easier to keep track of your important contacts throughout future virtual experiences you may attend. It also makes it easy to send them messages even when they are offline. (Continued)
Connecting with Others Messages Clicking on “Messages” in the Social Collaboration Network will open up your Inbox and Sent Messages area. Messages can be either text or video. You can send a text or video message, review messages you’ve received or previously sent, or reply to (or forward) a message you have previously viewed. To send a message to someone in the virtual experience you are attending, or even to a Colleague that is not online, click the “send a message” icon next to their name (it’s an icon that looks like a combination of a video camera and an envelope). The messaging functionality will immediately open and you can record your video message or type your text message. If you’ve recorded a video message, you can even preview it before sending it by clicking the “play” button when you’re done recording. To add recipients for your message, simply click and drag their name from the Roster or your Colleagues list over to the Recipients section and let go. They will be added to the list of people that will receive your message. Your messages will be stored for 30 days after they have been sent.
Connecting with Others Virtual Briefcase To access your Virtual Briefcase click the icon on the Toolbar or the tab at the top of the Social Collaboration Network. Your virtual Briefcase will always be accessible. That’s because it’s a part of your Social Collaboration Network profile, which you can utilize in all the virtual experiences you attend. You can even login to your profile through the 6Connex website, if you wish (it’s in the upper right corner of the home page at www.6connex.com – click the Login icon). All downloadable content items which you have added to the Briefcase will show up here. You can preview documents, rate them, download them individually, share them to anyone with a valid email address, or you can download your Briefcase in its entirety in a .zip file to your desktop.
Connecting with Others Public Chat Public Chats can be accessed by clicking on the “Public Chats” tab in the Social Collaboration Network. It can also be accessed by clicking the “Public Chats” icon on the Toolbar. Public Chats allow you to access any public forum that has been created and made available to participants. Any participant can also create a Public Chat using the Add Public Chat icon on this page. When you create your own Public Chat you name it, give it a description, and tell the Virtual Experience Platform where in the virtual experience you want it to be located. It will then be accessible to all all participants. Remember, if you want to privately chat, one to one or in a group setting, you can do that via the chat icons next to each participant’s name on the Roster or your Colleagues list.
More Help For more information on how to utilize the 6Connex Virtual Experience Platform, click on the “?Help” icon in the upper right of the screen in the virtual experience you are attending. You can also email us a support@6Connex.com