CGS 3220 Lecture 3
180 likes | 325 Vues
CGS 3220 Lecture 3. Introduction to Computer Aided Modeling Instructor: Brent Rossen. Adding Details – Overview. How to extrude polygonal faces How to move faces How to delete faces How to combine objects How to move the pivot point About construction history

CGS 3220 Lecture 3
E N D
Presentation Transcript
CGS 3220Lecture 3 Introduction to Computer Aided Modeling Instructor: Brent Rossen
Adding Details – Overview • How to extrude polygonal faces • How to move faces • How to delete faces • How to combine objects • How to move the pivot point • About construction history • How to delete construction history
Opening your file • Ctrl+o or File > Open Scene • If you can’t find your scene, you haven’t set your project • Either, cancel and File > Project > set or click Set Project… in the bottom right of the dialog box • Since we’ll be making changes, be sure to save the scene as a new scene, File > Save Scene As…, name it “Garage02”
Garage Opening • To make the garage door, let’s start by changing the room’s geometry and make an opening • First, let’s add some geometry by changing the number of subdivisions • Select the garage input in the channel box • Click drag all the subdivision items and MMB+drag to the right to increase the attributes to 5 (virtual slider)
Extruding Polygonal Faces • Extruding polygons is one of your main methods for making changes to geometry. • To extrude faces: • Hit F11 to display faces in component mode • Select the appropriate faces for the garage • Edit Polygons > Extrude Face • An all in one manipulator will appear • Use the translation portion of the manipulator, grab the blue axis and bring it in a little to make a border
Extrude and Scale • Edit Polygons > Extrude Face again • LMB+drag the square to scale the extruded faces smaller in z, y • LMB+drag the yellow translation arrow to move the bottom border even with the floor
Door Frame • Extrude again • Translate the faces towards the outside of the garage to create the inside door frame • Now delete the selected faces • This creates the door opening
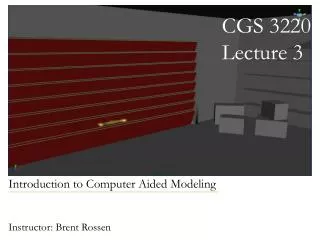
Garage Door • Now lets make the door to fit in the opening • We’ll model a single plank • Then duplicate it like last lecture to make the rest • Then combine the pieces together to make a single door • Create > Polygon Primitives > Cube • Move the cube to the bottom of the door frame • Scale the cube into a plank, rename it plank
One More Plank • Rotate the plank a little towards the inside of the garage • Edit > Duplicate Options, reset, then dup • Move the second plank up so the bottom touches the top of the last one • Scale both planks out until they are just touching
Many More Planks! • Figure out the difference in height by subtracting the height of the bottom plank from the height of the top using the channel box • Edit > Duplicate options • Copies: 6 • Translate Y: top – bottom
Combining Polys • Now that we’re done with making the door, let’s simplify door manipulation by combining them all into one big piece • With them all selected: polygon > combine • Rename the new model to garageDoor
Adjusting Pivots • When new objects are combined, the pivot point is placed the center of the world, we want it in the center of the object • To automatically center the pivot • Modify > Center Pivot • To move the pivot point manually, press the insert key (Home on Macs) • Move it around, then hit insert again to get back to regular manipulators • Let’s move it so the garage door appears to open correctly
Doorknob • Now we’ll give the door a doorknob, so our characters have something to grab when they want to open it • Make a new polygon primitive cube and rename it knob • Input: • Width: .5, Height: .25, Depth: .25 • Subdivisions Width: 2 • Move it to an appropriate place on the door
Symetric Faces • Extrude the two faces on each side of the front cube as shown • After you extrude, you can move one face, and the other face will be moved symmetrically. • The faces are moved based on the face’s own normal
More Knob • Continue extruding and moving until you get the look in the image • To finish it, smooth the doorknob • RMB > Object Mode • Polygon > Smooth
Construction History • All the different tools used on the doorknob are still accessible from the inputs section of the channel box • Select one of them and you can make changes to what you have already done, without losing work you’ve done later • The extrude manipulator is displayed if you select one of them • Let’s try changing some settings
Deleting History • Keeping all that history around is intensive for both calculation and size • especially later when you are working with high poly characters • Now that we’re sure the doorknob is done, let’s get rid of the history • Edit > Delete by type > History • To delete all history in the scene: Edit > Delete all by type > History
Conclusion • Save your scene! • There’s lots more to polygonal modeling, but you can create a wide range of things with what you’ve just learned • We’ll get more in-depth with modeling later, for now, we’ll try to experience many different 3d Modeling and Animation topics • In the next lesson, we add colors to the scene with shaders and textures
