Powerpoint Tips
Stephen Curry May 2007. Powerpoint Tips. Outline. Preparing for work – show toolbars & rulers Preparing the presentation – defining a style/template Useful drawing tools Handling text Inserting image files Transferring slides from one presentation to another Slide transitions

Powerpoint Tips
E N D
Presentation Transcript
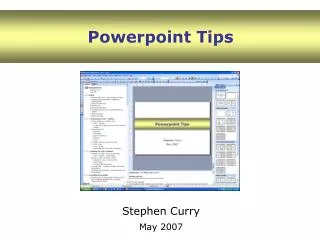
Stephen Curry May 2007 Powerpoint Tips
Outline • Preparing for work – show toolbars & rulers • Preparing the presentation – defining a style/template • Useful drawing tools • Handling text • Inserting image files • Transferring slides from one presentation to another • Slide transitions • Sound and video Please ask questions as we go…
1. Preparing for work – toolbars & rulers • Choose toolbars to display using: • View > Toolbars • Or tear off as separate menus from existing toolbars • My preferred set: • Standard • Formatting • Align or Distribute • Drawing • Order • Arrange on screen to suit your taste • To show rulers: • View > Rulers • Useful later for controlling text indents…
2. Defining the style/template • Establish the “look” of your presentation • View > Master > Slide master • Decide on fonts, font sizes, bullets • Safe fonts: Arial, Comic Sans MS • Set the sizes • Choose bullet style/colour • Can alter later – changes will affect the whole presentation • Template aids navigation – during creation and presentation
Controlling those bullets • It looks nicer (in most people’s opinion) if the text is indented and does not run directly underneath the bullet • It’s not so nice (in most people’s opinion) if the text is runs directly underneath the bullet - and is crowded up against the bullet point… • Use rulers to control the indentation • Set up default indentation within your template
3. Drawing tools • Basic shapes & lines • Line, arrow, rectangle, ellipse in drawing toolbar (autoshapes) • Lines: use shift key for horizontal or vertical • Shapes: Use shift key to keep proportions square or circular • Fancy shapes & lines – e.g. drawing smooth curves • Autoshapes > Lines • Choose “Curve” for lines, “Freeform” for closed shapes • Click to define basic outline • Then right-click and select “Edit points” to refine
Quick Copy • Use control key + left-click + drag to make a copy • When dragging, hold down the shift key to restrict to horizontal or vertical movement (if desired) Text to be copied On a Mac, use alt key + left-click + drag to make a copy
3. Drawing tools – align & distribute toolbars • When drawing similar objects, duplicate and edit • Select the group of objects you want to work with • Use alignment & distribution to position Aligned left, even distribution Start
Distribution relative to slide? Start Distribute (not relative to slide) Overall spacing determined by position of top and bottom objects Distribute (relative to slide)
Snapping • Draw > Grid and Guides • Select options as you wish • Guides: not so useful • Snap to grid • ON by default; restricts positions to a 0.2 cm grid • Turn OFF if you want complete freedom to position objects • Snap to shape • Useful when drawing/moving objects that should be in contact (e.g. domain structure in a protein)
Controlling Layers • Everything is on a separate layer • Newer objects on top • Control relative position in the stack using the “Order” toolbar • Bring to front • Send to back • Bring Forward • Send Backward
Lines • Control appearance using the drawing toolbar • Colour • Thickness • Dash style? • Arrow head? • Double-click line for more options
Shapes • Appearance also controlled from drawing toolbar • Filled or not? • Colour • Type of shading – solid or graded? • Outline or not? (Controlled as for lines) • Dropped shadow (nicer when blurred – available on later versions) • Use text tool to add text within an object (converts it to a text box) • Double-click for more options text
4. Handling text • Add content to ready-made text box list if present in slide master • To add a textbox elsewhere, use the text tool in the drawing toolbar • Text boxes can be filled with colour (and have outlines added) • Double-click for added format options • Restrict use of WordArt, for the sake of good taste… WordArt... Text in default box Text in coloured box Text in coloured, outlined box
5. Inserting Image Files • Typical projector has resolution of 1024 x 768 pixels (XGA) • Little point in using images that contain more pixels (except perhaps future-proofing?) • Edit images in Photoshop (or equivalent) to obtain appropriate size • Avoid excessive rescaling of images in Powerpoint (increases file-size, slows performance)
Adding images • Safest method: • Insert > Picture > From file… • Don’t drag and drop (pictures can go missing) • Drag corners to adjust size • Double-click image for more accurate control • Size • Add border • Adjust brightness/contrast • Can also adjust with Picture toolbar
6. Transferring slides • Insert > Slides from files • Select from dialogue box • Check “Keep source formatting” box to maintain style (if that’s what you want) • Edit as necessary… • Good luck…!
7. Slide transitions • Select slides • Slide Show > Slide transition… • Choose carefully: • Keep it simple and effective • Use a transition that is noticeable – so the audience realises the slide is changing • Use a distinct transition between sections of your talk?
8. Sound and Video • Sound – forget it (for 99.9% of cases) • Video • Prepare at the size to be used (less than 1024 x 768) • Play it safe: use your own computer for the presentation • Use a standard file format: • file.avi • Mpeg 1, 2, 4 – file.mpg, file.mp2, file.mp4 • N.B. Apple’s Quicktime format - file.mov - does NOT work within Powerpoint on a PC • Insert > Movies and sounds… > Movie from file… • Make sure to keep a copy of the movie file with your powerpoint file • Test before use!