Rational RequisitePro
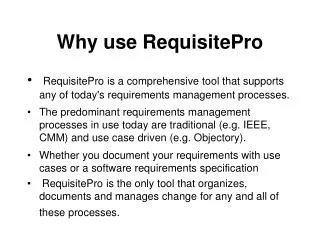
Rational RequisitePro. Fundamentals of RequisitePro. Overview. Coming to Terms with Terms Getting Started with RequisitePro Getting Around in RequisitePro Working with Requirement Documents Working with Requirements RequisitePro and CMS. Coming to Terms with Terms. Artifact

Rational RequisitePro
E N D
Presentation Transcript
Rational RequisitePro Fundamentals of RequisitePro
Overview • Coming to Terms with Terms • Getting Started with RequisitePro • Getting Around in RequisitePro • Working with Requirement Documents • Working with Requirements • RequisitePro and CMS
Coming to Terms with Terms • Artifact • A piece of information that • is produced, modified, or used by a process, • defines an area of responsibility • is subject to version control. • An artifact can be a model, a model element, or a document. A document can enclose other documents. • Document Type • Defines descriptive and operational information associated with a requirements document. The document type serves as a template for each requirements document you create of that type. • The document type defines the document’s file extension, such as .prd; all documents of the same document type share the same file extension. The document type identifies a default requirement type; each new requirement you create in the document will be based on the default requirement type unless you indicate otherwise. The document type also identifies an outline (or template) for the document which controls its page layout, default text, paragraph styles, and other structure. • Offline authoring • A Rational RequisitePro feature that lets users read and modify a document in Microsoft Word outside of RequisitePro (i.e., offline). When you take a document offline, RequisitePro creates a copy of the document in the directory you specify. The original is still stored in RequisitePro, but it is changed to a read-only document. Other users can view the document in RequisitePro, but they cannot edit it until you bring it back online • Requirement type • A set of descriptive and operational information associated with a requirement when the requirement is created. A requirement type serves as a template for all requirements of the same type and is useful for classifying or grouping similar requirements in a project. Each requirement type has a unique set of user-defined attributes.
Coming to Terms with Terms (cont.) • Requirement attribute • A descriptive field of information associated with a requirement. • Rational RequisitePro requirement attributes are either system attributes (defined by RequisitePro) or user-defined (defined by the project owner). • Examples of system attributes include: • Revision number • Author • Date • Time • Examples of user-defined attributes include: • Priority • Cost • Risk • SoDA • Software Documentation Automation • Tag • The unique identifier for each requirement in a project. A requirement tag is composed of a tag prefix and a unique numerical value, such as "PR100.1.2." The tag prefix is always the requirement type, as defined in the Project Properties dialog box. The numerical value is generated by Rational RequisitePro. The tag prefix can include a maximum of 20 characters. • Traceability • A relationship between two requirements that implies the source, derivation, or dependencies between the requirements using the "trace to" and "trace from" features. • Traceability Matrix • A view that illustrates the relationships between requirements of the same or different types. You use this matrix to create, modify, and delete traceability relationships and view indirect relationships and traceability relationships with a suspect state. You can also use the Traceability Matrix to filter and sort the row requirements and column requirements separately. • Traceability Relationship • A relationship between two Rational RequisitePro requirements that implies the source, derivation, or dependencies between the requirements. The trace to/trace from state appears in a Traceability Matrix or Traceability Tree when you create a relationship between two requirements.
Getting Started With RequisitePro • Starting RequisitePro • Adding a Project • Removing a Project • Logging In to RequisitePro
Starting RequisitePro To start RequisitePro: • Click Start > Programs > Rational Software > Rational RequisitePro
Adding a Project Before you can access a RequisitePro project, you must add it to your project list. • Click File > Open Project. The Open Project dialog box opens. • Click Add. The Add Project dialog box opens. • Navigate to the project file you want to add to the list. • Click Open. RequisitePro adds the project to your project list, and it appears with the projects listed on the Existing tab.
Removing a Project You can remove a RequisitePro project from your project list without deleting the files from your system. To remove a project from the project list: • Click File > Open Project. • Select the project you want to remove, and click Remove. RequisitePro removes the project. • Click OK to save the changes.
Logging in to RequisitePro If security is enabled, you must log on in the Project Logon dialog box before you can open a RequisitePro project. • In the Username text box, type your user name. • In the Password text box, type your password. • Click OK.
Workshop #1: Register & Connect to Project To start RequisitePro: • Click Start > Programs > Rational Software > Rational RequisitePro To Add a Project: • Click the Existing tab in the Open Project dialog box. • Click Add. The Add Project dialog box opens. • Browse to • C:\Program Files\Rational\RequisitePro\Projects\Roche Learning Project\Roche Learning Project.rqs • Click Open. RequisitePro adds the project to your project list, and it appears with the projects listed on the Existing tab. Logging into a Project • On the Existing tab in the select the project that was just added and click the OK button. The Project Logon dialog opens. • In the <LOGIN> text box, type your user name. • In the <PASSWORD> text box, type your password. • Click OK.
Getting Around in RequisitePro • The Explorer Pane • Creating Packages • Working with Views
Explorerer Explorer Pane Traceability Tree Requirement Properties Traceability Matrix Attribute Matrix
Creating Packages A Package is a container, represented in the Explorer as a folder, that can contain requirements, documents, views, and other packages. • In the Explorer, select the project name or an existing package, and click File > New > Package. The Package Properties dialog box appears. • In the Name box, type the name under which the package will be listed in the Explorer. • In the Description box, type a brief description of the package. • Click OK. The new package appears in the Explorer, nested within the project or package you selected in step 1.
Working with Views • The View Pane • Creating Views
View Pane Three kinds of views can be created: • The Attribute Matrix displays all requirements of a specified type. The requirements are listed in the rows, and their attributes appear in the columns. • The Traceability Matrix displays the relationship (traceability) between two types of requirements. • The Traceability Tree displays the chain of traceability to or from requirements of a specified type.
Creating Views • Select the package in which you want the new view to appear and click File > New > View. The View Properties dialog box appears. • In the Name box, type a name under which you want the view to be listed in the Explorer. The Description is optional. Note that the Package box contains the package you selected in step 1. You can change the package at any time. • Select the View Type. • Attribute Matrix • Traceability Matrix • Traceability Tree • Select a Row Requirement Type and select a Column Requirement Type (if you are creating a Traceability Matrix). Note that user-defined requirement types are included. • Select the Private check box if you want to be the only user who can open the view. • Click OK. The view opens and appears in the Explorer, displayed in the selected package alphabetically by name. • If you want to save the view in the project database, click File > Save View.
Working with Requirement Documents • About requirement documents • Importing Requirement Documents • Opening Documents • Saving Documents • Creating Requirements in a Document • Modify Requirements in Documents • Offline Documents
About Requirement Documents • A requirements document is an integral part of a project. It can contain text, graphics, and OLE objects. • When you create a document, Rational RequisitePro adds the new document to the project database. • The requirements, their attribute values, and their traceability relationships are stored in the project database. • Before you can create a document, you must open the project with which you want to associate the new document. • By default, a document is stored in the project directory. However, you can choose to store a document in any location.
Importing Requirement Documents • You can import requirements into Rational RequisitePro from Microsoft Word documents or from databases in comma-separated-value (CSV) format. • For each import you perform, RequisitePro creates an import log, which is a written record of the import process. • The import log records such events as: • Requirement type matching • Conflict handling • Attribute mappings • Success or failure of search criteria • Cancelled operations • Opening source document • Value errors • Results • RequisitePro saves the import log in the directory where the project is stored.
Import Wizard: Select Source • Select one of the following import sources: • Microsoft Word Document • Comma Seperated Value (*.CSV) file • In the Name of document to import text box or the Name of CSV file to import text box, type the name and path for the .doc or .csv file, or click Browse to select a file. • 3 To go to the next screen of the wizard, click Next.
Import Wizard: Select Import Content Use this screen to designate the contents of the import process. • Do one of the following: • Requirements and Document • Requirement Only • Document Only • Click Next • If you selected • Requirements only, the Import Wizard: Select a Destination screen appears. • If you selected Requirements and document, the Import Wizard: Requirements to Import - Word screen appears. • If you selected Document only, the Import Wizard: Importing Requirements Status screen appears
Workshop #2: Import a Requirement Document To Import the Document • Click File > Import. The Import Wizard is displayed. • Select Microsoft Word Document. • Click the Browse button and navigate to the document. • C:\Program Files\Rational\RequisitePro\Projects\Roche Learning Project\ ClassicsCD Web Shop.doc • Click the Next button. • Select Document only and click Next. The Document Properties dialog is displayed. • In the Name text box provide a name for the document. • In the Description text provide a brief description of the document. • Select the Vision Document Type from the Document Type drop down. • Click the Next button. • Click Yes. • Click the Commit button on the Import Wizard dialog box.
Opening Documents You can open one or more requirements documents in an open Rational RequisitePro project. To open a document, do one of the following: • Double-click the document in the Explorer. • Click Window > Show Word. In Microsoft Word, click RequisitePro > Document > Open. The Open Document dialog box appears. Select a document and click OK.
Saving Documents When you save a document, Rational RequisitePro saves to the project database all document modifications, such as the document's name, revision number, label, and change description. • Click RequisitePro > Document > Save. The Change Description dialog box appears and prompts you to annotate each of your modifications to the requirements. • Type an explanation of your modification in the Change Description text box. • Tip: Check the "Apply to all modified..." check box if the description applies to all your modifications to the document. • Click OK to save the changes to the requirements, or Cancel to end the process.
Creating Requirements in a Document You can select existing text within a document to create requirements. When you create a requirement in a document, it is displayed in the style and color that you defined for requirements of that type. The requirement is tagged Pending until the document is saved. • In the document, select the information that will become part of the requirement. (If you do not select text, you will be prompted to enter text for the requirement.) • Click RequisitePro > Requirement > New or the Create Requirement button. The Requirement Properties dialog box appears. • Click the General tab. • In the Type box, select a requirement type with which to associate the requirement. • In the Name box, type the requirement name You are not required to assign a name to a requirement if you have data in the Text field, but you cannot leave both the Name and the Text boxes blank. • Click OK. • To save your changes, click RequisitePro > Document > Save. RequisitePro saves the document, updates the database, and assigns a requirement number to the requirement (in place of the Pending tag).
Workshop #3: Tagging a Requirement • Open the Vision document that was imported in Workshop #1. • Navigate to section 4.2. • Select the text “Generate reports”. • Click RequisitePro > Requirement > New. The Requirement Properties dialog box appears. • Click the General tab. • In the Name text box type “Generate reports”. • In the Type box select FEAT: Feature Requirement Type. • Click OK. • To save your changes, click RequisitePro > Document > Save.
Workshop #4: Creating & Tagging a Requirement • Navigate to section 4.2 and place the cursor just below the text “Generate reports” • Type the following text: “Ability to access on PDA” • Select the information added in step 2. • Click RequisitePro > Requirement > New.The Requirement Properties dialog box appears. • Click the General tab. • In the Name text box type “Ability to access on PDA”. • In the Type box select FEAT: Feature Requirement Type. • Click OK. • To save your changes, click RequisitePro > Document > Save.
Offline Documents • Offline Authoring Overview • Taking Documents Offline • Bringing Offline Documents back Online
Offline Authoring Overview • Offline authoring lets authors use a requirements document outside of Rational RequisitePro (i.e., offline). • When you take a document offline, RequisitePro creates a copy of the document in the directory you specify. The original is still stored in RequisitePro, but it is changed to a read-only document. Other users can view the document in RequisitePro, but they cannot edit it until you bring it back online. • When you take a document offline, RequisitePro includes Microsoft Word macros in the document. These macros allow you to add and delete requirements in the offline document. • Do not rename documents while they are offline. The original file name is necessary so that the offline document is recognized within RequisitePro. When you bring the document back online, RequisitePro replaces the read-only document with the modified document. Alternatively, you can elect to cancel the offline process. When you do, RequisitePro restores the original document, removing its read-only state, so all requirements authors and project administrators can again modify it within RequisitePro. • You can use the Tools > Offline Documents command to take a document offline, bring a document online, or check an offline document's status. From a document, you can use the RequisitePro > Document > Offline Documents command.
Taking Documents Offline Before taking a document offline, make sure all changes made to requirement text outside the document (such as in the Attribute Matrix, or in RequisiteWeb) have been saved in the document. • Do one of the following: • Click Tools > Offline Documents. • In an open document, click RequisitePro > Document > Offline Documents. The Offline Documents dialog box appears. • In the Display Types list, select a document type. • Click the document you want to take offline. (Use a multiple select action to select multiple documents.) • Click Take Offline. The Take Offline Information dialog box appears. • In the Reason text box, type a reason for taking the document offline. • In the Location text box, type the directory path where you want to store the document, or click Browse to locate the directory. • If you are taking multiple documents offline, the Take Offline Information dialog box includes the Apply to All check box. Select the check box to apply the Reason and Location entries to all the documents. Clear this check box to address each document individually. • Click OK.
Workshop #5: Take Document Offline • Right click on the Vision document and select Offline > Take Offline… • Provide a reason for taking the document offline. • Click the Browse button and point to C:\Temp
Bringing Offline Documents back Online • Do one of the following: • Click Tools > Offline Documents. • In an open document, click RequisitePro > Document > Offline Documents. The Offline Documents dialog box appears. • In the Offline documents list, select the document you want to bring back online. (Use a multiple select action to select multiple documents.) • Click Bring Online. The Bring Online Information dialog box appears. • In the Description of Changes box, type a description of the changes made to the currently selected document while it was offline. • If you are bringing multiple documents back online and the changes apply to all subsequent documents, select the Apply to All check box. • Click OK. A Microsoft Word warning message states that the document you are bringing online contains macros. Click the Enable Macros button. If you have deleted requirements in an offline document, RequisitePro notifies you how many requirements you have deleted and asks whether you want to update the online document with the changes. • Click Yes to accept updating the document, or click No to decline updating the document. If you decline updating the document, RequisitePro does not bring the document back online.
Workshop #6: Bring Documents Online • Right click on the Vision document and select Offline > Bring Online… • Document a description of any changes made.
Requirements Traceability • Traceability Overview • Creating traceability relationships in a document • Creating traceability relationships in n Attribute Matrix • Creating traceability relationships in a Traceability Tree
Traceability overview As requirements change, other related requirements can be affected. Rational RequisitePro allows you to create traceability relationships to monitor these changes. When creating traceability relationships, keep the following in mind: • You can create a traceability relationship between requirements of the same or different types. • You can create traceability relationships between requirements that exist in the same document, in different documents, or in the project database. • You can create, view, and manipulate traceability relationships in documents and views. • If you modify the name, text, or attributes of a requirement that is traced to or from another requirement, RequisitePro marks the relationship between the two requirements suspect. • Traceability relationships cannot have circular references. • There are two types of traceability relationships: direct relationships and indirect relationships.
Creating traceability relationships in a document You can create trace to/trace from relationships for a selected requirement in a document. If you have created requirements in a document, you must save the document before you can create traceability relationships for the new requirements. • In the document, select the requirement. • Click RequisitePro > Requirement, and then click Trace To or Trace From.The Trace To Requirements or Trace From Requirements dialog box appears. • Select requirement(s) from the list. (Use a multiple select action to select multiple requirements.) • Click OK.
Creating traceability relationships in an Attribute Matrix You can create traceability relationships in an Attribute Matrix by using the Traceability tab on the Requirement Properties dialog box. To create traceability relationships from more than one requirement at the same time, use the Traceability Matrix or the Traceability Tree. • Select the requirement from the row area. • Click Requirement > Properties. The Requirement Properties dialog box appears. • Click the Traceability tab. • In either the From or To area of the dialog box, click Add. The Trace From Requirement(s) or Trace To Requirement(s) dialog box appears. • Select the requirements to or from which you want to establish a traceability relationship. • Click OK to close each dialog box.
Creating traceability relationships in a Traceability Tree There are two methods for creating traceability relationships in the Traceability Tree: • Using drag and drop • Using menu commands
Creating traceability relationships in a Traceability Tree - Using drag and drop In a Traceability Tree, you can use drag and drop functionality to create and modify traceability relationships. • Select the traced requirement • Hold down the right mouse button, dragging up or down until the cursor is on the destination requirement and then release the mouse button. A shortcut menu appears. • Do one of the following: • Select Move Here to delete a previous traceability relationship of the selected requirement and create a traceability relationship with the destination requirement. • Select Copy Here to maintain a previous traceability relationship of the selected requirement and create an additional traceability relationship with the destination requirement. • Select Cancel to cancel the operation.
Creating traceability relationships in a Traceability Tree - Using menu commands In a Traceability Tree, you can use the Trace To or Trace From commands to create traceability relationships. • Select the requirement(s) which you want to create a traceability relationship. • Do one of the following: • Click Traceability > Trace To or Traceability > Trace From. • Right-click and select Trace To or Trace From from the shortcut menu. • Select the requirement(s) in the list. • Click OK.
RequisitePro and CMS Interaction Released Document State ReqPro (Editable) CMS (Baselined) Take document offline Check-in to CMS Performed from ReqPro Performed from CMS Place document in location of document that was taken offline Check-out of CMS When working on document (CMS) Bring document back online and make edits (ReqPro)
RequisitePro and CMS Interaction (continued) • Step by Step approach to RequisitePro and CMS interaction: • From RequisitePro – Right-click on the document and chose “Take offline.” When the document has been taken offline, a read-only copy of the document is available to everyone. The document must be brought back online by the person responsible for taking the document offline (owner). • Store the document on a local drive – C:\ • From CMS – Check-in the document. • From CMS – Check-out the document when modifications need to be made to the document. • Owner – If the file has been modified from the original document that was brought offline, then the new version of the document must replace the document that was brought offline. • From RequisitePro – the owner must right-click on the document and chose “Take online.”