
Style Sheets
E N D
Presentation Transcript
Style Sheets • In this first lesson, Style Sheets, you will learn to: • Define and describe style sheets. • Define and describe cascading style sheets (CSS). • Explain how to implement styles with CSS.
Need of Style Sheets 1-2 Style sheets are a set of rules that describe the appearance of data in an XML document. XML was inspired by the problems posed by presentational markup. Presentational markup does not describe data; it defines the appearance of data. In a document, if you had to change all proper nouns from bold to italics, you would have to do it manually for each proper noun. Presentation markup failed to provide same look and feel across multiple devices such as computers, Personal Digital Assistant (PDA) devices, and cell phones. Style sheets and XML solve these problems. XML describes data. Style sheets define the appearance of data. However, both XML and style sheets are defined in separate files.
Need of Style Sheets 2-2 Figure depicts formatted document with style sheet.
Various Style Sheets There are several style sheets available. However, following two are the most popular style sheets:
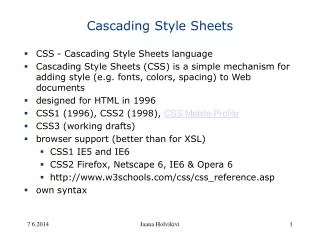
Cascading Style Sheets 1-2 CSS Cascading Style Sheets is a rule-based language invented in 1996 to write formatting instructions for data contained in HTML documents. A CSS style sheet comprises a set of rules for various elements in a document. Each rule defines how the data enclosed in the element should be displayed. Style sheet rules can be combined from different sources, or subsets can be created or the rules can be overridden. The term cascading is derived from this ability to mix and match rules.
Cascading Style Sheets 2-2 Figure shows an example of Cascading Style Sheet.
Benefits of CSS • Benefits of Cascading Style Sheets: • Any style or presentation changes to data can be achieved faster as changes are to be implemented in one place. • Device independence can be achieved by defining different style sheets for different device. For example, you can have different style sheet for desktop computers, PDAs, and cell phones. • Reduction in document code as the presentation information is stored in a different file and can be reused.
Style Rules 1-4 • A style sheet in CSS comprises a set of style rules. • These rules define how the content enclosed in an element will be displayed. • These rules are applicable to all child elements within an element. • A style rule comprises a selector, a property, and a value. • A property and a value separated with a colon are referred to as property declaration. • Figure depicts the style rules. • selector selector is an element name of an XML document. A typical element name could be CD, Name, or Title. • property property is a CSS style property that defines how the element will be rendered. Some of the CSS properties are border, font, and color. • value Value is the value associated with a CSS property. One CSS property can have several values. The various values for property font-family are the various font family names such as ‘times’, ‘arial’, and ‘courier’ to name a few.
Style Rules 2-4 Snippet <?xml version="1.0" ?> <Endangered_Species> <Animal> <Name language="English">Tiger</Name> <Threat>poachers</Threat> <Weight>500 pounds</Weight> </Animal> </Endangered_Species> In Cascading Style Sheets (CSS), style rules can comprise more than one selector. To include multiple selectors or group multiple selectors, one needs to provide a comma-separated list of element names. The following code depicts a sample XML document containing information about endangered species.
Style Rules 3-4 Snippet Name { display: block } Threat { display: block } Weight { display: block } Snippet Name, Threat, Weight { display: block } The following code demonstrates an ideal way to define style rules by displaying each element on a separate row. However, these three style rules can be converted to a single style rule by grouping the selectors as demonstrated in the following code.
Style Rules 4-4 A single selector can have more than one property-value pairs associated with it. For example, the figure shows a CD element having two property declarations – one to set the font family to sans-serif, and other to set the color of text to black. Notice the property-value pairs are separated by a semi-colon. Similarly, a collection of one or more property-value pairs can be associated with more than one selector. For example, the figure shows two property declarations assigned to three elements namely, CD, Title, and Name.
External Style Sheets 1-2 Syntax <?xml-stylesheet href="url" [type="text/css"]?> • In CSS, the style rules are written in a file with the extension .css. • This file is associated with an XML document using a style sheet processing instruction. • A few points to note about style sheet processing instruction are: • It should appear in the prolog section of an XML document, that is, it should appear before any tag of an element. • One XML document can have more than one style sheet processing instructions, each linked to one .css file. • where, • xml-stylesheet is the processing instruction. • url is the URL of a .css file which can be on a local system or anywhere on the Internet. • type="text/css" is optional; however if a browser does not support CSS, it informs the browser that it does not have to download a .css file.
External Style Sheets 2-2 Snippet <?xml-stylesheet href="headers.css" type="text/css"?> The following XML code demonstrates an example of an external style sheet. Here the style rules are defined in a file named headers.css.
Selectors in CSS • In this second lesson, Selectors in CSS, you will learn to: • Identify simple selectors in CSS. • State the use of universal selector in CSS. • Describe ID selectors.
Simple Selectors Snippet /* Simple selector */ CD { color: black } /* Single element, multiple property declarations */ CD { color: white; background-color: blue } /* Multiple elements, multiple property declarations */ CD, Name, Title { color: white; background-color: blue } Simple selector comprises an element name followed by one or more property declarations. Same property declarations can be assigned to multiple elements by separating element names with a comma. Simple selectors match every occurrence of the element in a document. The following code demonstrates an example of simple selector.
Universal Selector Snippet * { color : blue } A universal selector comprises an asterisk followed by property declarations. It is used when you want to assign the same style rules to all the elements in a document. A universal selector matches all the elements in a document. The following code displays the content of all elements in a document in blue.
ID Selector 1-3 An ID selector comprises a hash (#) symbol, immediately followed by an attribute's value followed by property declarations. It is used to define styles for unique elements in a document. For example, if you want the data of a unique element to be in a different style, you would define an ID selector for it. Unique element is one which has one of its attributes named as id as shown in figure.
ID Selector 2-3 Syntax #attribute_value { property_declarations } Snippet #1001 { color : blue }
ID Selector 3-3 ID selectors are used to emphasize the data contained in unique elements in an XML document. However, not all browsers support ID selectors. A browser has to read the Document Type Definition (DTD) to identify which attributes have an ID type. Browsers such as Safari, Mozilla, and Netscape do not read external DTD subsets. Opera lacks the ability to read internal DTDs as well. Hence, these browsers may not apply the style rules involving ID selectors. Internet Explorer does support ID selectors as it reads external DTDs.
Properties and Values • In this third lesson, Properties and Values, you will learn to: • State and describe how to use color properties. • Describe the font property. • Describe the other properties such as margins, borders, and padding. • Explain briefly about positioning and alignment.
Color Properties 1-2 CSS provides properties to set the foreground and background color of text. CSS uses color name, red-green-blue (RGB) values, RGB percentages, and hexadecimal values to specify color values. The various ways in which color values are specified is shown:
Setting Color Properties 1-2 • The CSS specification provides the properties color and background-colorto set the foreground and background color of text enclosed in elements. • Figure depicts the syntax for setting properties. • where, • color: Property to set the foreground color of text in an element. • colorValue: colorValue can take up any value from the CSS color table. • background-color: Property to set the background color of text in an element.
Setting Color Properties 2-2 • Figure shows the XML code for style rules defined in Colors.css file. • Figure depicts the style sheet for Colors.css file. • where, • Cars { background-color: rgb(0%,32%,100%); color: #ffffff }: Causes the text enclosed in Cars element to be displayed in white color with a background color of blue. • Price { color: yellow; }:Causes the text enclosed in Price element to be displayed in yellow color. • The output is shown in figure.
Font Properties Arial Times New Roman Calibri Sans Serif The CSS specification defines several font properties to set the font family, font size, font style such as bold, italics, and so forth. Some of these properties are listed in the table.
font-family Property 1-2 • The font-family property is used to specify the name of the font family to be applied to an element. • Figure shows the syntax for font-family property. • where, • font-family: Property to specify the font-family to be used. • font-family name(s): Comma separated list of font-family names such as serif, san-serif, monospace, cursive, and fantasy. The list should start with the most specific font in which you want to display the data and end with the most generic font.
font-family Property 2-2 Figure shows the code for style rules stored in FontFamily.css file. Figure depicts the style sheet for FontFamily.css file. The output is shown in figure.
font-size Property 1-3 • The font-size property is used to specify the size of font used to display element data. • Figure shows the syntax for font-size property. • where, • font-size: Property to specify the size of font. • xx-small | x-small | small | medium | large | x-large | xx-large: One of various values that can be assigned to the property font-size.
font-size Property 2-3 Figure shows the code for style rules defined in FontSize.css file.
font-size Property 3-3 • Figure depicts the style sheet for FontSize.css file. • where, • Cars { font-size: medium }: All the text enclosed in Cars element and its child elements will be displayed with medium font size. • The text enclosed in the element Cars will be displayed in either Arial, Times, or Serif font. • The rule becomes applicable to all the elements enclosed in Cars element. • If the system does not support Arial font, then Times will be selected; if Times is not supported then, Serif will be selected. • The output is shown in figure.
Font Style and Weight Properties 1-3 • CSS provides two properties namely, font-style and font-weight to add emphasis or meaning to parts of data. • Figure shows the syntax for font style and weight properties. • where, • font-style: Property to specify the style of text in an element. • normal|oblique | italic: One of the values that can be assigned to font-style property. • font-weight: Property to specify the weight style of the text in an element. • light|normal|bold: One of the values that can be assigned to font-weight property.
Font Style and Weight Properties 2-3 Figure shows the code for style rules defined in FontStyle.css file.
Font Style and Weight Properties 3-3 • Figure depicts part of the style sheet for fontstyle.css file. • where, • Manufacturer { font-weight: bold }: The text enclosed in Manufacturer element will be displayed in bold. • Location { font-style: italic }: The text enclosed in Location element will be displayed in italics. • The output is shown in figure. • where, • BMW: Text is displayed in bold • Liverpool: Text is displayed in italics
Margins in CSS 1-3 • Every element in an XML document is displayed in its own box. • CSS provides four properties namely, margin-left, margin-right, margin-top, and margin-bottom to insert space around the element's box. • Figure shows the syntax for margins in CSS. • where, • margin-left | margin-right | margin-top | margin-bottom: The various margin properties to set left, right, top and bottom margins. • marginValue: The value to be assigned to one of the margin properties. This value can be a fixed value or a percentage.
Margins in CSS 2-3 Figure shows the code for style rules defined in Margin.css file.
Margins in CSS 3-3 • Figure depicts the style sheet for Margin.css file. • where, • Manufacturer{margin-left:20; margin-right: 50; }: Inserts a space of 20 pixels to the left and a space of 50 pixels to the right of text enclosed in element Manufacturer. • Manufacturer{ background-color:aqua}: Sets the background of text enclosed in element Manufacturer to aqua. • Vehicle{ background-color:orange}: Sets the background of text enclosed in element Vehicle to orange.
Border Properties in CSS 1-4 • Borders are rectangular outlines surrounding an element's box. • CSS provides properties to create dotted, solid, and groove borders to name a few. • Figure shows the syntax for border properties. • where, • border: Property to set the border of the box surrounding an element's data. • border_width: Specifies the thickness of the border. Possible values are thin, medium, and thick. • border_style: Specifies the style of the border. Possible values are solid, dashed, dotted, groove, ridge, double, inset, and outset. • border_color: Specifies the color of the border. All values that are applicable to CSS color property are allowed.
Border Properties in CSS 2-4 Figure shows the code for style rules defined in Border.css file.
Border Properties in CSS 3-4 • Figure depicts the style sheet for Border.css file. • where, • Manufacturer {border: thick dashed magenta }: Displays a thick and dashed magenta border around the content of Manufacturer element. • Model { border: thick solid olive }:Displays a thick and solid olive border around the content of Model element. • Color { border: thick groove aqua }:Displays a thick and groove aqua border around the content of Color element. • Price { border: thick inset gray }: Displays a thick and inset gray border around the content of Price element.
Border Properties in CSS 4-4 • The output is shown in figure. • where, • BMW has thick dashed magenta border • M3 has thick solid olive border • Metallic Silver has thick groove aqua border • 40,000 has thick inset gray border
Padding Properties in CSS 1-4 • The border property surrounds the text in an element with an outline. • To insert space between the border and the text of an element, CSS provides the padding property. • Figure shows the syntax for padding property. • where, • padding: Property specifying padding between the text and border of an element. • padding_width: Composite value that can have maximum four values in the following order: top, right, bottom, and left. These values are followed by length unit designators. However, default is pixel unit.
Padding Properties in CSS 2-4 Figure shows the XML code for style rules defined in Padding.css file.
Padding Properties in CSS 3-4 • Figure depicts the style sheet for Padding.css file. • where, • Manufacturer { padding: 2 }: Inserts padding of 2 pixels between the four borders and text of Manufacturer element. The four borders applicable are top, right, bottom, and left. • Model { padding: 2 5 }: Inserts padding between the borders and text of Model element. The value 2 is applied to top and bottom borders and 5 is applied to left and right borders. • Color { padding: 2 5 8 }: Inserts padding between the borders and text of Color element. The value 2 is applied to top border, 5 to left and right borders, and value 8 to bottom border. • Price { padding: 2 5 8 10 }: Inserts padding between the borders and text of Price element. The value 2 is applied to top border, 5 to right border, 8 to bottom border, and 10 to left border.
Padding Properties in CSS 4-4 The output is shown in figure.
CSS Units The values assigned to CSS properties are expressed in length units. The table describes these units.
Position Properties Every element's text is placed in a box of its own. The table lists the CSS positioning properties to position the text inside the box. Note that the properties top, left, bottom, and right are used only if value of position property is not static.
Position Properties Example 1-2 Consider an example based on positioning properties of CSS. Figure shows the code for style rules defined in Position.css file.
Position Properties Example 2-2 • Figure depicts the style sheet for Position.css file. • where, • Location { position: relative; top:20; left :20 }:Positions the text of Location element relative to the previous element. However, inside the box, the content is placed at 20 pixels from top and 20 pixels from left. • Price { position: absolute; top:40; left :20 }:Positions the text of Price element at an absolute location of 40 pixels from the top and 20 pixels from the left. • The output is shown in figure. • where, • 40,000: Text displayed using absolute positioning • Liverpool: Text displayed using relative positioning
Display Property 1-3 • In HTML, if you wanted the text to appear as new paragraph, you would use the <P> tag. • The same can be achieved in XML by using CSS display property. • Figure shows the syntax for displayproperty. • where, • display: Property to specify how the element is to be rendered. • none: No rendering is applied to the element. • inline : Displays the element text as inline. This is the default value if no value is specified. • block: Displays the element text on a new line in a block of its own.