Outlook 2003
Outlook 2003. Important Note!!!. Please note that these screen shots were taken by a computer that had Microsoft Windows XP installed on it. The colors used in your version of Outlook 2003 may appear muted (with more grays and blues) if you are using a different operating system. Topics.


Outlook 2003
E N D
Presentation Transcript
Important Note!!! • Please note that these screen shots were taken by a computer that had Microsoft Windows XP installed on it. The colors used in your version of Outlook 2003 may appear muted (with more grays and blues) if you are using a different operating system.
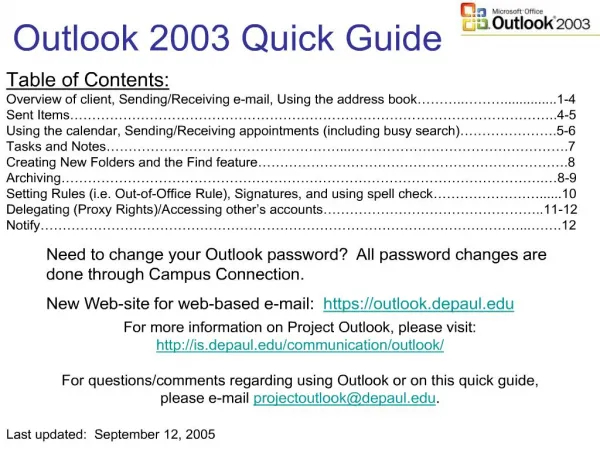
Topics • Overview • Default View • Changing View Options • Using the Personal and Global Address Books • Composing and Sending E-Mail • Using the Calendar View • Scheduling an Appointment • Scheduling a Meeting • Scheduling an Event • Adding Contacts • Using the Contact List
Default View Navigation Pane Navigation Buttons
Changing View Options • Click the Navigation Options Button • Select Navigation Pane Options
Changing View Options • The Navigation Pane Options dialog box will open
Folders in Navigation Pane Inbox and Sent Items are both displayed in Favorites folder
New Features on Menubar & Toolbar * New Button Create Rule Button • Click on Inbox Folder in the Navigation Pane to see this toolbar
The New Button Click black arrow on New Button to see list of options
Creating E-Mail Rules Click Create Rule button
Creating E-Mail Rules • Create Rule dialogue box Opens
Outlook Today Click Customize Outlook Today
Outlook Today, Continued • Select Your Desired Options • Click Save Changes
Various Methods for Opening Address Book Click Tools menu, then select Address Book option Click Address Book button on toolbar Hold down the Control, Shift, and B key at the same time
Using the Personal Address Book Menubar Toolbar Click on drop-down list to select an Address Book
Using the Personal Address Book • Click the Properties Button • Select Personal Address Book from drop-down list
Using the Personal Address Book • The Personal Address Book Properties Dialogue box will open: • Select desired display option • Click OK
Copying People to Contact List You can easily add people from any address book to your Contact List • Click Add to Contacts button • Select appropriate Address List from drop-down menu • Type contact’s name in textbox • Select contact’s name from list
Copying People to Contact List • The Contact Information dialogue box will open: • Click Save and Close button • Make desired changes to the contact information
Adding New Contacts to Address Book Click New Entry button
Adding New Contacts to Address Book • The New Entry dialogue box will open: • Click OK • Select appropriate entry type • Select appropriate address book from drop-down list
Composing E-Mail Click New Mail Message Button
Composing E-Mail An untitled message will be created: Enter recipient’s e-mail address in To: textbox Or, click To: button
Composing E-Mail If you click the To: button, then the address book dialogue box will bedisplayed: • Select appropriate address list • Type receiver's name in textbox, or select from list • Click To button • Click OK
E-Mail Message Options Click Options button
E-Mail Message Options • The Message Options dialogue box will open: • Select desired Options • Click Close
Composing and Sending E-Mail • Click Send button • Type message in body
Arranging E-Mail Messages • Click the View Menu • Select the Arrange By: menu option • Select / deselect arrangement options
Search Folders • Filter messages Large Mail search folder Search Folders • Displays largest messages in mailbox
Creating Custom Search Folders • Right-Click on Search Folders icon • Select New Search Folder option
Creating Custom Search Folders • The New Search Folder dialogue box will open: • Select Create a custom Search Folder option • Click Choose button
Creating Custom Search Folders • The Custom Search Folder dialogue box will open: • Type name ofnew folder • Click Criteria button to specify desired filtering options • Click OK
Calendar View Click Calendar button
Calendar View The Calendar will open to today’s date If not, click the Go To Today button
Methods for Scheduling an Appointment Click New Appointment button Or, simply double-click on a row in the calendar
Scheduling an Appointment • The Appointment dialogue box will open: • Click Save and Close button • Input relevant information
Sharing Your Calendar Click Share My Calendar
Sharing Your Calendar • The Calendar Properties dialogue box will open:
Changing the Calendar View Click View, Arrange By, Current View, Customize Current View
Changing the Calendar View The Customize View dialogue box will open: Click Other Settings button
Changing the Calendar View • The Format Day/Week/Month dialogue box will open:
Changing the Calendar’s Default Times Select Tools, Options
Changing the Calendar’s Default Times • The Options dialogue box will open: • Click Calendar Options button • Click Preferences tab
Changing the Calendar’s Default Times • The Calendar Options dialogue box will open:
Scheduling a Meeting • Click Actions, New Meeting Request
Scheduling a Meeting • The Untitled Meeting Request dialogue box will open: Click the To: button
Scheduling a Meeting • The Select Attendee and Resources dialogue box will open: • Type Attendee name in textbox • Select name • Click Required button • Click OK
Scheduling a Meeting • Click Scheduling Tab • Enter Meeting Information
Scheduling a Meeting Displays each attendee’s availability Click Send button
Scheduling Events Click Actions, New All Day Event