Download

1 / 22
220 likes | 409 Vues
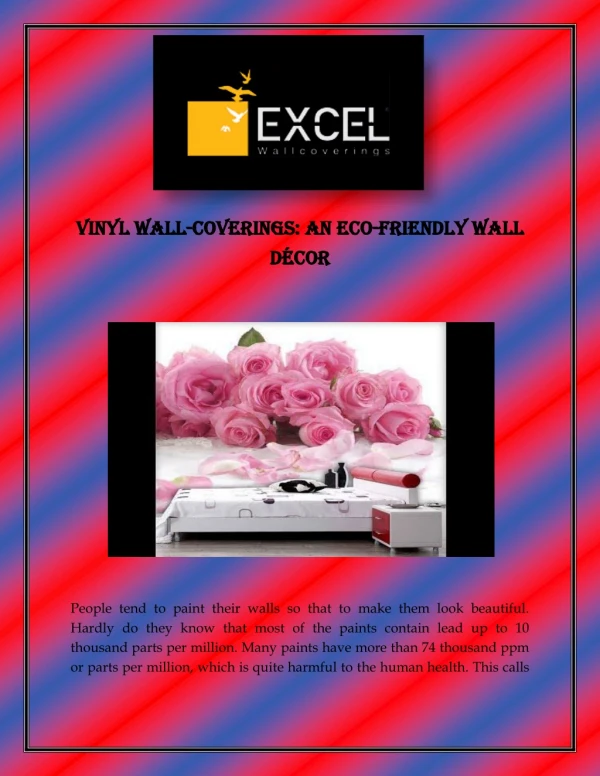
This technical manual covers the QT®EcoSeries Wall Panel, a masonry veneer wall cladding system<br>with a cavity. The QT®EcoSeries Wall Panel is a masonry panel that offers a solid substrate, can provide<br>a wide range of finishes, has high thermal insulation and sound abatement, fire resistance and ease of<br>construction. QT®EcoSeries Wall Panels are manufactured from a material called ‘Conpolcrete®<br>’<br>which consists of a blend of cement and recycled polystyrene. Patent Pending

E N D
C QT EcoSeries Exterior Wall Panel Contents 5 Coating System....................................................15 • 1 Coating / Rendering • 2 Pre - Coating System Inspection • 3 Application of a Polymer Modified Plaster Base Coat 6 Fire Rated Construction Details............................16 • 1 FRL - 90 Minutes & External Fire Source • 2 FRL - 90 Minutes • 3 Extended Wall Areas 7 Finishing..............................................................18 • 1 Services • 2 Penetrations • 3 Sealants • 4 Heavy & Frequently Adjusted Fixtures 8 Product Information.............................................19 • 1 Storage and Handling • 2 Quality Policy • 3 Maintenance • 4 Limitations of the QT®EcoSeries Wall Panel System • 5 Product Support • 6 Health and Safety • 7 Components & Accessories • 8 General Warranty • 9 Disclaimer Introduction.............................................................2 1 Design Considerations..............................................2 • 1 Material Properties • 2 Thermal Properties • 3 Impact Resistance • 4 Acoustic Performance • 5 Fire Performance • 6 Durability • 7 Cavity • 8 Vapour Permeable Sarking • 9 Weepholes 2 Installation & Fixing...............................................4 • 1 Panel Fixing • 2 Framing 3 Corners, Joints, Junctions.......................................6 • 1 Internal & External Corners • 2 Relief Joints • 3 Control Joints • 4 Junctions 4 Construction Detail................................................9 • 1 Slab & Floor • 2 Termites • 3 Windows • 4 Decorative Mouldings • 5 Doors • 6 Parapets • 7 Wall to Roof • 8 Soffit & Eaves 8.6 Health and Safety As with all cement based composite products, they contain crystalline silica. Breathing in fine silica dust is hazardous and may result in bronchitis, silicosis (lung fibrosis) and lung cancer. Do not breathe dust, always contain dust during clean up and disposal i.e. place dust in a sealed bag. Safe working practice is to avoid contact with skin, eyes and lungs, e.g. full-length clothing including boots, P1 or P2 dust mask, and safety goggles to AS 1337. (Wash worn clothing regularly, each day). We recommend that you always seek advice for recommended handling, health and safety requirements for products or components by other suppliers and manufacturers. Consult your local Work Place Health and Safety Officer for specific advice. Also see Material Safety Data Sheets for specific products. P1 or P2 Dust Mask Safety Goggles AS 1337 Gloves 8.7 Components & Accessories QT®EcoSeries Panel – 50mm 900m(w) x 50mm(d) x 2250mm(L) 45˚ Mesh - 140-160gr/m2 alkali resistant woven fibreglass 150mm x 50 metres Polyurethane – Trigger Foam Can and Gun sold Separately Panel Fixing Nails - 75mm x 3.15 or 3.75mm ring shank nails, (Galvanised) Reveal Bead – uPVC edge moulds available 75mm, 60mm & 40mm Panel Fixing Screw - 10g x 75mm Class 3 Screws (AS3566) FullMesh - 140-160gr/m2 alkali resistant woven fibreglass 1000mm x 50 metres or 1200mm x 50m Clip Fixing Screw - 12g x 25mm Class 3 Screws (AS3566) Panel Boot – Consist of 2 parts Reveal Bead and a J-Bead QT®Buttons Ridged plastic circular washer Corner Mesh - heavy duty alkali resistant woven fibreglass 75mm x 75mm x 2.5metres (Pre-Folded) Clip and Channel Rondo Beta-Fix Clip and Rondo 16mm or 28mm Furring channel Weepholes – Ridged Plastic rectangular Notes to Users and Installers • 40mm EcoSeries sheet is no longer available. • Heavy items or items with mechanical movement such as external taps, gates and clothes lines should have fixing provision made behind the sheet or seek the advice from QT® Systems. • Do not use any steel (including Stainless) corner or expansion beads. Only alkali resistant fibreglass mesh or perforated PVC and aluminium profiles are acceptable. • After delivery to site, the shrink wrapped packs of QT® EcoSeries Wall Panels should have their wrapping sliced down each of the four corners, three sheets from the top. This will allow the panel to acclimatize prior to installation. Panels that get wet must be placed in a sunny well ventilated location and allowed to dry out prior to installation, (this will take several days of good sun and ventilation). Sheets that are wetted after installation should be allowed to dry prior to rendering. (This may take a week of fine weather). After drying make good all fixings and joints that may have been compromised. • QT® EcoSeries Wall Panel is a cement based material and therefore any water run-off from the panel or cement render may be alkaline and will damage anodising. The builder must cover all anodised products (including windows) prior to panel installation and this covering should remain intact until render and coating system is completed. • The specified curing time must be allowed between render coats, usually 2-3 days but preferably 7 days, especially on pumped render as it is wetter during application. - If in doubt, always ask your local representative for advice. 8.8 8.9 General Warranty New Product 15 year Warranty. Disclaimer QT Systems provides the information in this manual in good faith and to the best of its knowledge the information is correct and covers most situations where its products may be used. However, it is acknowledged that not every possible application of QT® products could be covered within this manual therefore specific design and detailing, must be undertaken by the designer. The Specifier, Architect, Designer and Engineer for the project are responsible to ensure that the information and details in this manual are suitable for any intended application or specific design. • Uneven sheet faces must be rasped or ground to feather edges regardless of the cause of the unevenness. Alternatively a patch render can be used to fill the low points, ensuring the edges are feathered and the curing times are observed. - Screws used in the CCA battens must be a minimum class 4 galvanised or stainless steel. - The installer must have a copy of the QT® EcoSeries Wall Panel technical manual on site at all times during installation. This warranty cover limits any cost or liability arising from the supply of defective Conpolcrete® products, excluding third party manufactured accessories and components. Liability is limited to replacement and or repair of any defect solely attributable to defective Conpolcrete® manufactured products that do not meet the manufacturers standards. No liability is assumed or implied for project supervision or defects caused by improper installation of the system. • During installation, the QT® EcoSeries Wall Panels must be hard butted for the glue to function effectively. Bond all horizontal and vertical joints with polyurethane foam adhesive, moments prior to hard butting the panels. • The fixing of down pipe’s brackets and other lightweight fittings such as house numbers, can be done with metal Ram set Wallm ates™, other lightweight objects such as light fittings and security cameras use Ram set Hollow Wall Anchors™ or Ram set Toggles™. Document Number: QTCI-ESAS-001 Version: 7 Date: 01/06/10 20 QTSystems 1
8 Storage and Handling Care should be exercised in handling the QT®EcoSeries Wall Panels to avoid any damage to edges, ends and faces. Panels must be stacked flat, off the ground and supported on a level platform. Plastic Shrink- wrap applied to pallets of panels for transportation from the factory, must be removed at the destination (i.e. distributors warehouse or direct to site) to allow panel to continue drying and equalise with local humidity. The panels must be kept dry at all times by storing under cover, or providing weatherproof covers to the stack. Panels must be dry prior to fixing. Intermittent weather exposure is not detrimental to the panel. However if QT®EcoSeries Wall Panels become wet, allow thorough drying before fixing. Drying shrinkage may occur if the QT®EcoSeries Wall Panels are not allowed to dry sufficiently. The proprietary Coating System must be applied and completed within 1 month from the date of installation of the QT®EcoSeries Wall Panels. QT EcoSeries Exterior Wall Panel Product Information Introduction 8.1 8.3 Maintenance Annual inspection of the exterior walls must be made to ensure they remain in a weatherproof condition. Checks must be made of the exterior coating system, sealants, flashings, control joints and any water-proofing systems. Should any repairs be required, seek remedial advice from the manufacturer. If the project is still under the statutory warranty period contact the appropriate body, or check with your insurer. This technical manual covers the QT®EcoSeries Wall Panel, a masonry veneer wall cladding system with a cavity. The QT®EcoSeries Wall Panel is a masonry panel that offers a solid substrate, can provide a wide range of finishes, has high thermal insulation and sound abatement, fire resistance and ease of construction. QT®EcoSeries Wall Panels are manufactured from a material called ‘Conpolcrete®’ which consists of a blend of cement and recycled polystyrene. Patent Pending. 8.4 Limitations of the QT®EcoSeries Wall Panel System QT®EcoSeries Wall Panels are not designed to provide bracing for the building. The internal linings or other specifically designed systems must provide external wall bracing. QT®EcoSeriesWall Panels are not suitable to be used for chimneys and flues. QT®EcoSeries Wall Panels and cement based renders, will release their salts and/or fines if saturated; this condition is know as efflorescence. In order to prevent efflorescence the cement products must be sealed to prevent the ingress of moisture and/or installed with careful attention to the weather-tightness details to prevent the ingress of wind driven rain, gutter overflow or moisture tracking along a surface with capillary action. The water that has permeated through the panel and render will collect and dissolve any salts and/or fines that are then released through hairline cracking in the render which are caused by hydrostatic pressure build up. The dissolved salts and/or fines will crystallise on the external surface. Should efflorescence occur, it is essential that the moisture source be eliminated and any hairline cracking repaired to maintain weather- tightness. Refer to coating manufacturer for suitable surface repair techniques. QT® EcoSeries Wall Panel QT®EcoSeries Wall Panels must not come in contact with the ground for extended periods of time. The panel must not be used for retaining. Conpolcrete® Galv Ring Shank Nail or Screw This Technical Manual is limited to residential construction, for other applications contact your QT Distributor. Designers must check that the details in this Technical Manual meet their own specific design requirements. For use outside the scope of this Technical Manual, specific design may be necessary. The Architect, Designer, Engineer, Specifier and Builder, are responsible for specific design and should ensure compliance with the BCA. QT® Button Proprietary Coating System 8.5 Product Support Installers are registered trades people, equipped to install the panel and its complementary accessories. These installers, acting as independent contractors, should be industry licensed trades people such as carpenters or dry wall installers who are familiar with the QT®EcoSeries Wall Panel system and components. The authorized agent or appointed licensee shall supply all QT®EcoSeries Wall Panel system components directly to the contracting or sub-contracting party. We recommend you seek advice from all manufacturers or suppliers, regarding correct installation and maintenance requirements associated with their products. Failure to comply with specification requirements, which may compromise the exterior coating, sealants, flashing, weatherproofing and waterproofing, will render any manufacturers warranty void. Panels must always be carried on edge. Any minor damage should be repaired with joint compounds or polyurethane foam. Fixings and other accessories must be stored so that they are kept clean, dry and undamaged. All components must be used within the designated shelf life. Any damage to Clips and Channel may affect the integrity or performance of the wall system. Panel may be cut with an electric circular saw 60 pt tungsten tip blade, diamond blade or handsaw. Panels are best shaped with the use of an electric plane or a hand- rasping tool. Holes or services may be formed with the use of an electric fretsaw or drill. When power tools are used for cutting, grinding or forming holes in the panels, appropriate safety measures as set out under the heading of Health and Safety must be observed. All materials that are susceptible to deterioration due to plastics migration or alkalinity of cement base products must be protected (check with product manufacturer). Design 1 Galv Steel or H3 Timber Batten Steel or Timber Stud Framing 1.1 Material Properties QT Systems regularly updates its literature to keep up with system and product developments, changing trends in design, and therefore reserves the right, to revise and change its technical information without notice. Weepholes Width 900mm Length 2250mm Thickness 50mm (nom) Weight 40kg (nom) 8.2 Quality Policy QT Systems is dedicated to delivering quality building systems for internal and external use on residential and commercial projects. QT Systems is committed to ensuring that its Conpolcrete® building products provide the highest standards and consistency by meeting the requirements of customers and regulatory authorities. This objective is met through the implementation of a Quality System, based upon the requirements of an internationally recognised quality standard: AS/NZS ISO 9001:2000. Continued testing and independent scrutiny will ensure QT Systems continues to offer an eco-friendly alternative construction material that consistently provides outstanding performance. Damp Proof Membrane x x To ensure the latest information, contact your local distributors of QT Products or QT Systems direct on 1800 233 001 or Email: mail@qt-sys.com.au; or refer to www.qt-sys.com.au • • Total Square Metres per Panel = 2.0 m2. Number of 50mm Panels per Pallet = 23 panels Pallet Weight:- 940kg (approx) (± 20 kg safety factor). Pallet Size - 900m m Width x 2250m m Length x Max. 1350mm Height (nom). Damp Proof Course • Slab on Ground 2 QTSystems 19
QT EcoSeries Exterior Wall Panel 1.2 1.4 Thermal Performance The Thermal performance of the QT® EcoSeries Wall System is calculated in accordance with AS 2627.1 Thermal Insulation of Dwellings. QT® EcoSeries Wall Panel has a k-value of 0.07 w/mk. Acoustic Performance The QT® EcoSeries Wall System was tested in accordance with AS/NZS 1276.1 for Airborne Sound Transmission and achieved STC41 and Rw41(-3;-8)(Wall Composition: 50mm QT® EcoSeries Wall Panel with 30mm (nom) cavity on a 70mm x 35mm stud frame and 10mm plasterboard) CSIRO TL399. Acoustic performance can be significantly increased with the addition of bulk or acoustic insulation batts. 7Finishing Services Ensure service pipes and wires are fixed or checked into the frame and not laid loose in the extended wall cavity. All materials that are susceptible to deterioration due to plasticiser migration must be protected (check with product manufacturer). Some PVC products or electrical cabling that penetrate the coating system and QT®EcoSeries Wall Panel, require a conduit to ensure it is protected. Copper pipes require a sleeve, conduit or tape to prevent contact with the wall panel. Meter Box Wall System Composition 7.3 Sealants Use an exterior grade weatherproof sealant for exterior wall construction and as a general-purpose gap filling. Apply sealant in accordance to manufacturers recommendations. For a sealant to work effectively, the sealant must be applied as shown in the sketch below, Opening Width (D) x Depth (D/2) half the width. Use backing rod as required. Ensure surfaces are in good condition clean and free from oil, dust, loose materials including old sealant and release agents. Apply masking tape to surfaces where contact with sealant is not required. Tape should be removed before sealant cures. Smooth the surface of the sealant and ensure excess sealant is removed. Refer manufacturers curing or drying times before painting. Plasterboard • • • • • • • • • • • • • • • • • • • • • • • 70 or 90mm Stud Framing R1.5 Bulk Insulation Vapour Permeable Sarking 20-50mm Cavity 1.5 Fire Performance QT® EcoSeries Wall Panels when tested to AS/NZS 3837 and in accordance with BCA Specification C1.10a Section is classed as a GROUP 1 material. 7.1 • • • • • • • • • • 50mm panel R-Value m2 k/w • 2.5 2.0 1.5 1.5 1.5 1.5 3.0 3.0 * Note: R-Values in table have been rounded up or down to the nearest R0.5 as permitted under AS 2627.1 Early Fire Hazard Indices (Test to AS/NZS 1530 Part 3) Ignitability Index Spread of Flame Index Heat Evolved Index Smoke Developed Index 0 0 0 0-1 Sealant Application 1.3 Impact Resistance QT®EcoSeries Wall Panel when coated with a cement base render, can provide resistance for hard body impacts typically found under normal situations. (Refer coating manufacturers for details). 30 Wall Panel Nom. Vapour Permeable Sarking 1.6 Durability In normal conditions and when maintained properly in a weatherproof condition, the cladding systems should exceed 30 years of trouble free serviceable life. When the system is installed in high corrosion zones, such as coastal locations within distances of up to 500m from the sea, particular care must be taken to ensure that openings through the cladding panels are kept to a minimum to prevent corrosive salt aerosols from entering the wall cavity and affecting metal components. (Permitted openings are base weepholes, soffit vents and openings beneath window joinery at sills). Render Panel Fixing Sealant (Continuous) Internal Wall Lining Wildlife Attack The panels will not support growth of micro-organisms such as fungi or bacteria and do not hold any nutritional value for ants or rodents. Meter Box Vapour Permeable Sarking Sealant (Continuous) Panel Steel or Timber Batten Steel or Timber Stud 1.7 Cavity Cavities form an important role in the weathertightness and life cycle of any wall system QT® EcoSeries Wall Panels constructed without a cavity will void any warranty. The cavity acts as a secondary barrier against wind driven rain penetration entering the wall framing. The cavity also allows the wall to ventilate and drain which is essential for a healthy wall. 7.2 Penetrations Voids or gaps created by service penetrations through the exterior wall require weatherproofing and or waterproofing. A common method is to inject with expandable polyurethane foam and seal with a long lasting exterior gap sealant to make a weather tight seal. Where practical add a flange or decorative feature over the hole or penetration. Skirting Board Flooring 1.8 Vapour Permeable Sarking Vapour permeable sarking must be installed to the face of the building framing prior to installation of the battens and panels. The vapour permeable sarking has two main functions, weathertightness and thermal resistance. In its weathertightness role it protects the building framing from direct contact with moisture generated by wind driven rain penetration, while allowing the condensation of moisture from interior artificial heating and cooling to escape. Thermally the vapour permeable sarking divides the wall into two separate air spaces, which significantly increases the thermal performance of the wall. Penetrations Render 7.4 Heavy & Frequently Adjusted Fixtures: Heavy items are not to be fitted directly to the QT®EcoSeries Wall Panel. They should have their own stand-alone supports or be tied to the supporting wall frame (eg. Clothes lines). Items subject to frequent handling (e.g. Flood-Lights and sensors) require a mounting plate, to be fixed across at least two or more frame studs to give long- term fixing support. The backing plate must be of a material that will offer, long-term weatherproof durability. If the internal lining is already installed, the mounting plate can be installed externally prior to the installation of the QT®EcoSeries Wall Panel. Panel 10 Max. Remove Cut Plastic Weephole 1.9 Weepholes On the first horizontal course (ground level) weep holes are to be installed at centres not exceeding 1200mm immediately above any damp proof membrane or flashing. Weepholes are also required in areas where there is a possibility of moisture build up. Weepholes must be limited to 8mm in width to reduce the potential for vermin access. 10 Max. Sealant (Continuous) Backing Rod Render Width Panel Width 18 QT Systems3
QT EcoSeries Exterior Wall Panel 2 The Fire Rating information for sections 6.2, 6.3 and 6.4 are based on CSIRO Opinion FCO-2310 Dated 17th February 2004 and the Fire Resistance Test performed by Warrington Fire Research Consultancy Testing. WFRA Report No.2172500 of a 50mm thick QT ECOSERIES Exterior Wall Panel, system tested in accordance with AS 1530.4-2005 dated 01st May 2007. 90 Minute Fire Rated Wall Installation and Fixing 50mm Wall Panel FRL -/90/90 Non load Bearing Or FRL 90/90/90 AS 1684 AS 1530.4 -1997 FRL -/90/90 Non load Bearing Or 6.2 FRL - 90 Minutes To achieve a 90 minute Fire Rating the wall must be constructed so as the wall consists of two layers of 13mm thick fire resistance plasterboard affixed to the timber frame internally and one layer of fire resistant building foil, one layer of 50mm QT®EcoSeries Wall Panel with a 5-8mm render applied with finish, affixed directly to a 20-50mm battened out cavity. This system would be capable of achieving Fire Resistance Levels of -/90/90 for Non Load Bearing walls and 90/90/90 for Load Bearing Walls designed in accordance with AS1684 for fire exposure from either direction if tested in accordance with AS1530.4 Cavity FRL 90/90/90 AS 1684 AS 1530.4 -1997 Max. 112 2.1 Panel fixings Fix the QT EcoSeries Wall Panel onto timber battens with galvanised 100 mm x 3.75mm ring shank nails or 10g x 100mm Class 3 (AS3566) screws onto timber or steel battens with the addition of QT Buttons in all cases. Panel fixings must be no closer than 50mm but no further than 112mm to the horizontal panel edge and no closer than 50mm to the vertical edge, while normal fixing centres are at 225mm maximum centres. It is essential that the vertical and horizontal butt joints be bonded with polyurethane foam adhesive. Also ensure polyurethane foam adhesive is applied to all batten faces prior to the panel being pushed against them for maximum bonding to the support frame. Panels can be joined off stud, if glued to the abutting panel with polyurethane foam adhesive. QT® EcoSeries Wall Panels can span 225mm as an unsupported cantilever. Panels must span across a minimum of two channels or battens and must be installed in a horizontal stretcher bond pattern. To prevent corrosion from salt aerosols in high corrosion zones, (such as geothermal activity or within a 500m distance from the sea) upgrade fixing screws to class 4 or stainless steel (AS3566). Horizontal Wall Panel Butt Jointed Max. 112 6.3 Extended Wall Areas The Fire Resistance Levels of 60 & 90 minutes would still apply to the same system extended in height in modular form provided that the structural members are designed in accordance with the relevant structural design code for the height and load of actual installation and an approved joint system appropriate to the FRL and the width of the gap is used for the horizontal and vertical joints in a manner as detailed in the attached drawings. Maximum Centres 5-8mm modified Cement Render 225 Panel Fixings Steel or Timber Stud Framing Steel or Timber Battens 2 Layer Fire Resistant plasterboards Refer Manufacturer for Details 50mm Panel Fixing 50mm Panel Edge Detail Non Combustible Breathable Sarking Fire Cavity Wall Panel Resistant Bond horizontal and vertical joints with polyurethane foam adhesive. Polyurethane foam adhesive between batten face and back of panel 50mm minimum end fixing distance 112 225 225 225 112 50 200 200 200 200 50 Maximum Fixing Centres Choose QT®EcoSeries Wall Panel Choose an external cladding that helps protect your home from the spread of fire. 112 Polyurethane foam adhesive between batten face and back of panel 900 225mm maximum edge fixing distance for unsupported wall cantilevers 600 225 Alternative Fixing Centres QT®EcoSeries Exterior Wall System Maximum Stud Centres 4 QT Systems17
QT EcoSeries Exterior Wall Panel 2.2 Framing Timber framing must comply with AS 1684 and steel framing must be designed and constructed in accordance with AS 3623. Minimum distances from end and edge of timber framing members must be observed to avoid splitting. Stud spacing must not exceed 600mm centres. Noggings must be fitted between studs at 1350mm maximum centres. 6Fire Rated Construction Details Specimen - Typical Cross Section Timber Batten System Mechanically fix H3 treated timber battens to stud with 100mm gun framing nails or 100 x 3.15 or 3.75 ring shanked nails. Galvanised nails are required in H3-CCA treated battens. H3-LOSP treated battens are considered non corrosive. With a 1.8 m spirit level, check for variations in the frame that are over 6 mm. Large variations negatively affect weather protection or can appear as visual defects under critical light conditions. If the frame is out of plumb, but not structurally defective, consult with the builder or contractor for remediation. Timber End and Edge Fixing Fire Test - FS3685-2695 edge distance 12 x dia. of Clip and Channel System fastener 50mm Wall Panel Mechanically fix clips at 600 centres in both directions with 2 - 12g x 25mm Class 3 (AS3566) screws into face of stud. Select appropriate slot and engage channel, ensuring channel is plumb. Note: Prior to any firewalls being constructed it is essential that the builder consults with the project certifier to ensure that the certifier is aware of the firewall construction procedures and the certifier deems the installer competent. Cavity 1 Layer of 10mm Standards Plasterboards Refer Manufacturer for Details 5-8mm modified Cement Render Fire Resistance Level (FRL) is assessed by three performance measures:- Structural Adequacy / Integrity /Insulation eg 90/90/90 Wind Channel w x d (mm) Framing Stud Centres Maximum Clip Fixing Centres (mm) 5 x dia. of fastener edge distance Max. Classification (AS4055) 112 Horizontal Wall Panel Butt Jointed Bonded with polyurethane Expandable Foam N1 (W28N), N2 (W33N), N3 (W41N) and C1 (W41C) 45 x 16 or 28 600mm 600mm Max. 112 Wind Timber Batten wxd (mm) Framing Stud Centres Maximum Batten Fixing Nail Centres (mm) N4 (W50N), N5 (W60N), C2 (W50C) and C3 (W60C) 45 x 16 or 28 450mm 600mm 6.1 FRL - 90 Mins. & External Fire Source CSIRO Full-Scale Fire Test FS 3685/2695 has proven that the QT®EcoSeries Wall System (shown right) is capable of achieving a fire resistance of 113 minutes Integrity and 115 minutes Insulation when tested in accordance with AS1530.4. Therefore for the purpose of Building Regulations in Australia, the QT®EcoSeries Wall System achieved a fire resistance level (FRL) of 90/90/90. The FRL is applicable for exposure to fire source from the tested side (QT®EcoSeries Wall Panel side). Classification (AS4055) Maximum Centres N1 (W28N), N2 (W33N), N3 (W41N) and C1 (W41C) 45 x 20 600mm 400mm FRL 90 /90/90 225 Internal Lining Clip N1 (W28N), N2 (W33N), N3 (W41N) and C1 (W41C) 45 x 21-50 600mm 300mm Panel Fixings Channel Steel or Timber Stud Sarking N4 (W50N), N5 (W60N), C2 (W50C) and C3 (W60C) 45 x 20 450mm 300mm Steel or Timber Battens Sarking N4 (W50N), N5 (W60N), C2 (W50C) and C3 (W60C) 45 x 21-50 450mm 200mm Stud Framing to AS 1684 Timber or AS/NZ4600 or AS3623 Steel Clip Steel or Timber Stud Non Combustible Breathable Sarking Channel Internal Lining Fixing Nail Fixing Screw Steel or Timber Stud Sarking Channel Steel Battening System - 40mm Top Hat Fire Rated Vertical Control J oint Fire Rated Horizontal Control J oint Fixing 40mm Metal Battens onto timber studs Sarking Wind Batten Spacing at 600 crs Batten Spacing at 450 crs 0.55 BMT 2/3.06x65 DSN 2/3.06x65 DSN 2/3.75x65 DSN 2x Type 17 8-15x25mm Pan 2x Type 17 8-15x25mm Pan Batten Steel or Timber Stud Classification 0.55 BMT 2/3.06x65 DSN 2/3.06x65 DSN 2/3.75x65 DSN 0.75 BMT 2/3.06x65 DSN 2/3.06x65 DSN 2/3.75x65 DSN 2x Type 17 8-15x25mm Pan 30 Wall Panel Fixing Nail N2 (W33N) N3 (W41N) N4 (W50N) N5 (W60N) N6 (W70N) Nom. 5-8mm Render 5-8mm modified Cement Render Continuous Fire Resistant Sealant 5-8mm Render Steel or Timber Battens Panel Fixings Panel Fixings Backing Rod Min. 15 DSN = DEFORMED SHANK NAILS 15mm Gap Maximum NOTE: For fixing 40mm top hat battens to steel framing 2/10-16x16 self drilling hex head screws for each connection to top plate, bottom plate and nogging is all that is required for all wind categories. Panel 112 Wall Nom. 30 Internal Lining 40mm top hat fixed at bottom plate, nogging and top plate 15mm Gap Maximum Backing Rod 112 Steel or Timber Stud Continuous Fire Resistant Sealant Steel or Timber Stud Framing Steel or Timber Battens Non Combustible Breathable Sarking Sarking Sarking Damp Proof Membrane (Optional) 5-8mm modified Cement Render 40mm Top Hat Steel or Timber Stud Steel or Timber Stud Framing 100 100 2 x fixing screws to be placed in bottom plate’ nogging and top plate (see tables for sizes) Non Combustible Breathable Sarking Maximum Maximum 16 QTSystems 5
5 QT EcoSeries Exterior Wall Panel Coating Systems 3Corners, Joints & Junctions Internal & External Corners Internal corners can be formed by continuing the FullMesh around the corner or by embedding a CornerMesh into the base coat render. External corners can be formed by embedding a CornerMesh into the base coat render or by fixing a corner bead prior to rendering. In all cases the abutting corner panels must be bonded with polyurethane foam adhesive. Steel or Timber Batten Steel or Timber Stud Vapour Permeable Sarking FullMesh 5.1 Coating /Rendering The proprietary coating systems consist of polymer-modified cement renders, which must be finished with an acrylic texture and paint. The proprietary coating manufacturer’s instructions and application requirements must be followed at all times. In most cases these coating systems must be applied by an approved applicator. High profile or heavy texture finishes can minimise surface imperfections or glancing light concerns. Light coloured coatings are recommended. Polymer-modified cement renders must not be applied over sealants or control joints. Panel 3.1 Panel Fixing External Corners Internal Corners 1st Coat Base coat (Polymer-Modified Cement Render) embedded with FullMesh 3-5mm thick Corner Bead FullMesh Steel or Timber Batten Steel or Timber Stud 30 Wall Panel 30 Wall Panel Panel Fixing Render Nom. Nom. Bond Panel Joints with Polyurethane Foam Adhesive OVERLAP Vapour Permeable Sarking 100 2nd Coat Leveling render 2-3mm thick or texture coat to achieve desired effect Steel or Timber Batten FullMesh 100mm Overlap Min. wrapped around Panel Render 300mm Min. FullMesh Steel or Timber Stud corners FullMesh 225 Max. Edge Fixing Paint Coat 100% Acrylic paint required for weathertightness Panel Fixing Panel Wall Nom. 30 Nom. Overlap External FullMesh Must Grade Corner 30 Panel Wall Bead Panel FullMesh Vapour Permeable Sarking 225 Maximum Edge Fixing 5.2 Pre - Coating System Inspection Check all internal and external corners are formed correctly and have good straight lines. Check the first horizontal course, and panels above rooflines have a good clean bottom line. Check weep holes have been installed in the first horizontal course. With a 1.8m spirit level check for variations greater than 3mm in the QT®EcoSeries Wall Panels, especially where panels butt together. If variations are found, take the appropriate remedial action eg. rasp to an acceptable level, or re-fix the offending panels. It is important to eliminate large variations, as they may appear under critical or glancing light conditions. If the internal lining has not yet been installed, advise the building supervisor that internal wall lining cannot be installed using nails as the knocking vibrations will transfer through the frame and crack the render coatings (hairline cracking). Hence internal lining must be screwed. After the inspection has been completed, application of the base coat can begin. External graded uPVC Corner Bead FullMesh Must Overlap External Grade Corner Bead 50 Min. Edge Fixing Polyurethane Foam Adhesive Reinforced Reinforced Steel or Timber Batten Steel or Timber Stud 30 Wall Panel 30 Wall Panel Nom. Nom. Vapour Permeable Sarking Panel Render Render Steel or Timber Batten Panel Fixing Steel or Timber Stud Panel CornerMesh FullMesh 225 Max. Edge Fixing FullMesh 5.3 Application of a Polymer Modified Render Base Coat Trowel an even coat of polymer-modified cement render over the entire QT®EcoSeries Wall Panel, embed FullMesh into the wet Render, overlapping joints by 100mm minimum. Allow to firm and then screed and or float to a flat and level finish. The purpose of this coat is to even out the substrate and the porosity of the QT®EcoSeries Wall Panel. 150mm wide x 300mm long strips of 45° Mesh are also required to be set into the base coat at 45° angle across the corner of all windows and door openings into wet render. Do not render or texture over control joints. The above is a generic guide only. Refer to the proprietary coating manufacturer’s instructions for a detailed description of application. Any proprietary coating system specified must meet or exceed the performance criteria of the BCA. Panel Wall 225 Maximum Edge Fixing Nom. 30 Nom. 30 Panel Wall Vapour Permeable Sarking Polyurethane Foam Adhesive 225 Maximum Edge Fixing Panel Fixing Polyurethane Foam Adhesive 50 Min. Edge Fixing CornerMesh 6 QT Systems15
3.2 Relief Joints Relief joints are required to accommodate any structural movement or panel movement due to temperature or moisture changes. If the panel above or below an opening is less than 300mm in depth or more than 2400mm in length the panel must be articulated by creating a vertical expansion joint to reduce and/or relieve the stress in the panel and coating system. All other corner openings must be reinforced with 45˚Mesh. The 45˚Mesh helps prevent any 45˚hairline cracks forming from the corner of any opening. QT EcoSeries Exterior Wall Panel Soffit Type 1 Roof Framing Steel or Timber Relief J oint Setout 2400 or More or Less 300 Vapour Permeable Sarking Steel or Timber Stud Frame 4.8 Soffit & Eaves The eaves or roof overhang play a significant role in the comfort performance of the building. Eaves or overhangs are used to shade the walls from the summer sun, while capturing the sun’s heat in the winter. Eaves will reduce glancing light, which highlights the wall surface. Glancing light is the light that is nearly parallel to the surface of the wall and casts visible shadows and uneven projections of the surface finish QT®EcoSeries Wall Panels can be installed to suit various soffit designs and details. Steel or Timber Batten Soffit Sealant Render Vapour Permeable Sarking Vertical Expansion or Relief Joint Window Steel or Timber Stud Opening Steel or Timber Batten Panel Panel Fixing or Greater 300 Flush Eaves 450 Mesh 30 Nom. Wall Panel Door Roof Framing Steel or Timber 300 Damp Proof Membrane FALL 150 Min. 30 Sealant Render Soffit Type 2 3.3 Control joints Control joints are designed to relieve structural movement between the wall cladding and building frame and also relieve any stress that builds up in the applied coating system. Vertical control joints are required at no greater than 5 metre centres (+ or - 500mm) in walls greater than 8 metres in length. Double studs are required at all vertical control joints. Vertical joints are best aligned with windows, doors, openings, or internal corners. Where timber floor joists are used a 15mm (nom), horizontal control joint must be provided at floor levels to allow for shrinkage and movement of the joists. 10mm control joints must also occur where the QT®EcoSeries Wall Panels meet alternative wall claddings eg. Weatherboard, brickwork, etc. On gable ends, a horizontal control joint will be required at the top plate of the wall so as to separate the gable wall from the wall below. Control joints can be formed with the use of a backing rod and sealant or by the installation of uPVC expansion bead. Steel or Timber Batten Roof Framing Steel or Timber Steel or Timber Stud Panel Vapour Permeable Sarking Panel Fixing Vapour Permeable Sarking Vertical Expansion J oint Horizontal Batten 30 Nom. Wall Panel Backing Rod Sealant Soffit uPVC Expansion Bead OR Sealant Render Render Panel Fixing Steel or Timber Stud Panel Vapour Permeable Sarking 10 Steel or Timber Batten Pane Wall Panel Panel Fixing Nom. 30 100 Max. 100 Max. Steel or Timber Batten Steel or Timber Stud 30 Nom. Wall Panel Flashing (Optional) 14 QTSystems 7
QT EcoSeries Exterior Wall Panel 4.7 Wall to Roof Wall to roof details can often be unsightly as they are easily seen and hard to conceal without compromising the weathertighness of the dwelling. Because of its visibility, it is essential to create clean straight lines either by using a uPVC moulding or cover flashings. Wall to Roof Panel Upper storey to Brick Lower Storey J unction Type 1 Type 2 Horizontal Expansion J oint 30 Nom. Wall Panel 30 Nom. Wall Panel 30 Wall Panel 30 Wall Panel Nom. Nom. Vapour Permeable Sarking Vapour Permeable Sarking Vapour Permeable Sarking Panel Fixing Render Steel or Timber Stud Panel Fixing Render Steel or Timber Stud Steel or Timber Stud Steel or Timber Stud Render Panel Fixing Steel or Timber Batten Steel or Timber Batten Panel Steel or Timber Batten Panel Weepholes Panel Sealant Steel or Timber Batten Floor Framing Cantilevered Cantilevered Panel Fixing Edge Fixing Edge Fixing Maximum Maximum 100 Minimum 225 225 uPVC Expansion Bead Backing Rod Floor Framing Min. Min. 10 10 Weepholes 10 OR 15 Sealant Render Sealant Compressible Foam Roof Framing Flashing Panel Boot Roof Framing Flashing (Secondary) Flashing (Primary) Panel Vapour Permeable Sarking Flashing Masonry Veneer 30 Wall Panel Nom. Parapet Type 2 Parapet Type 3 Cavity Masonry 3.4 Junctions Sloped Cap Flashing Sloped Cap Flashing Min. Min. Lap Lap 50 50 Min. Lap Min. Lap 50 Panel to Wall Sheet J unction Panel to Brick J unction 50 Render Steel or Timber Stud Panel Fixing Steel or Timber Stud Steel or Timber Stud 100 Nominal 100 Nominal Steel or Timber Stud Steel or Timber Batten Steel or Timber Batten Steel or Timber Batten Vapour Permeable Sarking Steel or Timber Batten Vapour Permeable Sarking Colorbond Sheeting or F/C Sheet Panel Vapour Permeable Sarking Vapour Permeable Sarking Sealant Nom. Nom. Cavity 30 30 Nom. 50 Cantilevered Edge Fixing Maximum Panel Panel Wall Wall 225 100 Min. 100 Min. Flashing Flashing Thin Wall Cladding Masonry Unit Min. 100 Damp Proof Membrane Render Panel Panel Fixing Render Panel Panel Fixing Min. Min. 50 Min. 225 Max. 50 Min. 225 Max. 10 10 Flashing Roof Framing Roof Framing Masonry Veneer Flashing (Secondary) Flashing (Primary) Flashing (Secondary) Flashing (Primary) Sealant Sealant 8 QT Systems13
4 Details QT EcoSeries Exterior Wall Panel Suspended Floor Construction Vapour Permeable Sarking Roller Door J amb Steel or Timber Stud Render Steel or Timber Stud Steel or Timber Batten Vapour Permeable Sarking Panel Fixing Roller Door Floor Framing 4.5 Doors 4.1 Slab & Floor All foundations must comply with the relevant standards and local authority requirements, with appropriate consideration given to soil type. QT®EcoSeries Wall Panel is suitable for construction on concrete slab or suspended floors. The concrete slab can either be rebated or non-rebated. The slab rebate will need to be a minimum of 50mm below floor level and 100mm above paved level or 150mm above ground level (See local standards). To ensure a flush finish, the width of the slab rebate needs to allow for the thickness of the coating system, the thickness of the panel (50mm), and the size of the extended wall cavity 20 – 50mm (30mm nom). Minimum ground clearances, must be maintained at all times during the life of the building. Insufficient clearance from the ground to the bottom of the wall panels will affect long-term durability. Panel Roller Door Reveal Door framing must be fixed in position prior to the installation of the QT®EcoSeries Wall Panels. The door framing will allow the panel to be cut and installed neat but independent of the frame. Door frames must be fixed to the structural framing. Decorative mouldings can be used to emphasize the door opening. Nom. 30 Steel or Timber Batten Panel Wall Panel Panel Fixing All materials that are susceptible to deterioration due to plastics migration or alkalinity of cement base products must be protected (check with product manufacturer). Sealant Weepholes 50 Corbel (Optional) Panel Boot Timber Door J amb Termite Barrier Sliding Door Steel or Timber Stud Door Head Steel or Timber Batten Vapour Permeable Sarking Vapour Permeable Sarking Panel Steel or Timber Batten Steel or Timber Stud Door Rebated Slab Flush Slab Panel Fixing 30 Wall Panel Nom. 30 Nom. Render 30 Wall Panel Door Reveal Panel Nom. Wall Render Corbel (Optional) Render Panel Sealant Vapour Permeable Sarking Panel Panel Fixing Corbel (Optional) Damp Proof Membrane Panel Fixing Panel Steel or Timber Batten Damp Proof Membrane Panel Fixing Vapour Permeable Sarking Steel or Timber Stud Reveal Bead or Render Steel or Timber Batten Steel or Timber Stud 4.6 Parapets Parapets are generally used to conceal or to emphasize features of a building. The top of the parapet must be designed and installed to shed water and maintain the weatertighness of the building below. Damp Proof Membrane Slab-on-ground Sealant Weepholes Sliding Door Head Slab-on-ground Weepholes Sealant Door Sill Min. 50 15 50 To Ground To Ground 150 Min. To Paved 125 Min. To Paved 150 Min. 175 Min. Level Level Level Level Termite 75 Min. Barrier Visual Termite 75 Min. Barrier Visual Parapet Type 1 Sliding Door Sill Sloped Cap Flashing Min. Lap Sealant 50 1:20 Fall Floor Slab Panel Boot 15 Nom. 15 Min. Lap 50 Min. 50 Render 15 Panel Fixing Steel or Timber Stud 10 40 VARIES Sealant Backing Rod Damp Proof Membrane VARIES Steel or Timber Batten Panel Boot Assembly Slab Rebate Door J amb Panel Vapour Permeable Sarking Steel or Timber Stud Damp Proof Membrane 4.2 Termites The Building Code of Australia in conjunction with AS 3660 specifies the requirement for termite risk management. (See local standards). The edge of a slab-on-ground may be used as a visual perimeter barrier. Provided that the slab edge is left exposed not less than 75mm above finished ground or paved level. The face of the perimeter must not be concealed by a flashing, rendered, tiled or clad. The exposed edge of the slab must be kept clean and free of debris and regularly visually inspected for termite activity. QT®EcoSeries Wall Panel does not hold any nutritional value for ants or rodents. Weepholes Steel or Timber Batten Vapour Permeable Sarking Cantilevered Edge Fixing Maximum 225 100 Min. Flashing Nom. 30 50 150 Minimum Slope Panel Wall Sliding Door Jamb Sealant Reveal Bead or Render Panel Boot Part 2 of 2 (Reveal Bead - 40mm/60mm/75mm) Panel Panel Fixing Corbel (Optional) Roof Framing Panel Boot Part 1 (J-Bead) Flashing Panel Boot 12 QT Systems9
QT EcoSeries Exterior Wall Panel Window Head Type 1 Window Head Type 2 Wall Panel 30 Nom. Wall Panel 30 Nom. Vapour Permeable Sarking Vapour Permeable Sarking Panel Panel Fixing Panel Fixing Steel or Timber Batten Steel or Timber Batten Render Render Render Panel Polyurethane Foam Adhesive Steel or Timber Stud Steel or Timber Stud Corbel (Optional) Corbel (Optional) Damp Proof Membrane 4.3 Windows Wherever possible windows and associated flashings should be installed prior to the installation of the QT®EcoSeries Wall Panel. When ordering the window frame it is essential to plan where the window flange will be positioned either flush with the stud frame, flush with battens or even over the panel. Reveal Bead or Render Reveal Bead or Render Damp Proof Membrane Sealant Sealant Window Head Window Head All materials that are susceptible to deterioration due to plastics migration or alkalinity of cement base products must be protected (check with product manufacturer). Window Sill Type 1 Window Sill Type 2 Window Sill Type 3 4.4 Decorative Mouldings To provide added design flexibility, decorative mouldings or features can be made using QT®EcoSeries Wall Panels. The panel can be cut into bands or laminate multiple layers and shape to achieve the desired profile. Once installed, a coating system would then be applied. Alternatively, a wide range of decorative mouldings are available from various manufacturers. Window Sill Window Sill Window Sill Sealant Sealant Sealant Damp Proof Membrane Damp Proof Membrane Reveal Bead or Render Reveal Bead or Render Rendered Sill Fall Fall Fall Damp Proof Membrane Polyurethane Foam Adhesive QT®EcoSeries Wall Panels can be cut into bands that can be installed around windows, doors, along horizontal control joints, etc to enrich the aesthetics of the project. They are installed so the top and bottom edge (bevelled at 15 degrees) falls away from the wall. Where bands meet, they should be cut at a 45˚ angle, across the face of the corbel to help conceal the join and increase the adhered surface bond. Bands are bonded into place with polyurethane foam and corbel screws or nails to mechanically fix the bands until the foam is set. Panel Steel or Timber Batten Steel or Timber Batten Steel or Timber Stud Polyurethane Foam Adhesive Steel or Timber Batten Steel or Timber Stud Steel or Timber Stud Panel Panel Fixing Panel Fixing Panel Fixing Vapour Permeable Sarking Vapour Permeable Sarking Vapour Permeable Sarking Panel Render Render Wall Panel 30 Nom. Wall Panel 30 Nom. Wall Panel 30 Nom. Window J amb Type 1 Type 2 Steel or Timber Stud Steel or Timber Stud Steel or Timber Batten Damp Proof Membrane Steel or Timber Batten Vapour Permeable Sarking Damp Proof Membrane Vapour Permeable Sarking Nom. Nom. 30 30 Panel Panel Wall Wall Window Sill Window Sill Sealant Reveal Bead or Render Polyurethane Foam Adhesive Panel Panel Fixing Corbel (Optional) Panel Panel Fixing Corbel (Optional) Sealant Reveal Bead or Render 10 QT Systems11
QT EcoSeries Exterior Wall Panel Window Head Type 1 Window Head Type 2 Wall Panel 30 Nom. Wall Panel 30 Nom. Vapour Permeable Sarking Vapour Permeable Sarking Panel Panel Fixing Panel Fixing Steel or Timber Batten Steel or Timber Batten Render Render Render Panel Polyurethane Foam Adhesive Steel or Timber Stud Steel or Timber Stud Corbel (Optional) Corbel (Optional) Damp Proof Membrane 4.3 Windows Wherever possible windows and associated flashings should be installed prior to the installation of the QT®EcoSeries Wall Panel. When ordering the window frame it is essential to plan where the window flange will be positioned either flush with the stud frame, flush with battens or even over the panel. Reveal Bead or Render Reveal Bead or Render Damp Proof Membrane Sealant Sealant Window Head Window Head All materials that are susceptible to deterioration due to plastics migration or alkalinity of cement base products must be protected (check with product manufacturer). Window Sill Type 1 Window Sill Type 2 Window Sill Type 3 4.4 Decorative Mouldings To provide added design flexibility, decorative mouldings or features can be made using QT®EcoSeries Wall Panels. The panel can be cut into bands or laminate multiple layers and shape to achieve the desired profile. Once installed, a coating system would then be applied. Alternatively, a wide range of decorative mouldings are available from various manufacturers. Window Sill Window Sill Window Sill Sealant Sealant Sealant Damp Proof Membrane Damp Proof Membrane Reveal Bead or Render Reveal Bead or Render Rendered Sill Fall Fall Fall Damp Proof Membrane Polyurethane Foam Adhesive QT®EcoSeries Wall Panels can be cut into bands that can be installed around windows, doors, along horizontal control joints, etc to enrich the aesthetics of the project. They are installed so the top and bottom edge (bevelled at 15 degrees) falls away from the wall. Where bands meet, they should be cut at a 45˚ angle, across the face of the corbel to help conceal the join and increase the adhered surface bond. Bands are bonded into place with polyurethane foam and corbel screws or nails to mechanically fix the bands until the foam is set. Panel Steel or Timber Batten Steel or Timber Batten Steel or Timber Stud Polyurethane Foam Adhesive Steel or Timber Batten Steel or Timber Stud Steel or Timber Stud Panel Panel Fixing Panel Fixing Panel Fixing Vapour Permeable Sarking Vapour Permeable Sarking Vapour Permeable Sarking Panel Render Render Wall Panel 30 Nom. Wall Panel 30 Nom. Wall Panel 30 Nom. Window J amb Type 1 Type 2 Steel or Timber Stud Steel or Timber Stud Steel or Timber Batten Damp Proof Membrane Steel or Timber Batten Vapour Permeable Sarking Damp Proof Membrane Vapour Permeable Sarking Nom. Nom. 30 30 Panel Panel Wall Wall Window Sill Window Sill Sealant Reveal Bead or Render Polyurethane Foam Adhesive Panel Panel Fixing Corbel (Optional) Panel Panel Fixing Corbel (Optional) Sealant Reveal Bead or Render 10 QT Systems11
4 Details QT EcoSeries Exterior Wall Panel Suspended Floor Construction Vapour Permeable Sarking Roller Door J amb Steel or Timber Stud Render Steel or Timber Stud Steel or Timber Batten Vapour Permeable Sarking Panel Fixing Roller Door Floor Framing 4.5 Doors 4.1 Slab & Floor All foundations must comply with the relevant standards and local authority requirements, with appropriate consideration given to soil type. QT®EcoSeries Wall Panel is suitable for construction on concrete slab or suspended floors. The concrete slab can either be rebated or non-rebated. The slab rebate will need to be a minimum of 50mm below floor level and 100mm above paved level or 150mm above ground level (See local standards). To ensure a flush finish, the width of the slab rebate needs to allow for the thickness of the coating system, the thickness of the panel (50mm), and the size of the extended wall cavity 20 – 50mm (30mm nom). Minimum ground clearances, must be maintained at all times during the life of the building. Insufficient clearance from the ground to the bottom of the wall panels will affect long-term durability. Panel Roller Door Reveal Door framing must be fixed in position prior to the installation of the QT®EcoSeries Wall Panels. The door framing will allow the panel to be cut and installed neat but independent of the frame. Door frames must be fixed to the structural framing. Decorative mouldings can be used to emphasize the door opening. Nom. 30 Steel or Timber Batten Panel Wall Panel Panel Fixing All materials that are susceptible to deterioration due to plastics migration or alkalinity of cement base products must be protected (check with product manufacturer). Sealant Weepholes 50 Corbel (Optional) Panel Boot Timber Door J amb Termite Barrier Sliding Door Steel or Timber Stud Door Head Steel or Timber Batten Vapour Permeable Sarking Vapour Permeable Sarking Panel Steel or Timber Batten Steel or Timber Stud Door Rebated Slab Flush Slab Panel Fixing 30 Wall Panel Nom. 30 Nom. Render 30 Wall Panel Door Reveal Panel Nom. Wall Render Corbel (Optional) Render Panel Sealant Vapour Permeable Sarking Panel Panel Fixing Corbel (Optional) Damp Proof Membrane Panel Fixing Panel Steel or Timber Batten Damp Proof Membrane Panel Fixing Vapour Permeable Sarking Steel or Timber Stud Reveal Bead or Render Steel or Timber Batten Steel or Timber Stud 4.6 Parapets Parapets are generally used to conceal or to emphasize features of a building. The top of the parapet must be designed and installed to shed water and maintain the weatertighness of the building below. Damp Proof Membrane Slab-on-ground Sealant Weepholes Sliding Door Head Slab-on-ground Weepholes Sealant Door Sill Min. 50 15 50 To Ground To Ground 150 Min. To Paved 125 Min. To Paved 150 Min. 175 Min. Level Level Level Level Termite 75 Min. Barrier Visual Termite 75 Min. Barrier Visual Parapet Type 1 Sliding Door Sill Sloped Cap Flashing Min. Lap Sealant 50 1:20 Fall Floor Slab Panel Boot 15 Nom. 15 Min. Lap 50 Min. 50 Render 15 Panel Fixing Steel or Timber Stud 10 40 VARIES Sealant Backing Rod Damp Proof Membrane VARIES Steel or Timber Batten Panel Boot Assembly Slab Rebate Door J amb Panel Vapour Permeable Sarking Steel or Timber Stud Damp Proof Membrane 4.2 Termites The Building Code of Australia in conjunction with AS 3660 specifies the requirement for termite risk management. (See local standards). The edge of a slab-on-ground may be used as a visual perimeter barrier. Provided that the slab edge is left exposed not less than 75mm above finished ground or paved level. The face of the perimeter must not be concealed by a flashing, rendered, tiled or clad. The exposed edge of the slab must be kept clean and free of debris and regularly visually inspected for termite activity. QT®EcoSeries Wall Panel does not hold any nutritional value for ants or rodents. Weepholes Steel or Timber Batten Vapour Permeable Sarking Cantilevered Edge Fixing Maximum 225 100 Min. Flashing Nom. 30 50 150 Minimum Slope Panel Wall Sliding Door Jamb Sealant Reveal Bead or Render Panel Boot Part 2 of 2 (Reveal Bead - 40mm/60mm/75mm) Panel Panel Fixing Corbel (Optional) Roof Framing Panel Boot Part 1 (J-Bead) Flashing Panel Boot 12 QT Systems9
QT EcoSeries Exterior Wall Panel 4.7 Wall to Roof Wall to roof details can often be unsightly as they are easily seen and hard to conceal without compromising the weathertighness of the dwelling. Because of its visibility, it is essential to create clean straight lines either by using a uPVC moulding or cover flashings. Wall to Roof Panel Upper storey to Brick Lower Storey J unction Type 1 Type 2 Horizontal Expansion J oint 30 Nom. Wall Panel 30 Nom. Wall Panel 30 Wall Panel 30 Wall Panel Nom. Nom. Vapour Permeable Sarking Vapour Permeable Sarking Vapour Permeable Sarking Panel Fixing Render Steel or Timber Stud Panel Fixing Render Steel or Timber Stud Steel or Timber Stud Steel or Timber Stud Render Panel Fixing Steel or Timber Batten Steel or Timber Batten Panel Steel or Timber Batten Panel Weepholes Panel Sealant Steel or Timber Batten Floor Framing Cantilevered Cantilevered Panel Fixing Edge Fixing Edge Fixing Maximum Maximum 100 Minimum 225 225 uPVC Expansion Bead Backing Rod Floor Framing Min. Min. 10 10 Weepholes 10 OR 15 Sealant Render Sealant Compressible Foam Roof Framing Flashing Panel Boot Roof Framing Flashing (Secondary) Flashing (Primary) Panel Vapour Permeable Sarking Flashing Masonry Veneer 30 Wall Panel Nom. Parapet Type 2 Parapet Type 3 Cavity Masonry 3.4 Junctions Sloped Cap Flashing Sloped Cap Flashing Min. Min. Lap Lap 50 50 Min. Lap Min. Lap 50 Panel to Wall Sheet J unction Panel to Brick J unction 50 Render Steel or Timber Stud Panel Fixing Steel or Timber Stud Steel or Timber Stud 100 Nominal 100 Nominal Steel or Timber Stud Steel or Timber Batten Steel or Timber Batten Steel or Timber Batten Vapour Permeable Sarking Steel or Timber Batten Vapour Permeable Sarking Colorbond Sheeting or F/C Sheet Panel Vapour Permeable Sarking Vapour Permeable Sarking Sealant Nom. Nom. Cavity 30 30 Nom. 50 Cantilevered Edge Fixing Maximum Panel Panel Wall Wall 225 100 Min. 100 Min. Flashing Flashing Thin Wall Cladding Masonry Unit Min. 100 Damp Proof Membrane Render Panel Panel Fixing Render Panel Panel Fixing Min. Min. 50 Min. 225 Max. 50 Min. 225 Max. 10 10 Flashing Roof Framing Roof Framing Masonry Veneer Flashing (Secondary) Flashing (Primary) Flashing (Secondary) Flashing (Primary) Sealant Sealant 8 QT Systems13
3.2 Relief Joints Relief joints are required to accommodate any structural movement or panel movement due to temperature or moisture changes. If the panel above or below an opening is less than 300mm in depth or more than 2400mm in length the panel must be articulated by creating a vertical expansion joint to reduce and/or relieve the stress in the panel and coating system. All other corner openings must be reinforced with 45˚Mesh. The 45˚Mesh helps prevent any 45˚hairline cracks forming from the corner of any opening. QT EcoSeries Exterior Wall Panel Soffit Type 1 Roof Framing Steel or Timber Relief J oint Setout 2400 or More or Less 300 Vapour Permeable Sarking Steel or Timber Stud Frame 4.8 Soffit & Eaves The eaves or roof overhang play a significant role in the comfort performance of the building. Eaves or overhangs are used to shade the walls from the summer sun, while capturing the sun’s heat in the winter. Eaves will reduce glancing light, which highlights the wall surface. Glancing light is the light that is nearly parallel to the surface of the wall and casts visible shadows and uneven projections of the surface finish QT®EcoSeries Wall Panels can be installed to suit various soffit designs and details. Steel or Timber Batten Soffit Sealant Render Vapour Permeable Sarking Vertical Expansion or Relief Joint Window Steel or Timber Stud Opening Steel or Timber Batten Panel Panel Fixing or Greater 300 Flush Eaves 450 Mesh 30 Nom. Wall Panel Door Roof Framing Steel or Timber 300 Damp Proof Membrane FALL 150 Min. 30 Sealant Render Soffit Type 2 3.3 Control joints Control joints are designed to relieve structural movement between the wall cladding and building frame and also relieve any stress that builds up in the applied coating system. Vertical control joints are required at no greater than 5 metre centres (+ or - 500mm) in walls greater than 8 metres in length. Double studs are required at all vertical control joints. Vertical joints are best aligned with windows, doors, openings, or internal corners. Where timber floor joists are used a 15mm (nom), horizontal control joint must be provided at floor levels to allow for shrinkage and movement of the joists. 10mm control joints must also occur where the QT®EcoSeries Wall Panels meet alternative wall claddings eg. Weatherboard, brickwork, etc. On gable ends, a horizontal control joint will be required at the top plate of the wall so as to separate the gable wall from the wall below. Control joints can be formed with the use of a backing rod and sealant or by the installation of uPVC expansion bead. Steel or Timber Batten Roof Framing Steel or Timber Steel or Timber Stud Panel Vapour Permeable Sarking Panel Fixing Vapour Permeable Sarking Vertical Expansion J oint Horizontal Batten 30 Nom. Wall Panel Backing Rod Sealant Soffit uPVC Expansion Bead OR Sealant Render Render Panel Fixing Steel or Timber Stud Panel Vapour Permeable Sarking 10 Steel or Timber Batten Pane Wall Panel Panel Fixing Nom. 30 100 Max. 100 Max. Steel or Timber Batten Steel or Timber Stud 30 Nom. Wall Panel Flashing (Optional) 14 QTSystems 7
5 QT EcoSeries Exterior Wall Panel Coating Systems 3Corners, Joints & Junctions Internal & External Corners Internal corners can be formed by continuing the FullMesh around the corner or by embedding a CornerMesh into the base coat render. External corners can be formed by embedding a CornerMesh into the base coat render or by fixing a corner bead prior to rendering. In all cases the abutting corner panels must be bonded with polyurethane foam adhesive. Steel or Timber Batten Steel or Timber Stud Vapour Permeable Sarking FullMesh 5.1 Coating /Rendering The proprietary coating systems consist of polymer-modified cement renders, which must be finished with an acrylic texture and paint. The proprietary coating manufacturer’s instructions and application requirements must be followed at all times. In most cases these coating systems must be applied by an approved applicator. High profile or heavy texture finishes can minimise surface imperfections or glancing light concerns. Light coloured coatings are recommended. Polymer-modified cement renders must not be applied over sealants or control joints. Panel 3.1 Panel Fixing External Corners Internal Corners 1st Coat Base coat (Polymer-Modified Cement Render) embedded with FullMesh 3-5mm thick Corner Bead FullMesh Steel or Timber Batten Steel or Timber Stud 30 Wall Panel 30 Wall Panel Panel Fixing Render Nom. Nom. Bond Panel Joints with Polyurethane Foam Adhesive OVERLAP Vapour Permeable Sarking 100 2nd Coat Leveling render 2-3mm thick or texture coat to achieve desired effect Steel or Timber Batten FullMesh 100mm Overlap Min. wrapped around Panel Render 300mm Min. FullMesh Steel or Timber Stud corners FullMesh 225 Max. Edge Fixing Paint Coat 100% Acrylic paint required for weathertightness Panel Fixing Panel Wall Nom. 30 Nom. Overlap External FullMesh Must Grade Corner 30 Panel Wall Bead Panel FullMesh Vapour Permeable Sarking 225 Maximum Edge Fixing 5.2 Pre - Coating System Inspection Check all internal and external corners are formed correctly and have good straight lines. Check the first horizontal course, and panels above rooflines have a good clean bottom line. Check weep holes have been installed in the first horizontal course. With a 1.8m spirit level check for variations greater than 3mm in the QT®EcoSeries Wall Panels, especially where panels butt together. If variations are found, take the appropriate remedial action eg. rasp to an acceptable level, or re-fix the offending panels. It is important to eliminate large variations, as they may appear under critical or glancing light conditions. If the internal lining has not yet been installed, advise the building supervisor that internal wall lining cannot be installed using nails as the knocking vibrations will transfer through the frame and crack the render coatings (hairline cracking). Hence internal lining must be screwed. After the inspection has been completed, application of the base coat can begin. External graded uPVC Corner Bead FullMesh Must Overlap External Grade Corner Bead 50 Min. Edge Fixing Polyurethane Foam Adhesive Reinforced Reinforced Steel or Timber Batten Steel or Timber Stud 30 Wall Panel 30 Wall Panel Nom. Nom. Vapour Permeable Sarking Panel Render Render Steel or Timber Batten Panel Fixing Steel or Timber Stud Panel CornerMesh FullMesh 225 Max. Edge Fixing FullMesh 5.3 Application of a Polymer Modified Render Base Coat Trowel an even coat of polymer-modified cement render over the entire QT®EcoSeries Wall Panel, embed FullMesh into the wet Render, overlapping joints by 100mm minimum. Allow to firm and then screed and or float to a flat and level finish. The purpose of this coat is to even out the substrate and the porosity of the QT®EcoSeries Wall Panel. 150mm wide x 300mm long strips of 45° Mesh are also required to be set into the base coat at 45° angle across the corner of all windows and door openings into wet render. Do not render or texture over control joints. The above is a generic guide only. Refer to the proprietary coating manufacturer’s instructions for a detailed description of application. Any proprietary coating system specified must meet or exceed the performance criteria of the BCA. Panel Wall 225 Maximum Edge Fixing Nom. 30 Nom. 30 Panel Wall Vapour Permeable Sarking Polyurethane Foam Adhesive 225 Maximum Edge Fixing Panel Fixing Polyurethane Foam Adhesive 50 Min. Edge Fixing CornerMesh 6 QT Systems15
QT EcoSeries Exterior Wall Panel 2.2 Framing Timber framing must comply with AS 1684 and steel framing must be designed and constructed in accordance with AS 3623. Minimum distances from end and edge of timber framing members must be observed to avoid splitting. Stud spacing must not exceed 600mm centres. Noggings must be fitted between studs at 1350mm maximum centres. 6Fire Rated Construction Details Specimen - Typical Cross Section Timber Batten System Mechanically fix H3 treated timber battens to stud with 100mm gun framing nails or 100 x 3.15 or 3.75 ring shanked nails. Galvanised nails are required in H3-CCA treated battens. H3-LOSP treated battens are considered non corrosive. With a 1.8 m spirit level, check for variations in the frame that are over 6 mm. Large variations negatively affect weather protection or can appear as visual defects under critical light conditions. If the frame is out of plumb, but not structurally defective, consult with the builder or contractor for remediation. Timber End and Edge Fixing Fire Test - FS3685-2695 edge distance 12 x dia. of Clip and Channel System fastener 50mm Wall Panel Mechanically fix clips at 600 centres in both directions with 2 - 12g x 25mm Class 3 (AS3566) screws into face of stud. Select appropriate slot and engage channel, ensuring channel is plumb. Note: Prior to any firewalls being constructed it is essential that the builder consults with the project certifier to ensure that the certifier is aware of the firewall construction procedures and the certifier deems the installer competent. Cavity 1 Layer of 10mm Standards Plasterboards Refer Manufacturer for Details 5-8mm modified Cement Render Fire Resistance Level (FRL) is assessed by three performance measures:- Structural Adequacy / Integrity /Insulation eg 90/90/90 Wind Channel w x d (mm) Framing Stud Centres Maximum Clip Fixing Centres (mm) 5 x dia. of fastener edge distance Max. Classification (AS4055) 112 Horizontal Wall Panel Butt Jointed Bonded with polyurethane Expandable Foam N1 (W28N), N2 (W33N), N3 (W41N) and C1 (W41C) 45 x 16 or 28 600mm 600mm Max. 112 Wind Timber Batten wxd (mm) Framing Stud Centres Maximum Batten Fixing Nail Centres (mm) N4 (W50N), N5 (W60N), C2 (W50C) and C3 (W60C) 45 x 16 or 28 450mm 600mm 6.1 FRL - 90 Mins. & External Fire Source CSIRO Full-Scale Fire Test FS 3685/2695 has proven that the QT®EcoSeries Wall System (shown right) is capable of achieving a fire resistance of 113 minutes Integrity and 115 minutes Insulation when tested in accordance with AS1530.4. Therefore for the purpose of Building Regulations in Australia, the QT®EcoSeries Wall System achieved a fire resistance level (FRL) of 90/90/90. The FRL is applicable for exposure to fire source from the tested side (QT®EcoSeries Wall Panel side). Classification (AS4055) Maximum Centres N1 (W28N), N2 (W33N), N3 (W41N) and C1 (W41C) 45 x 20 600mm 400mm FRL 90 /90/90 225 Internal Lining Clip N1 (W28N), N2 (W33N), N3 (W41N) and C1 (W41C) 45 x 21-50 600mm 300mm Panel Fixings Channel Steel or Timber Stud Sarking N4 (W50N), N5 (W60N), C2 (W50C) and C3 (W60C) 45 x 20 450mm 300mm Steel or Timber Battens Sarking N4 (W50N), N5 (W60N), C2 (W50C) and C3 (W60C) 45 x 21-50 450mm 200mm Stud Framing to AS 1684 Timber or AS/NZ4600 or AS3623 Steel Clip Steel or Timber Stud Non Combustible Breathable Sarking Channel Internal Lining Fixing Nail Fixing Screw Steel or Timber Stud Sarking Channel Steel Battening System - 40mm Top Hat Fire Rated Vertical Control J oint Fire Rated Horizontal Control J oint Fixing 40mm Metal Battens onto timber studs Sarking Wind Batten Spacing at 600 crs Batten Spacing at 450 crs 0.55 BMT 2/3.06x65 DSN 2/3.06x65 DSN 2/3.75x65 DSN 2x Type 17 8-15x25mm Pan 2x Type 17 8-15x25mm Pan Batten Steel or Timber Stud Classification 0.55 BMT 2/3.06x65 DSN 2/3.06x65 DSN 2/3.75x65 DSN 0.75 BMT 2/3.06x65 DSN 2/3.06x65 DSN 2/3.75x65 DSN 2x Type 17 8-15x25mm Pan 30 Wall Panel Fixing Nail N2 (W33N) N3 (W41N) N4 (W50N) N5 (W60N) N6 (W70N) Nom. 5-8mm Render 5-8mm modified Cement Render Continuous Fire Resistant Sealant 5-8mm Render Steel or Timber Battens Panel Fixings Panel Fixings Backing Rod Min. 15 DSN = DEFORMED SHANK NAILS 15mm Gap Maximum NOTE: For fixing 40mm top hat battens to steel framing 2/10-16x16 self drilling hex head screws for each connection to top plate, bottom plate and nogging is all that is required for all wind categories. Panel 112 Wall Nom. 30 Internal Lining 40mm top hat fixed at bottom plate, nogging and top plate 15mm Gap Maximum Backing Rod 112 Steel or Timber Stud Continuous Fire Resistant Sealant Steel or Timber Stud Framing Steel or Timber Battens Non Combustible Breathable Sarking Sarking Sarking Damp Proof Membrane (Optional) 5-8mm modified Cement Render 40mm Top Hat Steel or Timber Stud Steel or Timber Stud Framing 100 100 2 x fixing screws to be placed in bottom plate’ nogging and top plate (see tables for sizes) Non Combustible Breathable Sarking Maximum Maximum 16 QTSystems 5
QT EcoSeries Exterior Wall Panel 2 The Fire Rating information for sections 6.2, 6.3 and 6.4 are based on CSIRO Opinion FCO-2310 Dated 17th February 2004 and the Fire Resistance Test performed by Warrington Fire Research Consultancy Testing. WFRA Report No.2172500 of a 50mm thick QT ECOSERIES Exterior Wall Panel, system tested in accordance with AS 1530.4-2005 dated 01st May 2007. 90 Minute Fire Rated Wall Installation and Fixing 50mm Wall Panel FRL -/90/90 Non load Bearing Or FRL 90/90/90 AS 1684 AS 1530.4 -1997 FRL -/90/90 Non load Bearing Or 6.2 FRL - 90 Minutes To achieve a 90 minute Fire Rating the wall must be constructed so as the wall consists of two layers of 13mm thick fire resistance plasterboard affixed to the timber frame internally and one layer of fire resistant building foil, one layer of 50mm QT®EcoSeries Wall Panel with a 5-8mm render applied with finish, affixed directly to a 20-50mm battened out cavity. This system would be capable of achieving Fire Resistance Levels of -/90/90 for Non Load Bearing walls and 90/90/90 for Load Bearing Walls designed in accordance with AS1684 for fire exposure from either direction if tested in accordance with AS1530.4 Cavity FRL 90/90/90 AS 1684 AS 1530.4 -1997 Max. 112 2.1 Panel fixings Fix the QT EcoSeries Wall Panel onto timber battens with galvanised 100 mm x 3.75mm ring shank nails or 10g x 100mm Class 3 (AS3566) screws onto timber or steel battens with the addition of QT Buttons in all cases. Panel fixings must be no closer than 50mm but no further than 112mm to the horizontal panel edge and no closer than 50mm to the vertical edge, while normal fixing centres are at 225mm maximum centres. It is essential that the vertical and horizontal butt joints be bonded with polyurethane foam adhesive. Also ensure polyurethane foam adhesive is applied to all batten faces prior to the panel being pushed against them for maximum bonding to the support frame. Panels can be joined off stud, if glued to the abutting panel with polyurethane foam adhesive. QT® EcoSeries Wall Panels can span 225mm as an unsupported cantilever. Panels must span across a minimum of two channels or battens and must be installed in a horizontal stretcher bond pattern. To prevent corrosion from salt aerosols in high corrosion zones, (such as geothermal activity or within a 500m distance from the sea) upgrade fixing screws to class 4 or stainless steel (AS3566). Horizontal Wall Panel Butt Jointed Max. 112 6.3 Extended Wall Areas The Fire Resistance Levels of 60 & 90 minutes would still apply to the same system extended in height in modular form provided that the structural members are designed in accordance with the relevant structural design code for the height and load of actual installation and an approved joint system appropriate to the FRL and the width of the gap is used for the horizontal and vertical joints in a manner as detailed in the attached drawings. Maximum Centres 5-8mm modified Cement Render 225 Panel Fixings Steel or Timber Stud Framing Steel or Timber Battens 2 Layer Fire Resistant plasterboards Refer Manufacturer for Details 50mm Panel Fixing 50mm Panel Edge Detail Non Combustible Breathable Sarking Fire Cavity Wall Panel Resistant Bond horizontal and vertical joints with polyurethane foam adhesive. Polyurethane foam adhesive between batten face and back of panel 50mm minimum end fixing distance 112 225 225 225 112 50 200 200 200 200 50 Maximum Fixing Centres Choose QT®EcoSeries Wall Panel Choose an external cladding that helps protect your home from the spread of fire. 112 Polyurethane foam adhesive between batten face and back of panel 900 225mm maximum edge fixing distance for unsupported wall cantilevers 600 225 Alternative Fixing Centres QT®EcoSeries Exterior Wall System Maximum Stud Centres 4 QT Systems17
QT EcoSeries Exterior Wall Panel 1.2 1.4 Thermal Performance The Thermal performance of the QT® EcoSeries Wall System is calculated in accordance with AS 2627.1 Thermal Insulation of Dwellings. QT® EcoSeries Wall Panel has a k-value of 0.07 w/mk. Acoustic Performance The QT® EcoSeries Wall System was tested in accordance with AS/NZS 1276.1 for Airborne Sound Transmission and achieved STC41 and Rw41(-3;-8)(Wall Composition: 50mm QT® EcoSeries Wall Panel with 30mm (nom) cavity on a 70mm x 35mm stud frame and 10mm plasterboard) CSIRO TL399. Acoustic performance can be significantly increased with the addition of bulk or acoustic insulation batts. 7Finishing Services Ensure service pipes and wires are fixed or checked into the frame and not laid loose in the extended wall cavity. All materials that are susceptible to deterioration due to plasticiser migration must be protected (check with product manufacturer). Some PVC products or electrical cabling that penetrate the coating system and QT®EcoSeries Wall Panel, require a conduit to ensure it is protected. Copper pipes require a sleeve, conduit or tape to prevent contact with the wall panel. Meter Box Wall System Composition 7.3 Sealants Use an exterior grade weatherproof sealant for exterior wall construction and as a general-purpose gap filling. Apply sealant in accordance to manufacturers recommendations. For a sealant to work effectively, the sealant must be applied as shown in the sketch below, Opening Width (D) x Depth (D/2) half the width. Use backing rod as required. Ensure surfaces are in good condition clean and free from oil, dust, loose materials including old sealant and release agents. Apply masking tape to surfaces where contact with sealant is not required. Tape should be removed before sealant cures. Smooth the surface of the sealant and ensure excess sealant is removed. Refer manufacturers curing or drying times before painting. Plasterboard • • • • • • • • • • • • • • • • • • • • • • • 70 or 90mm Stud Framing R1.5 Bulk Insulation Vapour Permeable Sarking 20-50mm Cavity 1.5 Fire Performance QT® EcoSeries Wall Panels when tested to AS/NZS 3837 and in accordance with BCA Specification C1.10a Section is classed as a GROUP 1 material. 7.1 • • • • • • • • • • 50mm panel R-Value m2 k/w • 2.5 2.0 1.5 1.5 1.5 1.5 3.0 3.0 * Note: R-Values in table have been rounded up or down to the nearest R0.5 as permitted under AS 2627.1 Early Fire Hazard Indices (Test to AS/NZS 1530 Part 3) Ignitability Index Spread of Flame Index Heat Evolved Index Smoke Developed Index 0 0 0 0-1 Sealant Application 1.3 Impact Resistance QT®EcoSeries Wall Panel when coated with a cement base render, can provide resistance for hard body impacts typically found under normal situations. (Refer coating manufacturers for details). 30 Wall Panel Nom. Vapour Permeable Sarking 1.6 Durability In normal conditions and when maintained properly in a weatherproof condition, the cladding systems should exceed 30 years of trouble free serviceable life. When the system is installed in high corrosion zones, such as coastal locations within distances of up to 500m from the sea, particular care must be taken to ensure that openings through the cladding panels are kept to a minimum to prevent corrosive salt aerosols from entering the wall cavity and affecting metal components. (Permitted openings are base weepholes, soffit vents and openings beneath window joinery at sills). Render Panel Fixing Sealant (Continuous) Internal Wall Lining Wildlife Attack The panels will not support growth of micro-organisms such as fungi or bacteria and do not hold any nutritional value for ants or rodents. Meter Box Vapour Permeable Sarking Sealant (Continuous) Panel Steel or Timber Batten Steel or Timber Stud 1.7 Cavity Cavities form an important role in the weathertightness and life cycle of any wall system QT® EcoSeries Wall Panels constructed without a cavity will void any warranty. The cavity acts as a secondary barrier against wind driven rain penetration entering the wall framing. The cavity also allows the wall to ventilate and drain which is essential for a healthy wall. 7.2 Penetrations Voids or gaps created by service penetrations through the exterior wall require weatherproofing and or waterproofing. A common method is to inject with expandable polyurethane foam and seal with a long lasting exterior gap sealant to make a weather tight seal. Where practical add a flange or decorative feature over the hole or penetration. Skirting Board Flooring 1.8 Vapour Permeable Sarking Vapour permeable sarking must be installed to the face of the building framing prior to installation of the battens and panels. The vapour permeable sarking has two main functions, weathertightness and thermal resistance. In its weathertightness role it protects the building framing from direct contact with moisture generated by wind driven rain penetration, while allowing the condensation of moisture from interior artificial heating and cooling to escape. Thermally the vapour permeable sarking divides the wall into two separate air spaces, which significantly increases the thermal performance of the wall. Penetrations Render 7.4 Heavy & Frequently Adjusted Fixtures: Heavy items are not to be fitted directly to the QT®EcoSeries Wall Panel. They should have their own stand-alone supports or be tied to the supporting wall frame (eg. Clothes lines). Items subject to frequent handling (e.g. Flood-Lights and sensors) require a mounting plate, to be fixed across at least two or more frame studs to give long- term fixing support. The backing plate must be of a material that will offer, long-term weatherproof durability. If the internal lining is already installed, the mounting plate can be installed externally prior to the installation of the QT®EcoSeries Wall Panel. Panel 10 Max. Remove Cut Plastic Weephole 1.9 Weepholes On the first horizontal course (ground level) weep holes are to be installed at centres not exceeding 1200mm immediately above any damp proof membrane or flashing. Weepholes are also required in areas where there is a possibility of moisture build up. Weepholes must be limited to 8mm in width to reduce the potential for vermin access. 10 Max. Sealant (Continuous) Backing Rod Render Width Panel Width 18 QT Systems3
8 Storage and Handling Care should be exercised in handling the QT®EcoSeries Wall Panels to avoid any damage to edges, ends and faces. Panels must be stacked flat, off the ground and supported on a level platform. Plastic Shrink- wrap applied to pallets of panels for transportation from the factory, must be removed at the destination (i.e. distributors warehouse or direct to site) to allow panel to continue drying and equalise with local humidity. The panels must be kept dry at all times by storing under cover, or providing weatherproof covers to the stack. Panels must be dry prior to fixing. Intermittent weather exposure is not detrimental to the panel. However if QT®EcoSeries Wall Panels become wet, allow thorough drying before fixing. Drying shrinkage may occur if the QT®EcoSeries Wall Panels are not allowed to dry sufficiently. The proprietary Coating System must be applied and completed within 1 month from the date of installation of the QT®EcoSeries Wall Panels. QT EcoSeries Exterior Wall Panel Product Information Introduction 8.1 8.3 Maintenance Annual inspection of the exterior walls must be made to ensure they remain in a weatherproof condition. Checks must be made of the exterior coating system, sealants, flashings, control joints and any water-proofing systems. Should any repairs be required, seek remedial advice from the manufacturer. If the project is still under the statutory warranty period contact the appropriate body, or check with your insurer. This technical manual covers the QT®EcoSeries Wall Panel, a masonry veneer wall cladding system with a cavity. The QT®EcoSeries Wall Panel is a masonry panel that offers a solid substrate, can provide a wide range of finishes, has high thermal insulation and sound abatement, fire resistance and ease of construction. QT®EcoSeries Wall Panels are manufactured from a material called ‘Conpolcrete®’ which consists of a blend of cement and recycled polystyrene. Patent Pending. 8.4 Limitations of the QT®EcoSeries Wall Panel System QT®EcoSeries Wall Panels are not designed to provide bracing for the building. The internal linings or other specifically designed systems must provide external wall bracing. QT®EcoSeriesWall Panels are not suitable to be used for chimneys and flues. QT®EcoSeries Wall Panels and cement based renders, will release their salts and/or fines if saturated; this condition is know as efflorescence. In order to prevent efflorescence the cement products must be sealed to prevent the ingress of moisture and/or installed with careful attention to the weather-tightness details to prevent the ingress of wind driven rain, gutter overflow or moisture tracking along a surface with capillary action. The water that has permeated through the panel and render will collect and dissolve any salts and/or fines that are then released through hairline cracking in the render which are caused by hydrostatic pressure build up. The dissolved salts and/or fines will crystallise on the external surface. Should efflorescence occur, it is essential that the moisture source be eliminated and any hairline cracking repaired to maintain weather- tightness. Refer to coating manufacturer for suitable surface repair techniques. QT® EcoSeries Wall Panel QT®EcoSeries Wall Panels must not come in contact with the ground for extended periods of time. The panel must not be used for retaining. Conpolcrete® Galv Ring Shank Nail or Screw This Technical Manual is limited to residential construction, for other applications contact your QT Distributor. Designers must check that the details in this Technical Manual meet their own specific design requirements. For use outside the scope of this Technical Manual, specific design may be necessary. The Architect, Designer, Engineer, Specifier and Builder, are responsible for specific design and should ensure compliance with the BCA. QT® Button Proprietary Coating System 8.5 Product Support Installers are registered trades people, equipped to install the panel and its complementary accessories. These installers, acting as independent contractors, should be industry licensed trades people such as carpenters or dry wall installers who are familiar with the QT®EcoSeries Wall Panel system and components. The authorized agent or appointed licensee shall supply all QT®EcoSeries Wall Panel system components directly to the contracting or sub-contracting party. We recommend you seek advice from all manufacturers or suppliers, regarding correct installation and maintenance requirements associated with their products. Failure to comply with specification requirements, which may compromise the exterior coating, sealants, flashing, weatherproofing and waterproofing, will render any manufacturers warranty void. Panels must always be carried on edge. Any minor damage should be repaired with joint compounds or polyurethane foam. Fixings and other accessories must be stored so that they are kept clean, dry and undamaged. All components must be used within the designated shelf life. Any damage to Clips and Channel may affect the integrity or performance of the wall system. Panel may be cut with an electric circular saw 60 pt tungsten tip blade, diamond blade or handsaw. Panels are best shaped with the use of an electric plane or a hand- rasping tool. Holes or services may be formed with the use of an electric fretsaw or drill. When power tools are used for cutting, grinding or forming holes in the panels, appropriate safety measures as set out under the heading of Health and Safety must be observed. All materials that are susceptible to deterioration due to plastics migration or alkalinity of cement base products must be protected (check with product manufacturer). Design 1 Galv Steel or H3 Timber Batten Steel or Timber Stud Framing 1.1 Material Properties QT Systems regularly updates its literature to keep up with system and product developments, changing trends in design, and therefore reserves the right, to revise and change its technical information without notice. Weepholes Width 900mm Length 2250mm Thickness 50mm (nom) Weight 40kg (nom) 8.2 Quality Policy QT Systems is dedicated to delivering quality building systems for internal and external use on residential and commercial projects. QT Systems is committed to ensuring that its Conpolcrete® building products provide the highest standards and consistency by meeting the requirements of customers and regulatory authorities. This objective is met through the implementation of a Quality System, based upon the requirements of an internationally recognised quality standard: AS/NZS ISO 9001:2000. Continued testing and independent scrutiny will ensure QT Systems continues to offer an eco-friendly alternative construction material that consistently provides outstanding performance. Damp Proof Membrane x x To ensure the latest information, contact your local distributors of QT Products or QT Systems direct on 1800 233 001 or Email: mail@qt-sys.com.au; or refer to www.qt-sys.com.au • • Total Square Metres per Panel = 2.0 m2. Number of 50mm Panels per Pallet = 23 panels Pallet Weight:- 940kg (approx) (± 20 kg safety factor). Pallet Size - 900m m Width x 2250m m Length x Max. 1350mm Height (nom). Damp Proof Course • Slab on Ground 2 QTSystems 19
C QT EcoSeries Exterior Wall Panel Contents 5 Coating System....................................................15 • 1 Coating / Rendering • 2 Pre - Coating System Inspection • 3 Application of a Polymer Modified Plaster Base Coat 6 Fire Rated Construction Details............................16 • 1 FRL - 90 Minutes & External Fire Source • 2 FRL - 90 Minutes • 3 Extended Wall Areas 7 Finishing..............................................................18 • 1 Services • 2 Penetrations • 3 Sealants • 4 Heavy & Frequently Adjusted Fixtures 8 Product Information.............................................19 • 1 Storage and Handling • 2 Quality Policy • 3 Maintenance • 4 Limitations of the QT®EcoSeries Wall Panel System • 5 Product Support • 6 Health and Safety • 7 Components & Accessories • 8 General Warranty • 9 Disclaimer Introduction.............................................................2 1 Design Considerations..............................................2 • 1 Material Properties • 2 Thermal Properties • 3 Impact Resistance • 4 Acoustic Performance • 5 Fire Performance • 6 Durability • 7 Cavity • 8 Vapour Permeable Sarking • 9 Weepholes 2 Installation & Fixing...............................................4 • 1 Panel Fixing • 2 Framing 3 Corners, Joints, Junctions.......................................6 • 1 Internal & External Corners • 2 Relief Joints • 3 Control Joints • 4 Junctions 4 Construction Detail................................................9 • 1 Slab & Floor • 2 Termites • 3 Windows • 4 Decorative Mouldings • 5 Doors • 6 Parapets • 7 Wall to Roof • 8 Soffit & Eaves 8.6 Health and Safety As with all cement based composite products, they contain crystalline silica. Breathing in fine silica dust is hazardous and may result in bronchitis, silicosis (lung fibrosis) and lung cancer. Do not breathe dust, always contain dust during clean up and disposal i.e. place dust in a sealed bag. Safe working practice is to avoid contact with skin, eyes and lungs, e.g. full-length clothing including boots, P1 or P2 dust mask, and safety goggles to AS 1337. (Wash worn clothing regularly, each day). We recommend that you always seek advice for recommended handling, health and safety requirements for products or components by other suppliers and manufacturers. Consult your local Work Place Health and Safety Officer for specific advice. Also see Material Safety Data Sheets for specific products. P1 or P2 Dust Mask Safety Goggles AS 1337 Gloves 8.7 Components & Accessories QT®EcoSeries Panel – 50mm 900m(w) x 50mm(d) x 2250mm(L) 45˚ Mesh - 140-160gr/m2 alkali resistant woven fibreglass 150mm x 50 metres Polyurethane – Trigger Foam Can and Gun sold Separately Panel Fixing Nails - 75mm x 3.15 or 3.75mm ring shank nails, (Galvanised) Reveal Bead – uPVC edge moulds available 75mm, 60mm & 40mm Panel Fixing Screw - 10g x 75mm Class 3 Screws (AS3566) FullMesh - 140-160gr/m2 alkali resistant woven fibreglass 1000mm x 50 metres or 1200mm x 50m Clip Fixing Screw - 12g x 25mm Class 3 Screws (AS3566) Panel Boot – Consist of 2 parts Reveal Bead and a J-Bead QT®Buttons Ridged plastic circular washer Corner Mesh - heavy duty alkali resistant woven fibreglass 75mm x 75mm x 2.5metres (Pre-Folded) Clip and Channel Rondo Beta-Fix Clip and Rondo 16mm or 28mm Furring channel Weepholes – Ridged Plastic rectangular Notes to Users and Installers • 40mm EcoSeries sheet is no longer available. • Heavy items or items with mechanical movement such as external taps, gates and clothes lines should have fixing provision made behind the sheet or seek the advice from QT® Systems. • Do not use any steel (including Stainless) corner or expansion beads. Only alkali resistant fibreglass mesh or perforated PVC and aluminium profiles are acceptable. • After delivery to site, the shrink wrapped packs of QT® EcoSeries Wall Panels should have their wrapping sliced down each of the four corners, three sheets from the top. This will allow the panel to acclimatize prior to installation. Panels that get wet must be placed in a sunny well ventilated location and allowed to dry out prior to installation, (this will take several days of good sun and ventilation). Sheets that are wetted after installation should be allowed to dry prior to rendering. (This may take a week of fine weather). After drying make good all fixings and joints that may have been compromised. • QT® EcoSeries Wall Panel is a cement based material and therefore any water run-off from the panel or cement render may be alkaline and will damage anodising. The builder must cover all anodised products (including windows) prior to panel installation and this covering should remain intact until render and coating system is completed. • The specified curing time must be allowed between render coats, usually 2-3 days but preferably 7 days, especially on pumped render as it is wetter during application. - If in doubt, always ask your local representative for advice. 8.8 8.9 General Warranty New Product 15 year Warranty. Disclaimer QT Systems provides the information in this manual in good faith and to the best of its knowledge the information is correct and covers most situations where its products may be used. However, it is acknowledged that not every possible application of QT® products could be covered within this manual therefore specific design and detailing, must be undertaken by the designer. The Specifier, Architect, Designer and Engineer for the project are responsible to ensure that the information and details in this manual are suitable for any intended application or specific design. • Uneven sheet faces must be rasped or ground to feather edges regardless of the cause of the unevenness. Alternatively a patch render can be used to fill the low points, ensuring the edges are feathered and the curing times are observed. - Screws used in the CCA battens must be a minimum class 4 galvanised or stainless steel. - The installer must have a copy of the QT® EcoSeries Wall Panel technical manual on site at all times during installation. This warranty cover limits any cost or liability arising from the supply of defective Conpolcrete® products, excluding third party manufactured accessories and components. Liability is limited to replacement and or repair of any defect solely attributable to defective Conpolcrete® manufactured products that do not meet the manufacturers standards. No liability is assumed or implied for project supervision or defects caused by improper installation of the system. • During installation, the QT® EcoSeries Wall Panels must be hard butted for the glue to function effectively. Bond all horizontal and vertical joints with polyurethane foam adhesive, moments prior to hard butting the panels. • The fixing of down pipe’s brackets and other lightweight fittings such as house numbers, can be done with metal Ram set Wallm ates™, other lightweight objects such as light fittings and security cameras use Ram set Hollow Wall Anchors™ or Ram set Toggles™. Document Number: QTCI-ESAS-001 Version: 7 Date: 01/06/10 20 QTSystems 1