PowerPoint: Getting Started
This guide helps students learn how to create an engaging PowerPoint presentation about themselves over five class days. It covers essential topics like adding slides, titles, pictures, and text, as well as creating professional backgrounds and layouts. Students will learn to incorporate transitions, custom animations, and formatting techniques to enhance their presentations. Organized tips for saving and printing files are provided to ensure a smooth experience. Adhering to these guidelines will elevate students' projects and improve their public speaking skills.

PowerPoint: Getting Started
E N D
Presentation Transcript
PowerPoint: Getting Started • Students will create a PowerPoint all about themselves. Take a look at the class folder at www.scottbunin.com to see the rubric for this project. The project should take about 5 class days.
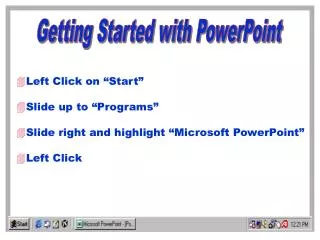
Adding Slides • A new PowerPoint presentation will start with a title slide alone. To add more slides, click the “New Slide” button towards the top left corner when on the “Home” tab. It is a good idea to add the total number of slides when you first start. If you click the bottom of the icon, there are different kinds of slides available.
Adding Titles and Pictures • The title should go towards the top of the slide. The title and text can be rearranged to make it look nicer. Keep the title short and in larger font. Be sure to stay on theme with both pictures and text. For a picture, click on “Insert” and “ClipArt”.
Adding Text • Each slide in this project will contain 5 sentences. This will clearly explain the student’s thoughts. The first sentence should explain the topic. The middle three sentences should give specific information or details. The final sentence should sum up the thoughts of the paragraphs.
Review • Getting Started • Adding Slides • Adding titles • Adding Pictures • Adding Text
Adding Backgrounds • Under the design tab there are options for creating an aesthetically pleasing background. Clicking on one of the designs will change the whole presentation to that theme. Right click on the options and select “Apply To Selected Slides”. This will allow the student to have a different style on each slide.
Professional Look • There are important ideas to remember to keep the presentation looking professional. Make sure slides don’t have too much or too little information. A slide is usually presented for a minute. 3 to 6 bullets or sentences is a good target. Think about the people the presentation will be given to.
Copy/Pasting/Arranging Slides • Some times a PowerPoint designer wants to change the order of the slides. On the left side of the screen, all the slides are shown in smaller windows. Left click on the slides and drag them where desired to move them. Right click on the slides to copy or cut them. Right Click the mouse between slides and select paste.
Hotkeys • Press <ctrl> + <c> to cut something. • Press <ctrl> + <v> to paste. • Press <ctrl> + <m> to create a new slide. • Press <alt> + <f> + <s> to save. • Press <alt> + <f4> to close the project.
Review • Adding Backgrounds • Professional Look • Copy/Pasting/Arranging Slides • Hotkeys
Transitions • Transitions are a graphic that will load each slide in a specific way. Click under the Animations tab to see options. Towards the top of the screen there are 18 regular transitions. There are many more available by clicking on the arrow boxes on the lower right side of the default transitions. Learn about the different options by trying them.
Contrast • The text and the pictures have to be different kinds of colors. If the colors are too similar, a person won’t be able to read the words. This can be fixed by making the text darker or lighter. Certain colors stand out better. For example, red is easy to see on green.
Custom Animations • Under the animations tab there is an option called custom animation. Click “Custom Animation” and a box will appear on the right side of the screen. Click the Add Effect button. Try select “motion path”, “draw custom path”, “curves”. This will let the designer have any graphic or text fly in any path.
Using Bold, Italics, Underline • Under the “Home” tab there are options to click: BIUabcS. Learning when to use these options takes practice. Use them to make ideas more clear, but be sure not to clutter the text. Be sure to select the text before pressing the button. Use hotkeys <ctrl> + <b>, <ctrl> + <i>, <ctrl> + <u>.
Review • Transitions • Contrast • Custom Animations • Using Bold, Italics, Underline
Saving • This project came with a default file name for each student. Click on the windows icon and click on Save As. Try to save it with words that you will recognize such as your name and the name of the project. Always ask for help if there is a problem with saving.
Opening and Finding PowerPoint Files • Windows always stores Microsoft PowerPoint files with its own icon. It is a little orange folder with an orange graphic and/or a “P” on it. If you can’t find a previously saved file, try looking on the desktop or in the “My Documents” folder. If a file can not be found there is no way to recover the original data.
Printing Files • There are different options for printing PowerPoint. Be careful when choosing the default because it will print each slide on a whole page. Click the Windows Icon in the upper left corner then click “Print”. Try configuring the print for “handouts” to save materials. Do not print this project since the teacher will grade it online.
Using Word Art • Under the “Insert” tab there is an option called “WordArt”. It will allow the designer to create fancy picture graphics from words. You can even take PowerPoint WordArt and copy/paste it to other documents. Microsoft Word has another set of art. This can then be copied to enhance a PowerPoint presentation.
Review • Saving • Opening and Finding PowerPoint Files • Printing Files • Using Word Art
Adding Sounds • Under the “Insert” tab there are options for adding sound. On the right side of the options, click the word “sound” and “sound from the clip organizer”. A clip-sound can be added the same way clipart is. Selecting “automatic” will have the sound play when the slide starts on the presentation. Selecting “When clicked” means the sound only plays when the presentation is running and the sound is clicked.
Starting and Presenting The Show • Under the “Slide Show” tab there are options to start the show to present the information to an audience. Click an option or use the <f5> key. When the show is playing, press the <esc> key to stop it. Slides can be advanced by using the space bar or by clicking a mouse. A wireless remote can let a user walk around and advance from a distance.
Using Timings For Auto Advance • PowerPoint can be set up to give the show automatically. This can be useful in advertising. It can also be timed carefully to advance in the time a person needs to spend on each topic. For example, if a student was assigned to make an oral presentation for 5 minutes they could create 10 slides that automatically advance every 30 seconds. This technique can help pace the speaking.
Techniques for Presenting • Do not copy and paste large amounts of text into a PowerPoint. Write down some simple ideas on a slide’s topics and then speak on the topic. Avoid reading. In general, people are nervous and can benefit from speaking more slowly. Practice the presentation as many times as possible before going before a group.