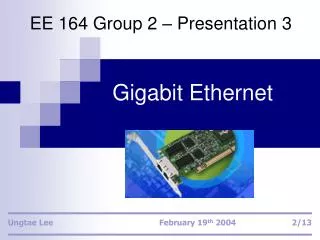
Gigabit Ethernet PMD
This report summarizes the project focused on designing, assembling, and testing the Physical Medium Dependent (PMD) layer of a Gigabit Ethernet optoelectronic link. Our main objectives were to achieve IEEE compliance, adhere to budget constraints, and optimize the design for cost-effectiveness. Key milestones, challenges faced during project planning, specification adherence, part selection, and assembly processes are documented. We analyzed Gantt charts to monitor progress and identified areas for improvement in time allocation. The optical link budget was computed to ensure the functionality of active components, leading to successful testing of the receiver board.

Gigabit Ethernet PMD
E N D
Presentation Transcript
Gigabit Ethernet PMD Opto-Link, Inc. – Progress Summary Vinh Nguyen, Clifton Kerr, Andrew Meyerson, Bryan Justice April 21, 2005
Project objective Design, assemble, and test the Physical Medium Dependent (PMD) layer of a Gbps Ethernet optoelectronic link
Defining Success • IEEE compliance is necessary at a minimum • Staying within our allowed budget • Assuming the specs are met, the most successful board will feature the least costly BOM.
Project Planning • To ensure that the project was completed on time, a Gantt chart was developed • The Gantt chart shows the scheduled tasks and the progress made on each task • The Gantt chart also shows whether work is proceeding on-schedule
Gantt Chart Revisions • An initial Gantt chart developed based on project objectives and deadlines • Actual progress rapidly deviated from initial Gantt chart • The initial Gantt chart revised based on rate of progress • The Gantt chart finalized after ~4 weeks
Hindsight • Time crunch towards end of semester • Should have allocated more time to testing • Should have worked harder/allocated less time to early project phases
Project Specifications • PMD should conform to the IEEE 802.3 specifications for type 1000BASE-SX (Short Wavelength Laser) • Key specs: Bit-Error rate < 1 x E9 • Proper operation with 7dB attached attenuation • Open and defined eye diagram (low noise) • Extinction ratio > 9dB • Eyesafe laser output (< 1mW)
Part Selection Process • Factors in part selection were: • Product specs (chosen parts must result in an IEEE compliant optical link budget) • Ability to contact and get responses from companies and vendors • Stocking and a sufficiently fast lead time for us to obtain the parts in time to build our prototype
VCSEL Selection • AOC HFE419x-541 • Suited to our specifications • Available within two weeks • Best pricing • Suitable Emcore sample VCSELs were also secured
PD Selection • AOC HFE3180-108 ROSA • Suited to specifications • Delivery within two weeks • Relatively inexpensive in all quantities • We would eventually find that incorporating the PD and TIA into one can completely eliminated crosstalk issues.
Optical Link Budget Description • An optical link budget was computed to ensure that all active components would function together • Data from the 4-Corners analysis of the VCSEL and the ROSA was used
The Design Process • Schematics based largely off of past designs, with some modification. • Filtering and decoupling a major focus, to make sure everything worked as planned. • PDs no longer widely available; ROSA replacing both the PD and the trans-impedance amp and simplifying circuit • Schematic design translated to PCB layout • In translation, emphasis on correctness first and spacing second • Transmission line considerations important
Board Construction • First design assembled with no problems. • 0603 components very small and hard to solder, in part due to smaller pads • Don’t underestimate how long it takes to put together a board
Board Construction (continued) • Second design construction was rushed after first failed to work • Communication mishap (and the depths of Hudson) left one person to assemble board • Soldering alone is no fun. Bring a solder buddy, as one person only has two hands.
Board Construction (continued) • Aggressive design construction – last ditch attempt to get a working board • Primarily done because debugging the then-broken common-cathode design was not efficient. Something had failed, but we couldn’t isolate it. • While soldering, the cause of our previous failures became clear. Corrected on this assembly. • Returned later to add a receiver to this design • Needed to do our most aggressive loop-back test. • The solder job was rushed once, and the receiver wasn’t perfect the first time around. Limiting amp had to be replaced.
Receiver Board Testing • First receiver circuit constructed worked from the start • No appreciable signal loss with 7dB optical attenuation • No errors detected with the BER tester in 5+ minutes of operation Receiver eye with no attenuation Receiver eye with 7dB optical attenuation
Receiver Board Testing (continued) • Second receiver circuit wasn’t so easy • Eye not clean on regular test (but loopback was no worse) • Error rate of about 10%, so signal was good enough for the equipment to get a lock but not much better. Bad receiver eye with 7dB optical attenuation
Receiver Board Testing (continued) • But was easily fixed • Limiting amp poorly attached and multiple pins bridged/ • BER of at worst 1e-10 once repaired Fixed receiver eye with 7dB optical attenuation
Transmitter Testing • First two transmitters didn’t work so well. • First, no optical output as the laser was in “upside down” • Fixed orientation, and got a very messy noise band with the traces of an eye inside. Insufficient signal? Transmitter PRBS7 Signal with no attenuation
Transmitter Testing (continued) • Troubleshooting accidentally led to part failures. • We blew two VCSELs and a handful of ferrite bead inductors. • Replaced parts, and then got the “magic probe” effect • Probing the output pins of the laser driver cleaned up the eye Signal output when using the probe across the output pins
Transmitter Testing (continued) • Third time was the charm • Aggressive design transmitter just worked. • Same eye as with the “magic probe” on the other design • At minimum currents, 1e-10 BER with 7dB optical attenuation • Tracked down the source of the “Magic Probe” while testing the good transmitter… • Only happened when probe touched laser driver output pins • Pushing down on the chip with excessive force produced the same result • Bad solder joint!
The Loop-Back Test • Once we got a working transmitter and receiver on one board, it just worked. • Lots of jitter on the eye, but lots on the clock too • Connection seems to be getting less reliable with time at the splitter • Did not effect bit error rate measurements • After 15 minutes of continuous testing, still no errors and a BER of 0 • Eye totally disappears when optical cable is removed, so entirely a product of transmitted light and not electrical cross-talk.
The Loop-Back Test A good, clean eye with a tiny bit of clock-induced trigger jitter
Preliminary Budgeting (estimation) • AOC VCSEL: $14.50 (2) • AOC ROSA: $10.00 (2) • Two board fabs: $70.00 • Maxim driver and limiting amp, Digikey passives, and Murata inductors, plus allowances for shipping costs: $80.00 • Total projected budget: • Approximately $210.00
Estimated Budget • Realized that our preliminary budget was very off (i.e. didn’t even add up right) • More itemized for actual parts we intended to use as well as quantities of parts • Based on previous shipping costs estimated total costs for entire project • Still under budget, although not by much ($327.85 for the project)
Final Budget • Determined that a second board fabrication was unnecessary since first design was adequate • Includes total amounts paid for parts, shipping • Total of $268.85 for the project, which is almost $100 below budget
Bill of Materials • Total cost of mass producing the board was found to be $23.93