Download

1 / 66
660 likes | 832 Vues
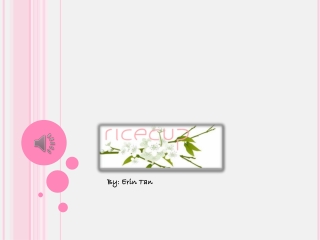
Contents. Fiesta chandelier earrings By Erin Siegel Jewelry - Erin Siegel Make your chandelier earrings sparkly or cool. Make them subtle or flamboyant, but most especially, make your Chandelier Earrings elegant!. 5. Features. Cherry Dangling Earring Jewelry Making Tutorial By XQDesigns.

E N D
Contents Fiesta chandelier earrings By Erin Siegel Jewelry - Erin Siegel Make your chandelier earrings sparkly or cool. Make them subtle or flamboyant, but most especially, make your Chandelier Earrings elegant! 5 Features Cherry Dangling Earring Jewelry Making Tutorial By XQDesigns 12 Gothic Chandelier Earrings Wire & Jewelry Making Tutorial By Sky Aldovino 25 38 45 Bead Cap Chandelier Earrings By Art Platter Chandelier Earrings Tutorial By Happy Hour Projects - Adrianne Surian BLOG: WWW.HANDMADE-JEWELRY-CLUB.COM MEMBERSHIP: WWW.DIYBEADINGCLUB.COM DIY BEADING MAGAZINE ISSUE 16
56 Featured Article from Handmade Jewelry Club 59 DIY Earrings and Dangles Tutorials Featured at Handmade Jewelry Club Chandelier Earrings Tutorial By ChrissyGemmil Jewelry – ChrissyGemmil BLOG: WWW.HANDMADE-JEWELRY-CLUB.COM MEMBERSHIP: WWW.DIYBEADINGCLUB.COM DIY BEADING MAGAZINE ISSUE 16
Editor’s Note Welcome to DIY Beading Magazine! Chandelier Earrings are also called Drop Earrings or Dangling Earrings. Similar to a chandelier lighting fixture, chandelier earrings sparkle with crystals that are hanging or suspended from an earring frame that is usually teardrop or triangular in shape. But nowadays, chandelier earrings come in a variety of shapes. They are now created with beads, gems and various types of stones and materials. In this issue of DIY Beading Magazine we’ll showcase to you different styles of chandeliers earrings and you’ll learn how to make them. Make your chandelier earrings sparkly or cool. Make them simple or flamboyant, but most especially, make your Chandelier Earrings elegant! Blog: www.handmade-jewelry-club.comLessons: www.diylessons.orgMembership: www.diybeadingclub.com Jane Chew Join The Fun! BLOG: WWW.HANDMADE-JEWELRY-CLUB.COMMEMBERSHIP: WWW.DIYBEADINGCLUB.COMDIY BEADING MAGAZINE ISSUE 16
FIESTA CHANDELIER EARRINGS By Erin Siegel BLOG: WWW.HANDMADE-JEWELRY-CLUB.COM MEMBERSHIP: WWW.DIYBEADINGCLUB.COM DIY BEADING MAGAZINE ISSUE 16
These red hot earrings are the perfect accessory for sizzling Summer style! Ingredients: 22 glass 6mm rounds 2 hammered brass 33mm metal rings 2 brass eye pins 2 brass ear wires 56” of walnut 4ply Irish waxed linen cord Tools: Round nose pliers Chain nose pliers Scissors Instructions: Step 1:Convert the headpins into eyepins by trimming off the heads and creating a loop at one end as shown. BLOG: WWW.HANDMADE-JEWELRY-CLUB.COM MEMBERSHIP: WWW.DIYBEADINGCLUB.COM DIY BEADING MAGAZINE ISSUE 16
Step 2:String one 6mm glass round; form a simple loop. Set aside. Cut the cord in half. Set one aside. Step 3:Make a 3” fold at one end of the cord. Form a larks head knot around the brass ring. BLOG: WWW.HANDMADE-JEWELRY-CLUB.COM MEMBERSHIP: WWW.DIYBEADINGCLUB.COM DIY BEADING MAGAZINE ISSUE 16
Step 4:Using the long end of cord, form two half-hitch knots around the ring. Step 5:Use the short end of cord to string one 6mm glass bead and form an overhand knot ¾” from the previous larks head knot. Trim end to 1/8”.Using the long end of cord, string a bead and form an overhand knot ½” from the last half-hitch knot. Trim end. Repeat steps 3-5 to complete another beaded section next to the first. BLOG: WWW.HANDMADE-JEWELRY-CLUB.COM MEMBERSHIP: WWW.DIYBEADINGCLUB.COM DIY BEADING MAGAZINE ISSUE 16
Step 6:Repeat step 3. Use the short end to string a bead and form an overhand knot ¾” from the larks head knot. Use the long end to string a bead and form an overhand knot 1 ¼” from the larks head knot. Trim ends. Step 7:Repeat step 3. Use the short end to string a bead and form an overhand knot ½” from the previous larks head knot. Use the long end to form two half-hitch knots around the brass ring. String a bead and form an overhand knot ¾” from the last half-hitch knot. Trim ends. Repeat entire step to complete another beaded section next to the last one. BLOG: WWW.HANDMADE-JEWELRY-CLUB.COM MEMBERSHIP: WWW.DIYBEADINGCLUB.COM DIY BEADING MAGAZINE ISSUE 16
Step 8: Attach the bead link made in step one to the brass ring. Attach an ear wire to the bead link. Step 9:Repeat steps 1-7 to complete the second earring. BLOG: WWW.HANDMADE-JEWELRY-CLUB.COM MEMBERSHIP: WWW.DIYBEADINGCLUB.COM DIY BEADING MAGAZINE ISSUE 16
About the Author Erin Siegel is a jewelry designer, author and teacher living in Salem, Massachusetts with her husband and daughter. She loves to create fun, fashion-forward jewelry for everyday wear. Erin especially enjoys creating knotted jewelry. She often incorporates various kinds of fibers in her work such as waxed linen cord, leather, silk knotting cord and ribbons. Erin is co-author of the book, Bohemian-Inspired Jewelry: 50 Designs Using Leather, Ribbon and Cords published by Interweave 2012. Her jewelry designs have been featured in beading magazines including Jewelry Stringing magazine and Belle Armoire Jewelry. Erin also designs and writes jewelry tutorials for Ornamentea.com. She teaches jewelry-making in person as well. Erin has taught classes and workshops at national events and retreats such as Bead Fest, artBLISS, and Bead Cruise. Visit her blog/website at www.erinsiegel.com. Facebook: www.facebook.com/erin.siegel1 Pinterest: www.pinterest.com/erinsiegel10 Erin Siegel BLOG: WWW.HANDMADE-JEWELRY-CLUB.COM MEMBERSHIP: WWW.DIYBEADINGCLUB.COM DIY BEADING MAGAZINE ISSUE 16
Cherry Dangling Earring Jewelry Making tutorial By XQDesigns BLOG: WWW.HANDMADE-JEWELRY-CLUB.COM MEMBERSHIP: WWW.DIYBEADINGCLUB.COM DIY BEADING MAGAZINE ISSUE 16
Descriptions: • Are you a fruit lover? Here's an accessory that will surely make you look fresh and sweet like a fruit cherry! • This is a fun wire jewellery project for beginners. Learn how to make a Cherry Dangling Earrings by making loops and curves. Simple the steps may seem but the techniques you'll learn will be useful and helpful in creating wire jewellery in the future. • Materials and Tools: • 2 x 14cm (5.5 inches) 0.8mm (20ga) wire 2 Ear wires 6 round bead 1 cm in diameter 8 Jump rings 1cm in diameter 2 T-pin/head pin • Wire cutter Round nose pliers Ruler or Tape measure BLOG: WWW.HANDMADE-JEWELRY-CLUB.COM MEMBERSHIP: WWW.DIYBEADINGCLUB.COM DIY BEADING MAGAZINE ISSUE 16
Step By Step Guide • Step 1: Preparing the wire • Cut 1 x 14cm (5.5 inches) 0.8mm (20ga) wire. Step 2: 1st Loop With your round nose pliers grip the wire at the center. Bend both wires crossing each other to make a loop. BLOG: WWW.HANDMADE-JEWELRY-CLUB.COM MEMBERSHIP: WWW.DIYBEADINGCLUB.COM DIY BEADING MAGAZINE ISSUE 16
Step 3: Size of the loop Aim to approximately have the loop at 0.5cm in diameter. Step 4: 2nd Loop Holding the wire like a "V" shape with a loop at the bottom, continue to create a 2nd loop with the left wire like shown in this picture. To make the 2nd loop, wrap the left wire onto the round nose pliers by bring the extended wire in clockwise direction. BLOG: WWW.HANDMADE-JEWELRY-CLUB.COM MEMBERSHIP: WWW.DIYBEADINGCLUB.COM DIY BEADING MAGAZINE ISSUE 16
You have formed 2 loops opposite each other. Step 5: Wrapping the bead With the extended wire from the 2nd loop, make a bend at the end of the wire. BLOG: WWW.HANDMADE-JEWELRY-CLUB.COM MEMBERSHIP: WWW.DIYBEADINGCLUB.COM DIY BEADING MAGAZINE ISSUE 16
Slide in your 1cm round bead at the bent end. BLOG: WWW.HANDMADE-JEWELRY-CLUB.COM MEMBERSHIP: WWW.DIYBEADINGCLUB.COM DIY BEADING MAGAZINE ISSUE 16
Using your thumb and point finger, carefully wrap the wire onto the bead going inward or counter-clockwise direction. Step 6: 3rd Loop Make a 3rd loop with the right wire. To make the 3rd loop, wrap the wire onto the round nose pliers in counter-clockwise direction. BLOG: WWW.HANDMADE-JEWELRY-CLUB.COM MEMBERSHIP: WWW.DIYBEADINGCLUB.COM DIY BEADING MAGAZINE ISSUE 16
After making the loop this is how it should look like. Step 7: Wrapping the bead Repeat Step 5 to wrap the bead, but this time wrapping in clockwise direction. BLOG: WWW.HANDMADE-JEWELRY-CLUB.COM MEMBERSHIP: WWW.DIYBEADINGCLUB.COM DIY BEADING MAGAZINE ISSUE 16
Step 8: Attaching jump rings Open up 2 jump ring and hook a jump ring into each loop. BLOG: WWW.HANDMADE-JEWELRY-CLUB.COM MEMBERSHIP: WWW.DIYBEADINGCLUB.COM DIY BEADING MAGAZINE ISSUE 16
Step 9: Attaching ear wire Open up a 3rd jump ring and hook the 2 jump rings, together with your ear wire. Step 10: Making a dangle Pick up a head pin or T-pin and slide in 1 round bead. BLOG: WWW.HANDMADE-JEWELRY-CLUB.COM MEMBERSHIP: WWW.DIYBEADINGCLUB.COM DIY BEADING MAGAZINE ISSUE 16
Bend the wire 90 degrees like shown in this picture. Make a loop with your round nose pliers. BLOG: WWW.HANDMADE-JEWELRY-CLUB.COM MEMBERSHIP: WWW.DIYBEADINGCLUB.COM DIY BEADING MAGAZINE ISSUE 16
Open up one more jump ring and attach into the loop. Then attach the jump ring to the very 1st loop you created on Step 2. BLOG: WWW.HANDMADE-JEWELRY-CLUB.COM MEMBERSHIP: WWW.DIYBEADINGCLUB.COM DIY BEADING MAGAZINE ISSUE 16
About the Author I like to give a brief introduction about myself - the founder of the online jewelry making magazine - www.handmade-jewelry-club.com. My name is Jane Chew a.k.a. XQDesigns. I started XQDesigns few years back and it has became my creative outlet which I can’t get from my day job at that time. I founded Handmade-Jewelry-Club in 2008 with the aims to gather and share jewelry making tips and tutorials that I discovered from the internet. I have subsequently published my own tutorials and lessons and found lots of fun in developing tutorials and sharing my knowledge. In 2010, I started a directory website called DIY Lessons. This website allows readers to view videos I found from the web apart from sharing my own tutorials where it allows my buyers to download free and paid tutorials instantly once they complete the purchase transaction. I am currently working with jewelry artists and jointly developing tutorials with them based on their designs. To make our tutorials more affordable and exclusive for loyal customers, I started DIY Beading Club in 2011 and offer monthly subscription plan to our fans. I am getting very excited about all these opportunities and would really like to work with more artists to turn their knowledge into lessons through this club. Year 2013 is another exciting year for me! I have started DIY Beading Magazine that is published through Newsstand at iPad. I will continue to work with many great artists to bring you more jewelry making tips, lessons and inspiration to all of you. Do join me at: Blog: www.handmade-jewelry-club.comLessons: www.diylessons.orgMembership: www.diybeadingclub.com Jane Chew BLOG: WWW.HANDMADE-JEWELRY-CLUB.COM MEMBERSHIP: WWW.DIYBEADINGCLUB.COM DIY BEADING MAGAZINE ISSUE 16
GOTHIC CHANDELIER EARRINGSWIRE & JEWELRY MAKING TUTORIAL SERIES I44 By Sky Aldovino BLOG: WWW.HANDMADE-JEWELRY-CLUB.COM MEMBERSHIP: WWW.DIYBEADINGCLUB.COM DIY BEADING MAGAZINE ISSUE 16
Introduction Learn to create an all-black theme wire chandelier earrings. This tutorial is created for DIY Beading Magazine @iPad.With the tutorial, you'll learn wirework techniques such as creating loops with a wigjig tool, wire wrapping and creating dangles. You'll create components that when constructed can turn into a chandelier earrings. Black is mysterious, black is elegant. Both mysterious and elegant is a perfect description for a Gothic Chandelier Earrings! The tutorial is catered for beginners or anyone who loves to learn this basic wirework technique. It has in-depth instructions and ultra-clear, close-up photos at each step. Additionally, you can ask me question you have on the tutorial. No more getting stuck and frustrated on a confusing or just plain inaccurate pattern. All materials used are suggested colors only. You can click on the materials list to see where to purchase the supplies. If you followed this tutorial and then sell the accessory or jewelry, please give credit to the author or DIY Beading Club.com BLOG: WWW.HANDMADE-JEWELRY-CLUB.COM MEMBERSHIP: WWW.DIYBEADINGCLUB.COM DIY BEADING MAGAZINE ISSUE 16
Materials Needed 20ga wire 28ga wire 12mm pearls 3mm pearls 4mm pearls 6mm pearls Tools Needed Flat nose pliers Round nose pliers Wire cutter Centaur Wigjig tool and pegs • Step By Step Guide • Step 1: • Insert your pegs in your Centaur wigjig tool, forming a U shape or a half circle. BLOG: WWW.HANDMADE-JEWELRY-CLUB.COM MEMBERSHIP: WWW.DIYBEADINGCLUB.COM DIY BEADING MAGAZINE ISSUE 16
Looking closely on a diagram, this is how you should position your pegs. Step 2: Cut 7 inches 20ga wire. Leaving at least 2 inches tail, position the wire diagonally on the 1st peg on the left. BLOG: WWW.HANDMADE-JEWELRY-CLUB.COM MEMBERSHIP: WWW.DIYBEADINGCLUB.COM DIY BEADING MAGAZINE ISSUE 16
Hold the extended wire and in clockwise direction, wrap it once around the 1st peg, Then continue onto the 2nd peg, 3rd peg and 4th peg, and so on and so forth, until you wrap the wire onto all the pegs. BLOG: WWW.HANDMADE-JEWELRY-CLUB.COM MEMBERSHIP: WWW.DIYBEADINGCLUB.COM DIY BEADING MAGAZINE ISSUE 16
Step 3: When you're finished wrapping the wire, pull it out from the wigjig. Press the loops with your thumb or with your flat nose pliers to flatten the wire. Cut off excess wire from the 1st and last loop. Step 4: Repeat from Step 1 and create another one,but adjust the 2nd piece and form a triangle. BLOG: WWW.HANDMADE-JEWELRY-CLUB.COM MEMBERSHIP: WWW.DIYBEADINGCLUB.COM DIY BEADING MAGAZINE ISSUE 16
Step 5: Cut 2-3 inches of 28ga wire. Connect 2 pieces on the side loops shown in arrow by wrapping the 28ga wire at least 3 times.Cut off excess wire. Repeat the previous step and do the same for the other side shown on arrow. You now have your ear frame. BLOG: WWW.HANDMADE-JEWELRY-CLUB.COM MEMBERSHIP: WWW.DIYBEADINGCLUB.COM DIY BEADING MAGAZINE ISSUE 16
Step 6: Cut another 2-3 inches 28ga wire and wrap onto the 1st loop of the lower ear frame. Wrap the wire onto the inner side of the 1st loop. Insert your 12mm pearl. Secure the pearl by wrapping the other end onto the inner side of the last loop from the 1st ear frame. BLOG: WWW.HANDMADE-JEWELRY-CLUB.COM MEMBERSHIP: WWW.DIYBEADINGCLUB.COM DIY BEADING MAGAZINE ISSUE 16
Cut off excess wire. Step 7: Prepare the following materials: 2 inches 20ga wire 3pcs 0.3mm pearls 2pcs 0.4mm pearls 0.5mm pearls BLOG: WWW.HANDMADE-JEWELRY-CLUB.COM MEMBERSHIP: WWW.DIYBEADINGCLUB.COM DIY BEADING MAGAZINE ISSUE 16
Make a loop at one end of the wire. Slide in the pearls from smallest to biggest and secure by creating another loop at the other end. You now have your dangles. Create 2 more dangles. Step 8: Bring up your ear frame and then attach your dangles. Repeat from Step 1 and create a pair. Continue with the all-black theme. Attach black ear wires and you're done! BLOG: WWW.HANDMADE-JEWELRY-CLUB.COM MEMBERSHIP: WWW.DIYBEADINGCLUB.COM DIY BEADING MAGAZINE ISSUE 16
You can also create a variation. Attach only 1 dangle or maybe make the dangles longer. BLOG: WWW.HANDMADE-JEWELRY-CLUB.COM MEMBERSHIP: WWW.DIYBEADINGCLUB.COM DIY BEADING MAGAZINE ISSUE 16
About the Author I consider myself a late bloomer when it comes to crafting. I’m a self-taught jewelry maker. Jewelry making wasn’t really a hobby of mine, but unforeseen events lead me to learn jewellery making. My family put up a craft store where we sell cross stitch, beads and all sorts of crafting materials. I fell in love with the beads and tried to create accessories only for myself. Clients liked the pieces and I started customizing handmade jewelleries. The craft store was a success for 6 years, but like any other small businesses we had to close it down and I was confined to staying at home. While at home I had all the time using the internet and now working as a home-based jewelry designer Do join me at Sky Aldovino BLOG: WWW.HANDMADE-JEWELRY-CLUB.COM MEMBERSHIP: WWW.DIYBEADINGCLUB.COM DIY BEADING MAGAZINE ISSUE 16
Artistic Wire Deluxe Jig Kit Wigjig Jewelry Making Tool The Deluxe Thing-a-ma-Jig is ideal for forming elaborate loops for jewelry components, including necklace links, ornaments, pins – you’re limited only by your imagination. Adjust the pegs on the jig base to create patterns of your own or follow the pattern-sheet included with the jig. Replicate designs consistently time and time again. The Deluxe Thing-a-ma-Jig has a sturdy 4-Inch by 5-Inch (10 by 13 centimeter) aluminum base with aluminum pegs, this sturdy aluminum construction reduces deformities from prolonged use. The Deluxe Thing-a-ma-Jig is suitable for use with all gauges of Artistic Wire
CHANDELIER EARRINGS TUTORIAL Adrianne Surian
These chandelier earrings are simple to make and lightweight to wear, and give some sparkle to any outfit using common beading supplies. What you will need: BLOG: WWW.HANDMADE-JEWELRY-CLUB.COM MEMBERSHIP: WWW.DIYBEADINGCLUB.COM DIY BEADING MAGAZINE ISSUE 16
Beads you love. These are a 6mm sized bicone crystal bead. You can create other looks with beads of different shapes, sizes, or colors. • 18 gauge wire – you only need about 6 inches for this project. • 18 inches (roughly 45 cm) of 1mm chain – this could be from a necklace (just remove the clasp) or it can be bulk chain. • Jump rings and earring wires (I needed six 4mm jump rings for these) • Round-nosed pliers and wire cutters • First, make your bead bar from your wire. Using the tip of your round-nosed pliers, form a small loop at the end of your wire. BLOG: WWW.HANDMADE-JEWELRY-CLUB.COM MEMBERSHIP: WWW.DIYBEADINGCLUB.COM DIY BEADING MAGAZINE ISSUE 16
Add your beads and make a loop at the opposite end. You may need to trim your wire down slightly to fit the beads, depending on exactly what size beads you’re using. Make two bars, one for each earring. Now, trim down your chain. I cut four lengths 2-3/4 inches (about 7cm), and two that were 3-1/2 inches (about 9 cm). BLOG: WWW.HANDMADE-JEWELRY-CLUB.COM MEMBERSHIP: WWW.DIYBEADINGCLUB.COM DIY BEADING MAGAZINE ISSUE 16
Now, using a small jump ring, add 2 smaller lengths and one longer length chain to the end of one bead bar. Then, attach the opposite ends to the other loop on the bead bar. Your configuration should look like this: Repeat the process for the other earring, and you now have a simple pair of earrings that make a statement! BLOG: WWW.HANDMADE-JEWELRY-CLUB.COM MEMBERSHIP: WWW.DIYBEADINGCLUB.COM DIY BEADING MAGAZINE ISSUE 16
Finally, add an earring wire to the center of each of the top chains. My earring wire loop wouldn’t quite fit through the small chain I used, so I attached it with a jump ring. If your earring wire fits easily through your chain, a jump ring isn’t necessary. BLOG: WWW.HANDMADE-JEWELRY-CLUB.COM MEMBERSHIP: WWW.DIYBEADINGCLUB.COM DIY BEADING MAGAZINE ISSUE 16
About the Author Adrianne Surian is a wife and mom of 2 from Michigan. She has been creating jewelry since the age of 8. What started as a passion for friendship bracelets and repurposing items to become accessories has grown into a love of all type of jewelry. Even more than designing, she enjoys showing others how to make their own jewelry at her blog, Happy Hour Projects. She focuses on sharing tutorials that are often inexpensive, suitable for beginners, explained in plain language with photos, and can be made in an hour or less. Adrianne Surian Links: Blog: http://happyhourprojects.com Facebook: https://www.facebook.com/happyhourprojects Twitter: http://www.twitter.com/HappyHrProjects Pinterest: http://www.pinterest.com/HappyHrProjects BLOG: WWW.HANDMADE-JEWELRY-CLUB.COM MEMBERSHIP: WWW.DIYBEADINGCLUB.COM DIY BEADING MAGAZINE ISSUE 16
BEAD CAP CHANDELIER EARRINGS By Art Platter BLOG: WWW.HANDMADE-JEWELRY-CLUB.COM MEMBERSHIP: WWW.DIYBEADINGCLUB.COM DIY BEADING MAGAZINE ISSUE 16
A pair of bead cap chandelier earrings are made here using bead caps, tear drop beads and jump rings. This technique can also be used to make earrings using chandelier earring findings. Supplies Needed: • Tools Needed: • Flat Nose Pliers BLOG: WWW.HANDMADE-JEWELRY-CLUB.COM MEMBERSHIP: WWW.DIYBEADINGCLUB.COM DIY BEADING MAGAZINE ISSUE 16
How to make Chandelier earrings: Step 1: Take a bead carp suitable for the project and open it up using flat nose pliers. Step 2: Connect a tear drop acrylic bead using a jump ring. Use flat nose pliers to open and close the jump rings. BLOG: WWW.HANDMADE-JEWELRY-CLUB.COM MEMBERSHIP: WWW.DIYBEADINGCLUB.COM DIY BEADING MAGAZINE ISSUE 16
Step 3: Similarly connect two more such tear drop beads to the arms of the bead can as shown here. Step 4: And finally, insert a fish hook ear wire at the top. BLOG: WWW.HANDMADE-JEWELRY-CLUB.COM MEMBERSHIP: WWW.DIYBEADINGCLUB.COM DIY BEADING MAGAZINE ISSUE 16
Completed earring… Step 5: Repeat steps 1 to 4 to make this pretty pair of chandelier earrings. BLOG: WWW.HANDMADE-JEWELRY-CLUB.COM MEMBERSHIP: WWW.DIYBEADINGCLUB.COM DIY BEADING MAGAZINE ISSUE 16
"Artplatter.com was started in 2010 to share my love for arts and crafts. Being an IT consultant by profession, this website was just a hobby which later evolved to something much more than that. The website features weekly DIY projects. These step-by-step tutorial cover a wide variety of crafts such as quilling, origami, clay jewelry and handmade greeting cards. The website also features tutorials on projects for festive occasions such as elf hats for Christmas, Kundandiyas for Diwali, Buntings for Halloween and so on. The patronage shown by readers of our blog makes each project more interesting than the previous one. The hope is to make artplatter.com a single stop for art and craft lovers." BLOG: WWW.HANDMADE-JEWELRY-CLUB.COM MEMBERSHIP: WWW.DIYBEADINGCLUB.COM DIY BEADING MAGAZINE ISSUE 16