Organizing Data with HTML: Tables, Forms, and Lists
Learn how to use tables, forms, and lists to organize and present data effectively on web pages. Tables for structuring content, forms for user interaction, and lists for content organization.

Organizing Data with HTML: Tables, Forms, and Lists
E N D
Presentation Transcript
Chapter 3: HTML Tables, Forms, and Lists • 3.1 The table Element • 3.2 The form Element • 3.3 Creating Pull-Down Lists • 3.4 Combining Tables and Forms • 3.5 E-Mailing the Contents of Forms • 3.6 The list Elements • 3.7 Using Frames
Purpose of this Material • Tables, forms, and lists provide a way to organize data on a Web page. • Forms provide the user interface that allows JavaScript to work. • Lists provide a default format for organizing content, but they don’t interact directly with JavaScript. • This course is about using JavaScript/PHP; HTML is “just” the interface.
3.1: The table Element • Tables help to organize content and provide more control over how a web page uses its space. • Tables often contain forms. • The basic table syntax includes elements for defining rows and columns. <table> <tr> <td> … </td>{as many columns as you need…} … </tr> {as many rows as you need…} … </table>
Document 3.1 (radonTable.htm) <html><head><title>Radon Table</title></head><body><h1>Results of radon testing</h1><p>The table below shows some radon levels measured in residences.<br /> For values greater than or equal to 4 pCi/L, action should be taken<br /> to reduce the concentration of radon gas. For values greater than or<br />equal to 3 pCi/L, retesting is recommended.</p><table><tr bgcolor="silver"><td>Location</td><td>Value, pCi/L</td><td>Comments</td></tr> Radon Testing
Radon Testing Document 3.1 (concluded) <td>ID's house, 2nd floor bedroom</td><td>3.7</td><td bgcolor="yellow">Should be retested.</td></tr><tr><td> FJ's house, 1st floor living room</td><td> 0.9</td><td bgcolor="lightgreen">No action required.</td></tr><tr><td> MB's house, 2nd floor bedroom</td><td>2.9</td><td bgcolor="lightgreen">No action required.</td></tr></table></body></html>
More table Elements <table> <caption> … </caption> <tr> <!-- Use of th in place of td is optional. --> <th> … </th> … </tr> <tr> <td> … </td> … </tr> … </table>
Merging Rowsand Columns Document 3.2 (cloudType.htm) <html><head><title>Cloud Type Chart</title></head><body><table border="2"><caption>Cloud Type Chart</caption><tr><th align="center">Altitude</th> <th colspan="2">Cloud Name</th></tr><tr> <td align="center" rowspan="3" >High</td><td colspan="2">Cirrus</td> </tr><tr> <td colspan="2">Cirrocumulus</td> </tr><tr> <td colspan="2">Cirrostratus</td></tr> </tr><tr><td align="center" rowspan="2">Middle</td><td colspan="2">Altocumulus</td></tr><tr><td colspan="2">Altostratus</td></tr></tr>
Merging Rowsand Columns Document 3.2 (concluded) <tr><td align="center" rowspan="5"> Low</td><td>Cumulus</td> <td>nonprecipitating</td></tr><tr><td>Altocumulus</td> <td>nonprecipitating</td></tr> <tr> <td>Stratocumulus</td> <td>nonprecipitating</td></tr><tr><td>Cumulonimbus</td> <td align="center" bgcolor="silver">precipitating</td></tr><tr><td>Nimbostratus</td> <td align="center" bgcolor="silver">precipitating</td></tr></tr></table></body></html>
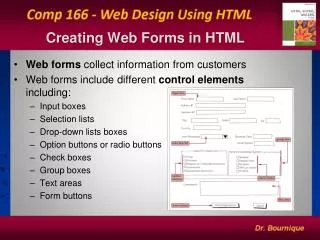
The form Element • HTML forms provide the online equivalent of a paper form that can be filled in by the user. • Contents of a form can be sent back (indirectly) to the creator of the form or to a server application. • Values entered in form fields can serve as input to JavaScript calculations • The results of JavaScript calculations can change the values of form fields.
Attributes of Forms • Forms use the <form> … </form> tag. • The action attribute allows contents of forms to be sent to an email address. • The enctype="text/plain" and method="post" attributes allow data to be transmitted in an easily readable format. • Forms include one or more <input /> tags, each of which defines one form field.
The <input />Tag's Type Attribute "button" Provides a user-specified action when the "button" is clicked. "checkbox" Allows a user to select one or more value from a list provided. "hidden" Define text fields that are available to JavaScript, but are invisible in the form. "password" Allows entry of text data, but displays asterisks in the form field. "radio" Allows only one choice from a list of options. "reset" Returns all form fields to their original values. "submit" Sends contents of form (via an e-mail or to a server). "text" Accepts entry of text,including digits that should be interpreted as a number..
Other <input />Attributes checked Default selection for radio and checkbox types. maxlength="…" Maximum number of displayed characters. name="…" An identifier for the field. readonly A value assigned in the HTML code cannot be changed by the user. size="…" Maximum number of characters that can be entered (not the same thing as maxlength.) type="…" (See previous page.) value="…" A text value initially assigned to a field.
UsingForms Document 3.4 (location.htm, partial) <form>Please enter your last name: <input type="text" name="last_name" size="20" maxlength="20" /> <br />Please enter your latitude:<input type="text" name="lat" value="40" size="7" maxlength="7" /> N <input type="radio" name="NS" value="N" checked /> or S <input type="radio" name="NS" value="S" /><br />Please enter your longitude:<input type="text" name="lon" value="75" size="8" maxlength="8" /> E <input type="radio" name="EW" value="E" /> or W<input type="radio" name="EW" value="W" checked /><br />Please enter your elevation:<input type="text" name="elevation" size="8" maxlength="8"/> meters<br />Please indicate the seasons during which your site reports data:<br />Winter: <input type="checkbox" name="seasons" value="Winter" />Spring: <input type="checkbox" name="seasons" value="Spring" />Summer: <input type="checkbox" name="seasons" value="Spring" />Fall: <input type="checkbox" name="seasons"value="Fall" /></form>
Output from Document 3.5 The user has selected April.
Document 3.5 (select.htm) <html><head><title>Pull-Down List</title></head><body>Select a month from this menu:<select name="testing"><option value="1" selected>January</option><option value="2">February</option><option value="3">March</option><option value="4">April</option><option value="5">May</option><option value="6">June</option><option value="7">July</option><option value="8">August</option><option value="9">September</option><option value="10">October</option><option value="11">November</option><option value="12">December</option></select></body></html> Pull-DownList
Document 3.6 (siteDefinition.htm, partial) <form><table border="2" cellpadding="5" cellspacing="2" align="center"><caption><font size="+2">Observation Site Descritions</font></caption><tr bgcolor="lightblue"><th>Site #</th><th>Site Name</th><th>Latitude</th><th>Longitude</td><th>Elevation</th></tr><tr bgcolor="palegreen"><td>Site 1</td><td><input type="text" name="Name1" size="10" maxlength="10" value="Name1" /></td><td><input type="text" name="Latitude1" size="10" maxlength="10" value="Latitude1" /></td><td><input type="text" name="Longitude1" size="10" maxlength="10" value="Longitude1" /></td><td><input type="text" name="Elevation1" size="10" maxlength="10" value="Elevation1" /></td></tr> Combining Tables and Forms
E-Mailing the Contents of Forms • Use the method and action attributes: <form method="post" action="mailto:my_mail@university.edu"> • This may not work on all computer systems. • Note that this doesn't allow the user of an HTML document to directly contact the host computer, but acts indirectly through an e-mail client. • The method="post" and enctype="text/plain" attributes deliver contents of all form fields in an easily readable format, embedded in the body of an e-mail. Output from method="get" is less easily readable.
Document 3.7 (location2.htm) <html><head><title>Location information</title></head><body bgcolor="ivory"><form method="post" action="mailto:my_mail@university.edu" enctype="text/plain"> Please enter your last name: <input type="text" name="last_name" size="20" maxlength="20" /><br/> Please enter your latitude:<input type="text" name="lat" size="7" maxlength="7" /> N <input type="radio" name="NS" value="N" /> or S <input type="radio" name="NS" value="S" /><br/> Please enter your longitude:<input type="text" name="lon" size="8" maxlength="8" /> E <input type="radio" name="EW" value="E"> or W <input type="radio" name="EW" value="W" /><br/> Please enter your elevation:<input type="text" name="elevation" size="8" maxlength="8" /> meters<br/><input type="submit" value="Click here to send your data." /></form></body></html>
Output from Document 3.7 Here is what appears in the body of an e-mail:: last_name=Brooks lat=40 NS=N lon=75 EW=W elevation=15
Document 3.8 (lists.htm) <html><head><title>Using HTML Lists</title></head><body>This page demonstrates the use of unordered, ordered, and definition lists.<ul><li> Use unordered lists for "bulleted" items.</li><li> Use ordered lists for numbered items. </li> <li> Use definition lists for lists of items to be defined. </li></ul>Here are three ways to organize content in an HTML document:<ol><li>Use a table. </li><li>Use a list. </li><li>Use <font face="courier"><pre> ... <pre></font> tags.</li></ol>This is a way to produce a neatly formatted glossary list.<dl><dt><strong>definition list</strong> (<font face="courier"><dl></font>)</dt><dd>Use this to display a list of glossary items and their definitions. </dd><dt><strong>ordered list</strong> (<font face="courier"><ol></font>) </dt><dd>Use this to display a numbered list. </dd><dt><strong>unordered list</strong> (<font face="courier"><ul></font>)</dt><dd>Use this to display a list of bulleted items. </dd></dl></body></html>
Document 3.11 (cloud1.htm, partial) <html><head><title>Cloud Observations</title></head><body bgcolor="#aaddff"><h1>Cloud Observations</h1><strong> Cloud Observations </strong>(Select as many cloud types as observed.)<br /><form><table>a<tr> <td><strong>High</strong> </td><td> <input type="checkbox" name="high" value="Cirrus" /> Cirrus</td><td> <input type="checkbox" name="high" value="Cirrocumulus" /> Cirrocumulus </td><td> <input type="checkbox" name="high" value="Cirrostratus" /> Cirrostratus </td></tr><tr> <td colspan="4"><hr noshade color="black" /></td></tr><tr> <td> <strong>Middle</strong> </td><td> For determining if a box is checked…
Divide up your screen… Document 3.10a:frameMain.htm <html><head><title>A simple frameset document</title></head><frameset cols="30%, 70%" frameborder="1"> <frameset rows="60%, 40%"> <frame src="frame1.htm" scrolling="no" /> <frame src="frame2.htm" /> </frameset> <frame name="homeFrame" src="homeFrame.htm"></frameset></html> One .htm file for each panel in the frame
Here’s homeFrame.htm… Document 3.10b:frame1.htm <html><head><title>My Home Frame</title></head><body bgcolor="lightgreen"><h1><blink><font color="maroon"><b> <i>Home page display goes here.</i></b> </font></blink></h1></body></html>
Here’s frame1.htm… Document 3.10c:frame1.htm <html><head><title>Title Frame</title></head><body bgcolor="pink"><font size="+6" color="navy"><center> <b><i>Frames<br />Demo<br /><a href="frameDescription.htm"> <img src="frame.gif" border="2"></i></b> </center></font></a></body></html>
Here’s frame2.htm… Document 3.10d:frame2.htm <html><head><title>Gossip Column</title></head><body bgcolor="lightblue">Links to other stuff...<br /><a href="gossip.htm" target="homeFrame"> Gossip Column</a><br /><a href="photoGallery.htm" target="homeFrame"> Picture Gallery</a><br /><a href="homeFrame.htm" target="homeFrame"> home</a><br /></body></html> All displayed in homeFrame
Document 3.12a (pyranometerMain.htm) <html><head><title>Display pyranometer data</title></head><frameset rows="10%, *"> <frame src="header.htm" scrolling="no" /> <frame src="pyranometer.dat" /></frameset></html> Split Window(cont.) Document 3.12b (header.htm) <html><head> <title></title></head><body><font face="courier" > This is the header.<br /> mon day yr hr min sec EST PYR-1 PYR-2 T<br /> </font></body></html>