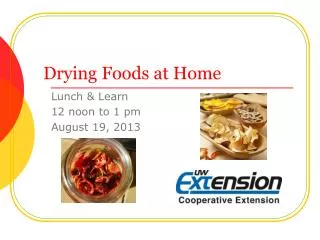
Drying Foods
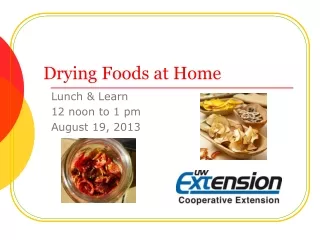
Drying Foods. Jananne Finck, MS, RD. Nutrition & Wellness Educator Springfield Center. Drying is New Again. One of the oldest methods of preserving food Alternative to canning & freezing Simple, safe and easy to learn Can dry year round No refrigeration needed Takes little space.


Drying Foods
E N D
Presentation Transcript
Drying Foods Jananne Finck, MS, RD. Nutrition & Wellness Educator Springfield Center
Drying is New Again • One of the oldest methods of preserving food • Alternative to canning & freezing • Simple, safe and easy to learn • Can dry year round • No refrigeration needed • Takes little space
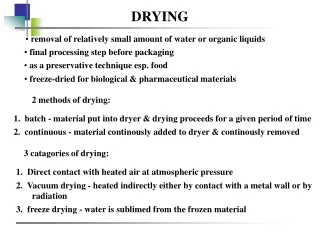
How Drying Preserves • Removes moisture from food so bacteria, yeasts & molds can’t grow and spoil food • Slows down action of enzymes but doesn’t inactivate them
Temperatures for Drying • Optimum temperature for drying food is 140°F • If higher temps are used, food cooks instead of drying • Avoid “case hardening” – dried outside and moisture is trapped inside – mold results
Helps Drying… • Low humidity aids drying • Increasing air current speeds up drying, removes air around food
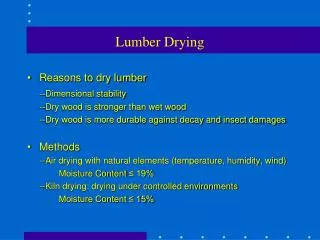
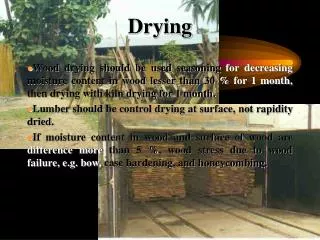
Ways To Dry Food • Foods can be dried in the sun, but often doesn’t work well in Illinois…need several days of high temp and low humidity • Dry in an oven • Dry in food dehydrator
Drying Out-Of-Doors • Sun Drying • Dry fruits, high sugar & acid make them safe • Don’t dry vegetables or jerky/meat outdoors • Need hot, dry, breezy days • Temp of 85ºF. or higher, for several days with humidity below 60% • Need to cover, watch materials used and control for insects and pests
Out-Of-Doors • Solar Drying • Need to make a dryer • Need to stir and turn food several times a day • Need several days… • Vine Drying • Dry beans, lentils and soybeans • Leave bean pods on vine until beans inside rattle • If not dried can dry further in oven or dehydrator
Freezer Method – seal food in freezer plastic bags. Freeze at 0ºF for at least 48 hours Oven Method – Place food in single layer on fray or in shallow pan. Place in oven preheated to 160ºF for 30 minutes Pasteurization
Drying Foods Indoors • Food dehydrators • Counter-top • Convection ovens • Conventional ovens
Food Dehydrators • Small electrical appliance for drying foods indoors • Electric element for heat & fat and vents for air circulation • Dry foods fast at 140ºF • Buy at department stores, mail-order, garden supply, internet
Costs vary depending on features. Some are expandable & extra trays can be purchased. Twelve square feet of drying space dries about a half-bushel of produce. Major disadvantage of dehydrator is limited capacity. Costs?
Double wall construction of metal or high grade plastic, not wood Enclosed heating element Counter top design Enclosed thermostat from 85ºF-160ºF Fan or blower 4-10 open mesh trays, plastic, sturdy, washable UL seal 1 year guarantee Convenient service Dial for regulating temp A timer, auto- shut off Dehydrator Features
Horizontal Air Flow – Heating element and fan are located on side Major advantages – reduces flavor mixing so different foods can be dried at once, all trays get equal heat, juices don’t drip into heating element Vertical Air Flow – Heating element and fan located at base Major disadvantage – if different foods dried, flavors can mix and liquids can drip into heating element Types of Dehydrators
Oven Drying • Slower than dehydrators, unless you have a convection oven, which has a fan • Take 2 times longer to dry in oven than dehydrator…oven not as efficient and uses more energy
Using Your Oven • Dial needs to go down to 140ºF • Leave oven door propped oven 2-6 inches • Best if you place a fan outside oven door • Oven temp varies…so need accurate oven thermometer to be sure 140 is achieved • Trays should clear sides of oven & 3-4” shorter front to back of oven, 2-3” between racks in oven
Room Drying • Herbs, hot peppers, & nuts in shell are most common air dried foods • Herbs & peppers – strung on string or tied in bundles and suspended from overhead racks in air until dry. • Can enclose in paper bags, with openings for air circulation • Spread nuts in single layer on paper
Drying Fruit • Preparing the Fruit – wash fruit and core, if needed • Fruits can be halved or sliced and some left whole • Thin, uniform, peeled slices dry fastest • Apples can be cored and sliced - wedges, rings • Bananas can be sliced • If fruit dried whole, “check” or crack the skin to speed drying – cranberries – place in boiling then cold water to “check”
Sulfuring Sulfite Dip Ascorbic Acid Ascorbic Acid Mixtures Fruit Juice Dip Honey Dip Syrup Blanching Steam Blanching Pretreating the Fruit
Drying the Fruit • Place fruit in single layer • Follow directions given • Follow approximate drying times given • Watch food as it dries much faster at the end of drying period
Determining Dryness of Fruit • Most fruit – should have 20% moisture content when dried • Cut several cooled pieces in half…should be no visible moisture and should not be able to squeeze any moisture from fruit • Not be sticky or tacky • If piece folded in half, shouldn’t stick to itself
After Drying… • Cool fruit 30-60 minutes before packaging…don’t pack too soon or moisture buildup could occur…don’t wait too long or could pick up moisture
Conditioning Fruits • Conditioning equalizes the moisture. • Pack cooled fruit in plastic or glass jars, seal and let stand for 7-10 days • Shake jars daily to separate pieces and check for moisture condensation • If condensation, return to dehydrator for more drying…unless has started to mold, then dispose of
Drying Vegetables • Preparing the vegetables • Wash, trim, peel, according to directions • Uniform pieces • Dry as soon as possible after picking
Water blanching – follow times given, start counting time as soon as water returns to boil. If takes more than 1 minute to return to boil, are putting in too many vegetables at a time Steam blanching – Vegetables should be no more than 2 inches deep above boiling water. Cover and steam according to directions given for each vegetable Pretreating Vegetables
Cooling Vegetables • Dip briefly in cold water only long enough to stop cooking • Cool to they feel only slightly hot to touch…about 120ºF • Wipe vegetables and place in dehydrator
Determining Dryness of Veggies • Dry vegetables until brittle or “crisp” • Some vegetables shatter if hit with hammer • 10% moisture • Don’t need conditioning like fruits, as lower moisture content
Fresh Fruit Canned or Frozen Fruits Fruit Leathers
Drying Fruit Leathers • Pour 1/8-inch thick on drying tray • Take 6-8 hours to dry in dehydrator, up to 18 in oven • Dry at 140ºF • Dry when no indention in center of leather • When warm, peel from plastic and roll , cool and rewrap roll in plastic • Keep up to 1 month at room temp, then may freeze up to 1 year
Jerky • Lean meat like beef, pork, venison or smoked turkey breast • If wild game is used, treat to kill Trichinella parasite by freezing a portion 6 inches or less thick at 0ºF at least 30 days…this doesn’t kill bacteria though
Heating meat strips in marinade before drying – drying times will be reduced. Check temp of several strips with metal stem-type thermometer to determine 160ºF is reached. Heating dried jerky strips in oven after drying process is completed. Heat strips 10 minutes in oven preheated to 275ºF. Thicker strips may take longer heating, check temp (160ºF) with thermometer. Eliminating E. coli O157:H7 Risk
Storing Jerky • Properly dried jerky keeps at room temp for 2 weeks in sealed container. • For best results, to increase shelf life and maintain best flavor and quality, refrigerate or freeze jerky.
Reference “So Easy To Preserve” Cooperative Extension Service The University of Georgia, 4th Edition, 1999.