Download
1 / 31
310 likes | 420 Vues
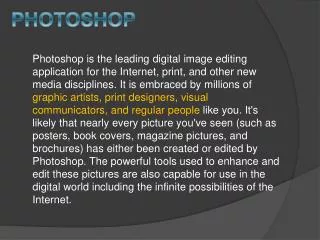
Join our comprehensive seminar on Adobe Photoshop designed for creative professionals looking to enhance their skills. Discover the essential tools such as the Marquee, Magic Wand, and Clone Stamp, and learn how to effectively work with layers, resolutions, and color modes. We’ll cover everything from creating new images to adjusting brightness and contrast. With hands-on experience and expert guidance, you’ll be able to master image editing techniques and improve your workflow. Perfect for beginners and seasoned users alike!

E N D
Photoshop I I450 Technology Seminar
Adobe • Photoshop • Illustrator • Acrobat • InDesign • ImageReady
This seminar • Resolution intro • Layers • Tools • Marquee • Paint Brush • Move • feather • Magic Wand • Clone Stamp • Paint Bucket • Gradient
New Image • File -> New • Set width, height and resolution • Leave resolution at 72 pixels/inch unless you need an image with a high resolution • Mode • RGB (red, green, blue – use for color images) • Grayscale (use for black and white) • Contents • White is you want a blank white image • Background Color if you want the same color as background • Transparent
Modes • Bitmap: uses black and white color values to represent the image. • Grayscale: up to 256 shades of gray • RGB: red, green and blue dots • CMYK: cyan, magenta, yellow and black to create printed colors
Resolution • The number of pixels on the screen • 640 x 480 • 800 x 600 • 800 pixels across, 600 pixels tall • Standard for 15” monitors • 1024 x 768 • What happens if you create an image at 800 x 600, and then reset the screen size to 1024 x 768?
Resolution • 800 x 600 = 480,000 pixels • 1024 x 768 = 786,432 pixels • 1280 x 1024 = 1,310,720 pixels • The pixels on an 800 x 600 screen are smaller than the pixels on a 1024 x 768 screen
Resolution • 1-by-1-inch image with a resolution of 72 ppi contains a total of 5184 pixels (72 pixels wide x 72 pixels high = 5184). File size=16K • The same 1-by-1-inch image with a resolution of 300 ppi contains a total of 90,000 pixels. File size=264K
Resolution • Bitmaps are resolution dependent • Difficult to increase or decrease their size without sacrificing a degree of image quality • Reduce the size of a bitmap image through your software's resample or resize command, you throw away pixels • Increase the size of a bitmap image through your software's resample or resize command, the software has to create new pixels • Creating new pixels, the software must estimate the color values of the new pixels based on the surrounding pixels. This process is called interpolation.
Scaling vs. Resizing • Zooming is scaling • Does not effect the image permanently • Does NOT change the number of pixels in an image • Resizing an image does change the image permanently
Resolution • On the web 72 ppi is good • For print 72 ppi may be too low • 300 ppi for print • Can move from high resolution to low • Don’t try to move from low resolution to high • Keep resolution in mind when creating images in Photoshop!
Samples • Program Files > Adobe > Photoshop 7.0 > Samples • Open ducky.tif, dune.tif eagle.psd, and flower.psd • .psd files are Photoshop Files • Contain all the layer and formatting information • Very large files
File Browser Upper right part of screen Easy way to open files
Navigator Move the focus of the picture Zoom in and out To zoom in press Crtl and the + button, to zoom out press Crtl and -
Layers Create layers of images on top of each other. This is one of the real strengths of Photoshop. View or hide layer Layer name and details
Layers • Minimize everything but the eagle and the flower • With the Move Tool (top row, right), drag the eagle on top of the flower • You’ve just created an layer (eagle) on top of the flower layer.
History Move backwards all the way to the NEW state of your document Create new document from current state Create new snapshot Delete current state
Tools There are many tools in Photoshop. Under the Window menu you can hide and unhide the ‘toolbox’.
Marquee (selection) Tool Allows you to make selections. Selections can be used for moving, filling, etc. You can always select the Inverse of what you’ve selected by going to Select in the Menu bar and selecting Inverse, after you’ve made a selection
Move Tool Allow you to move things that you have selected. Just select and drag
Magic Wand Selects a group at once.
Fill Tool Used to fill a selection with a color or a pattern Create a selection with the rectangular marquee tool, Select the fill tool, and fill that selection with a color
Fill with Patterns In the options bar of the Fill tool, select Pattern from the dropdown menu Select a pattern in the next drop down menu Fill a selection with a pattern
Adding options This triangle will open the dialog box Select Load Patterns Load new patterns This is the same for Loading Shapes, and Gradients
Cropping • Cropping lets you ‘set’ an image. • After you’ve selected the part of the image you want cropped, press Enter =
Brightness and Contrast • In the menu bar go to: • Image -> Adjustments -> Brightness and Contrast • Adjust the brightness and contrast of an image • Brightens and darkens the entire image • Very little tonal control
Layer Mask • When you have two layers, go to: • Layers -> Add Layer Mask ->Reveal All • Use the paint brush and erase tools to reveal and hide the layers
Filters • In the menu bar there are a lot of Filters you can apply to your images
Custom Shapes You can load shapes by pressing this button and selecting: Load Shapes • Many useful shapes are predefined in Photoshop
Gradients • Allow you to make colorful images • Good to use for backgrounds • You can load gradients the same way you load custom shapes