Download
1 / 60
600 likes | 618 Vues
Learn how to program your CRX robot using NQC (Not Quite C) language. Use BricxCC as your development environment. Includes basics of motors, subroutines, and control structures.

E N D
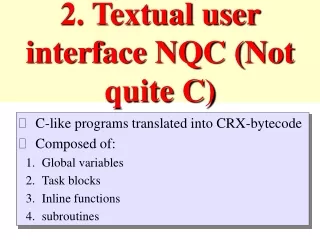
2. Textual user interface NQC (Not quite C) • C-like programs translated into CRX-bytecode • Composed of: • Global variables • Task blocks • Inline functions • subroutines
NQC Programming • You’ll be programming your robot in NQC (Not Quite C). • You’ll use the BricxCC (Bricx Control Centre) as your development environment. • When you first fire up BricxCC (by double clicking on the BricxCC icon) it looks for the RCX brick. • It will find it, because you will have switched it on (using the red On-Off button) and placed it with its infra-red windows facing the IR tower and a few centimetres away from it.
1 2 Click on RCX2, then OK
1 2 Click on Compile to compile, and on Download to put it into the RCX.
If your program won’t compile… • You will get helpful error messages below the program • If you can’t sort out the errors by yourself, call Renzo, the GTA
Tasks task name( ) { // the task 's code is placed here } • name: any legal identifier. • 1 task - named "main" - started when program is run. • Maximum number of tasks on RCX: 10 • The body of a task consists of a list of statements. • Tasks started and stopped: start and stopstatements • StopAllTasks stops all currently running tasks.
NQC/RCX basics: Motors • Motor connections A, B, and C are known as OUT_A, OUT_B, and OUT_C • You set the direction of a motor by • OnFwd (OUT_A) or OnRev(OUT_B) • You set the power of a motor by • SetPower (OUT_A, x) where x runs from 0 to 7 • You turn a motor off by • Off(OUT_B)
In robotC #pragma config(Motor, motorA, RightMotor, tmotorNormal, PIDControl, ) #pragma config(Motor, motorB, LeftMotor, tmotorNormal, PIDControl, ) //*!!Code automatically generated by 'ROBOTC' configuration wizard !!*// void rightTurn(int turnTime) { motor[RightMotor] = -100; motor[LeftMotor] = 100; wait10Msec(turnTime); } void leftTurn(int turnTime) { motor[RightMotor] = 100; motor[LeftMotor] = -100; wait10Msec(turnTime); } sub turn_around() { OnRev(OUT_C); Wait(400); OnFwd(OUT_A+OUT_C); } This in NQC
In robotC #pragma config(Motor, motorA, RightMotor, tmotorNormal, PIDControl, ) #pragma config(Motor, motorB, LeftMotor, tmotorNormal, PIDControl, ) //*!!Code automatically generated by 'ROBOTC' configuration wizard !!*// void rightTurn(int turnTime) { motor[RightMotor] = -100; motor[LeftMotor] = 100; wait10Msec(turnTime); } void leftTurn(int turnTime) { motor[RightMotor] = 100; motor[LeftMotor] = -100; wait10Msec(turnTime); } task main() { motor[RightMotor] = 100; motor[LeftMotor] = 100; wait10Msec(100); rightTurn(20); motor[RightMotor] = 100; motor[LeftMotor] = 100; wait10Msec(100); leftTurn(20); motor[RightMotor] = 100; motor[LeftMotor] = 100; wait10Msec(100); StopAllTasks(); }
NQC/RCX basics: Subroutines • There are several ways of avoiding having to write out long strings of repetitive chunks of code. • One is to use subroutines. • The format of a subroutine is: • sub subroutinename ( ) {code goes here} • And you call it in the main body of your code by • subroutinename ( ); • (Semicolons are used as separators for expressions etc.)
Subroutines sub turn_around() { OnRev(OUT_C); Wait(400); OnFwd(OUT_A+OUT_C); } task main() { OnFwd(OUT_A+OUT_C); Wait(100); turn_around(); Wait(200); turn_around(); Wait(100); turn_around(); Off(OUT_A+OUT_C);}c
Subroutines • Subroutines allow a single copy of some code to be shared between several different callers (space efficient). • Restrictions: • First of all, subroutines cannot use any arguments. • A subroutine cannot call another subroutine. • Maximum number of subroutines: 8 for the RCX • If calling from multiple tasks: no local variablesor perform calculations that require temporary variables (this restriction is lifted for the Scout and RCX2).
NQC/RCX basics: Control structures • while (true) {stuff} • will execute stuff forever. • if (condition) do_something_simple • will do_something_simple if the condition is true • if (condition) do_something_simple • else do_something_else • will do_something_else if the condition is not true
Control structures • If-statementsif (condition) consequenceif (condition) consequence elsealternative • While-statementswhile (condition) body • Repeat-statementsrepeat (expression) body • Switch-statementswitch (expression) body • Until-macro# define until (c) while (! (c ))
Inline function, call by reference task main() { int count=0; while (count<=5) { PlaySound(SOUND_CLICK); Wait(count*20); increment(count); } } void increment(int& n) { n++; } void turn_around(int turntime) { OnRev(OUT_C); Wait(turntime); OnFwd(OUT_A+OUT_C); } task main() { OnFwd(OUT_A+OUT_C); Wait(100); turn_around(200); Wait(200); turn_around(50); Wait(100); turn_around(300); Off(OUT_A+OUT_C); }
(Inline) Functions • void name( argument_list ) • { // body of the function } • Functions cannot return a value; void is related to C • Argument list: empty, or ≥ 1 argument definitions. • Arguments: type followed by its name. • All values are 16 bit signed integers. • 4 different argument classes:
Playing preprogrammed sounds & tones task main() { PlaySound(0); Wait(100); PlaySound(1); Wait(100); PlaySound(2); Wait(100); PlaySound(3); Wait(100); PlaySound(4); Wait(100); PlaySound(5); Wait(100); } task music() { while (true) { PlayTone(262,40); Wait(50); PlayTone(294,40); Wait(50); PlayTone(330,40); Wait(50); PlayTone(294,40); Wait(50); } } task main() { start music; while(true) { OnFwd(OUT_A+OUT_C); Wait(300); OnRev(OUT_A+OUT_C); Wait(300); } }
Variables • All variables of the same type: 16 bit signed integers. • Declarations:int variable[=initial value] [, variable [=initial value]] ; • Examples: • int x ; // declare x • int y, z ; // declare y and z • int a =1, b ; // declare a and b, initialize a to 1 • Global variables: declared at the program scope;Used within tasks, functions, subroutines. Max: 32 • Local variables: within tasks, functions, and sometimes within subroutines. Max: 0 @ RCX, 16 @RCX2 • Local variables may be declared in a compound statement, following a {
NQC/RCX basics: Variables All variables are integers. You have to declare them, otherwise the compiler will moan. int thing; at the beginning of your program will let you use the integer variable thing anywhere. If you declare it within some curly brackets (as part of an expression or subroutine etc.) it won’t work if you try to use it outside the brackets (and the compiler will complain).
NQC/RCX basics: Constants You can give constants meaningful names instead of numbers by defining them at the start of your program: #define MONKEY_SCORE 25 means you can write MONKEY_SCORE in your code instead of just 25, and so you will be able to distinguish it from all the other constants that might be 25 – for example, SLAMMER_RECORD
Arrays • Arrays exist only for RCX2
Assignments • Syntax:Variable operator expression • Operators: • = Set variable to expression • += Add expression to variable • -= Subtract expression from variable • *= Multiple variable by expression • /= Divide variable by expression • &= Bitwise AND expression into variable • |= Bitwise OR expression into variable • ||= Set variable to absolute value of expression • +-= Set variable to sign (-1,+1,0) of expression
Built-in API • SetPower(outputs, power)Function • Sets the power level of the specified outputs. • Power should result in a value between 0 and 7. • OUT_LOW, OUT_HALF, OUT_FULL may also be used.Examples: • SetPower( OUT_A, OUT _FULL) ; // A full power • SetPower( OUT_B, x ); • OnFwd(outputs)Function • Set outputs to forward direction and turn them on. • Outputs is one or more of OUT_A, OUT_B, and OUT_C added together. • Example: OnFwd (OUT_A );
Sensor Types NXT brick Old RCX
Setting Sensor Type and Mode • SetSensor(sensor, configuration) • Set the type and mode to the specified configuration(constant containing both type and mode info). • Example: • SetSensor (SENSOR_1, SENSOR_TOUCH) ; • SetSensorType(sensor, type) • Set type (one of the predefined sensor type constants). • Example: SetSensorType(SENSOR_1, SENSOR_TYPE _TOUCH ); • SetSensorMode(sensor, mode) • Set mode (one of the predefined sensor mode constants)Optional slope parameter for Boolean conversion.
Reading out sensors, Wait • SensorValue(n) • Returns the processed sensor reading for sensor n, where n is 0, 1, or 2. This is the same value that is returned by the sensor names • (e.g. SENSOR_1). • Example: x = SensorValue(0); // readsensor_1 • Wait(time) • Make a task sleep for specified amount of time (in 1/100 s). Argument may be an expression or a constant. • Wait(100); // wait 1 second • Wait(Random (100)); // wait random time up to 1 second For more information refer to the NQC programmers manual
Example of motor control in NQC // speed.nqc -- sets motor power, goes forward, waits, // goes backwards task main( ) { SetPower(OUT_A+OUT_C,2); OnFwd(OUT_A+OUT_C); Wait(400); OnRev(OUT_A+OUT_C); Wait(400); Off(OUT_A+OUT_C); } • sets motor power, • goes forward, waits, • goes backwards
Robots moves in a Spiral // spiral.nqc -- Uses repeat & variables to make robot// move in a spiral #define TURN_TIME 100 int move_time; // define a variable task main() { move_time = 20; // set the initial value repeat(50) { OnFwd(OUT_A+OUT_C); Wait(move_time); // use the variable for sleeping OnRev(OUT_C); Wait(TURN_TIME); move_time += 5; // increase the variable } Off(OUT_A+OUT_C); }
Declare that SENSOR_1 is touch sensor Use of touch sensors Go forward with speed OUT_A + OUT_C // Use of touch sensors task main() { SetSensor(SENSOR_1,SENSOR_TOUCH); OnFwd(OUT_A+OUT_C); while (true) { if (SENSOR_1 == 1) { OnRev(OUT_A+OUT_C); Wait(30); OnFwd(OUT_A); Wait(30); OnFwd(OUT_A+OUT_C); } } } Go backward with speed OUT_A + OUT_C
Use of light sensor // Use of a light sensor to make robot go forward until // it "sees" black, then turn until it's over white #define THRESHOLD 37 task main() { SetSensor(SENSOR_2,SENSOR_LIGHT); OnFwd(OUT_A+OUT_C); while (true) { if (SENSOR_2 < THRESHOLD) { OnRev(OUT_C); Wait(10); until (SENSOR_2 >= THRESHOLD); OnFwd(OUT_A+OUT_C); } } }
NQC/RCX basics: Sensors • Sensor connections 1, 2, and 3 are known as SENSOR_1, SENSOR_2, and SENSOR_3 • You have to tell each sensor connection what sort of sensor is plugged into it. • For the light sensor, it’s just a matter of: • SetSensor (SENSOR_2, SENSOR_LIGHT)
NQC/RCX basics: Tasks • NQC can run several tasks at the same time. (Unfortunately you have to be careful to ensure that tasks do not conflict, especially over resources.) • The format of a task is: • task taskname( ) {task instructions etc go here} • Every program must contain a task called main: • task ( ) main {stuff}
Tasking Starts two tasks described below task main() { SetSensor(SENSOR_1,SENSOR_TOUCH); start check_sensors; start move_square; } task move_square() { while (true) { OnFwd(OUT_A+OUT_C); Wait(100); OnRev(OUT_C); Wait(85); } } task check_sensors() { while (true) { if (SENSOR_1 == 1) { stop move_square; OnRev(OUT_A+OUT_C); Wait(50); OnFwd(OUT_A); Wait(85); start move_square; } } }
Macros #define turn_right(s,t) SetPower(OUT_A+OUT_C,s);OnFwd(OUT_A);OnRev(OUT_C);Wait(t); #define turn_left(s,t) SetPower(OUT_A+OUT_C,s);OnRev(OUT_A);OnFwd(OUT_C);Wait(t); #define forwards(s,t) SetPower(OUT_A+OUT_C,s);OnFwd(OUT_A+OUT_C);Wait(t); #define backwards(s,t) SetPower(OUT_A+OUT_C,s);OnRev(OUT_A+OUT_C);Wait(t); task main() { forwards(1,200); turn_left(7,85); forwards(4,100); backwards(1,200); forwards(7,100); turn_right(4,85); forwards(1,200); Off(OUT_A+OUT_C);}
EXAMPLE: The trusty.nqc program It’s straight from the Knudsen book. We’ll skip through some basics, and then go through the program.
trusty.nqc int state; #define BOTH_ON 3 #define LEFT_ON 1 #define RIGHT_ON 2 #define BOTH_OFF 0 #define INDETERMINATE 255 #define DARK2 35 #define LIGHT2 40 #define DARK3 40 #define LIGHT3 45 #define POWER 4
trusty.nqc int state; THIS IS THE DECLARATION OF THE VARIABLE WE WILL USE TO REPRESENT ALL THE DIFFERENT MEANINGFUL COMBINATIONS OF SENSOR STATES
trusty.nqc #define BOTH_ON 3 #define LEFT_ON 1 #define RIGHT_ON 2 #define BOTH_OFF 0 #define INDETERMINATE 255 THESE ARE THE VALUES THE VARIABLE state CAN TAKE. BOTH_ON MEANS BOTH SENSORS ON THE TRACK, ETC. INDETERMINATE MEANS AT LEAST ONE SENSOR IS ON THE BORDERLINE
trusty.nqc #define DARK2 35 #define LIGHT2 40 #define DARK3 40 #define LIGHT3 45 THESE ARE THE SENSOR INPUT VALUES FOR DECIDING WHETHER A SENSOR IS ON OR OFF THE LINE, OR ON THE BORDERLINE
Sensor tip • If the sensor port is correctly configured, you can read the value of a sensor directly from the LCD display on the RCX. • Press VIEW. • You will see a little ^ pointing to input 1. • The number on the LCD will be the current input of the sensor connected to input 1. • Press VIEW again. • The ^ will move round one place to input 2. • Keep on pressing and it will go 3, A, B, C, and then out of VIEW mode.
trusty.nqc #define POWER 4 THIS SETS THE POWER LEVEL THAT WILL BE USED FOR MOTORS THAT ARE ON.
trusty.nqc task main() { initialize(); while (true) { if (state == BOTH_ON) OnFwd(OUT_A + OUT_C); else if (state == LEFT_ON) { Off(OUT_A); OnFwd(OUT_C); } else if (state == RIGHT_ON) { Off(OUT_C); OnFwd(OUT_A); } } }