RDS 80A Contamination Meter
Discover the RDS-80A Contamination Meter, a dependable instrument designed to locate and detect contaminated surfaces. This user-friendly meter provides audible alarms for fixed contamination levels and retains data in its internal memory. Key features include a simplistic push-button operation, a six-digit display showing contamination levels, and options for displaying accumulated counts. Ideal for monitoring contamination, the RDS-80A ensures ease of use with alkaline batteries and an intuitive menu system. Download the manual for detailed instructions, troubleshooting tips, and setup guidelines.

RDS 80A Contamination Meter
E N D
Presentation Transcript
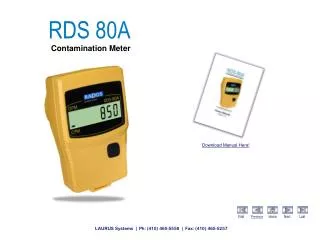
RDS 80AContamination Meter Download Manual Here! LAURUS Systems | Ph: (410) 465-5558 | Fax: (410) 465-5257
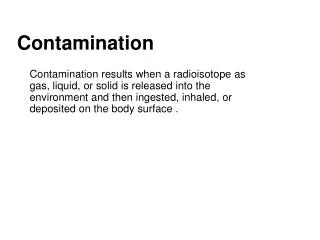
The RDS 80A, Introduction The RDS-80A is a contamination instrument used to locate and detect contaminated surfaces/objects. The RDS-80A provides alarms for fixed surface contamination levels and stores the histogram events into internal memory (the configuration software, CSW, is required for downloading data via the IrDA port). The RDS-80A is microprocessor controlled and is operated with a single push button. The push button gives a beep each time it is pressed. To complete an action, release the button or press again (beep) and hold the button down until a second beep is heard. The six digit display shows the prevailing contamination level and various messages. The display and the sound signal are used to indicate alarms. The RDS-80A is ready for use after the batteries (2 x IEC LR06/AA) have been installed. IrDA Link Detector under protective grid Display Push Button Battery Cover LAURUS Systems | Ph: (410) 465-5558 | Fax: (410) 465-5257
The RDS 80A, Battery Installation Remove the cap of the battery compartment by unscrewing the fixing screw and pulling the cap out and turning it up simultaneously. The instrument utilizes two IEC LR06/AA-size batteries. The use of alkaline batteries is recommended. The polarity of the batteries is illustrated in the picture on the right. Insert the batteries and lock the battery cap. The instrument is now ready for use. To turn the instrument on, press the push button shortly. Note: The operation of the instrument is optimized for alkaline batteries. The use of NiCd or metal hydride batteries may cause the wrong battery capacity indication or false battery alarm. LAURUS Systems | Ph: (410) 465-5558 | Fax: (410) 465-5257
The RDS 80A, Operation The parameters of the instrument can be changed using the menu functions described below. PC software is required to change some of the parameters. Also, some of the menu functions can be disabled with the software. If the push button is not pressed for seven seconds during the menu operation, the display returns to the contamination display. The RDS-80A has two optional measurement units available; CPM (Counts Per Minute) or DPM (Disintegrations Per Minute). The selected unit is indicated by a blinking segment on the left side of the display. The selected unit in the picture on the right is CPM. Switch On; Press the push button until all the segments are displayed • The meter performs a self test function (all the display segments are lit, the audible alarm and display backlight are switched on) • The battery condition is tested • The current/prevailing contamination level is displayed within 10 seconds. Display Illumination; To switch the illumination on, press the push button once. The display backlight is lit for 10 seconds. Other options for backlight operations are available through configurations. LAURUS Systems | Ph: (410) 465-5558 | Fax: (410) 465-5257
The instrument has only one push button. In order to change the operation of the instrument, the menu has to be activated A short beep is heard when the push button is pressed. The RDS 80A, Operation In order to activate the menu: Press the push button (approx. three seconds) until a long beep is heard. The display will change to the first menu item “oFF”. Release the button. Now the menu is activated for seven seconds and the menu items can be browsed by pressing the push button shortly (i.e. release the button immediately when a short beep is audible). In order to activate the desired menu item: Browse the menu until the desired menu item is displayed. Press and hold the push button until a long beep is heard and the desired menu item is activated. If the push button is not pressed for ten seconds, the menu and the menu item will be deactivated automatically and the display returns to the contamination display. Menu Items Push Button LAURUS Systems | Ph: (410) 465-5558 | Fax: (410) 465-5257
The RDS 80A, Menu Items Switch off (oFF) Activate the menu until the display changes to oFF. Continue pressing the push button until a long beep is heard. The display will go blank and the instrument is now off. Accumulated counts (Accu)* The instrument integrates the cumulative counts since the last reset of the accumulated counts register. To see the accumulated counts, activate the menu and browse until the display changes to Accu. Press the push button until a long beep is heard. The display shows the cumulative counts in kc (kilo counts) also when DPM unit is activated. To reset the accumulated counts, while the cumulative counts is displayed, press the push button again until a long beep is heard and the display shows the zero value. The accumulated counts are now set to zero. LAURUS Systems | Ph: (410) 465-5558 | Fax: (410) 465-5257
Change displayed unit (Unit)* The instruments default unit is CPM (Counts Per Minute). Optionally the display can be changed to show DPM. The initial Isotope calibration of the instrument is done with a 90Sr/90Y beta source. The instrument can be calibrated to other isotopes using the optional CSW software and calibrated surface source. The RDS 80A, Menu Items To see the current unit: Activate the menu and browse until the display changes to Unit. Press the push button until a long beep is heard. The display shows the current unit (-cPor -dP). To change the current unit: While the current unit is displayed, press the push button again until a long beep is heard and - The display changes to the first option -cP(blinking) Browse the options until the desired value is displayed and validate it with a long press. A long beep is heard and the display returns to the menu item Unit. LAURUS Systems | Ph: (410) 465-5558 | Fax: (410) 465-5257
Chirp On/Off and High /Low (cHirP)* The chirp function can be activated or deactivated (cHr oF). When activated, the chirp rate has two states: high (cHr Hi) and low (cHr Lo). In the high state (default) every pulse from the GM- tube emits a chirp. In the low state, the high rate is divided by 16. The RDS 80A, Menu Items To see the current status of chirp: Activate the menu and browse it until the display changes to cHirP. Press the push button until a long beep is heard. The current status is now displayed (cHr oF, cHr Hior cHr Lo) To change the status of chirp: While the current chirp state is displayed, press the push button again until a long beep is heard. The display changes to the first option cHr oF(blinking). Browse the options until the desired value is displayed and validate it with a long press. A long beep is heard and the display returns to the menu item cHirP. LAURUS Systems | Ph: (410) 465-5558 | Fax: (410) 465-5257
Background Correction (bGcor)* The background correction function can be used to subtract The prevailing background radiation level from the instruments readout. To see the current status of the background correction: Activate the menu and browse until the display changes to bGcor. Press the push button until a long beep is heard. The display shows the current status of the background correction (bGc oFor bGc on). The RDS 80A, Menu Items To switch on/off the background correction: While the current status is displayed, press the push button until a long beep is heard. The display changes to the current status of background correction bGc oFor bGc on(blinking). Browse the status menu until the desired value is displayed and validate it with a long press. A long beep is audible and the display returns to the menu item bGcor. LAURUS Systems | Ph: (410) 465-5558 | Fax: (410) 465-5257
To recalculate the background correction coefficient: Go to location where you want to define the new background correction level. Activate the current background correction status as described above. While the current status (bGc oFor bGc on) is displayed, press the push button until a long beep is audible. Browse the menu until the background enable (bGc En) display is blinking and enable the calculation of the background correction coefficient with a long press. A long beep is audible and the display turns to bGcordisplay. Now The instrument is enabled to start measure the background level and calculate the correction coefficient. To start the background measurement, switch off the instrument. Next time when the instrument is switched on it will automatically initiate the background counting and the display turns to bGcALafter the start- up diagnostics. When the calculation is finished (this may take a few minutes), the instrument gives a long beep and restarts. Now the new background correction coefficient is memorized into the instrument. The RDS 80A, Menu Items LAURUS Systems | Ph: (410) 465-5558 | Fax: (410) 465-5257
During the recalculation the background correction function will be automatically turned off and needs to be switched on again to activate. Once the background correction is enabled but the actual counting has not been completed yet (i.e. instrument has not been switched off) it is possible to cancel the operation in the same menu (when enabling it) by activating the background disable (bGcdiS). The RDS 80A, Menu Items Note: The background correction will be only performed when the DPM unit is activated. In other words, when the CPM unit is active, no background correction is carried out even if the bGc on was selected. Note: If the background correction is too large when compared to the current pulse rate, an error will be generated. This error is reset automatically when the condition of the alarm ceases to exist. If the measured pulse rate is very small, it is possible that the alarm will be activated every now and then due to the statistical variations of the measured signal. The meaning of the alarm is to indicate the user that there has been a change in the measurement conditions and that the measured and corrected values have become negative- a new calibration of background correction parameter should be made. LAURUS Systems | Ph: (410) 465-5558 | Fax: (410) 465-5257
Show and change alarm level (ALArL)* There are 8 different alarms for the contamination levels (CPM or DPM); disabled, 24, 60, 240, 600, 6000, 30 000, 60 000 or 600 000. The user may select any of these for the alarm levels. Note: All the contamination alarm level values can be changed and the new values stored into the instrument’s internal memory with the CSW software. The RDS 80A, Menu Items To see the current alarm level: Activate the menu and browse it until the display changes to ALArL. Press the push button until a long beep is heard. The current alarm level is displayed. To change the current alarm level: While the current alarm level is displayed, press the push button until a long beep is heard. The display changes to the first alarm level diSAbL(blinking). Browse the alarm levels until the desired value is displayed and validate it with a long press. A long beep is heard and the display returns to the menu item ALArL. LAURUS Systems | Ph: (410) 465-5558 | Fax: (410) 465-5257
Low battery warning An audible low battery warning signal followed by the LobAt“ indication for two seconds will be repeated every five Minutes. When the battery capacity is less than 30% but more than 10%. The Low Battery Warning: _ _______ (a short beep followed by a long beep once in five minutes). The contamination Measurement continues normally. Low battery alarm The display shows bAtAL blinking and the audible alarm is activated when the battery capacity is less than 10%. Low Battery Alarm: ___________ (continuous beep). The RDS 80A, Other Displayed Messages Contamination alarm (Blinking display) The display is blinking and the continuous audible alarm is on. The audible alarm can be reset by pressing the push button. Contamination Alarm: ------ (two beeps per second). LAURUS Systems | Ph: (410) 465-5558 | Fax: (410) 465-5257
Overflow alarm (oFL) When the measurement limits are exceeded, the display shows oFL. The continuous audible alarm is on. Contamination overflow: ___-----____ (continuous beep, two frequencies). The overflow alarm cannot be reset. The RDS 80A, Other Displayed Messages Error (dEF/Err) The display text alternates between dEF(defective) and Err+number. The continuous audible alarm is on. Error alarm: _____________ (continuous beep).The contamination measurement is prevented. If the Err+numbertext alone is alternating with the contamination level display, the contamination measurement is continued. Only the visual alarm is given, there is no audible alarm. Error codes and types: Error1 = Calibration Error2 = Non volatile memory Error3 = Detector Error4 = High voltage Error5 = Internal power supply Error6 = Cumulative counts overflow Should an error occur, write down the Error number (Err+number) and return the meter for servicing. LAURUS Systems | Ph: (410) 465-5558 | Fax: (410) 465-5257
Display illumination: There are three configuration options: Configuration 1: When the push button is pressed, the display backlight is lit for 10 seconds. Configuration 2: The display backlight is switched on by pressing the push button and remains lit until the button is pressed again. Configuration 3: The backlight is on permanently. Show and reset accumulated counts (Accu)* This is a configurable function with 2 options: Configuration 1: The accumulated counts are displayed and can be reset using the push button. Configuration 2: The accumulated counts can be displayed but can not be reset using the instrument’s push button. Show and change displayed unit (Unit)* The Unit function can be enabled or disabled. When disabled, it will not be displayed in the instrument menu. Chirp on/off and chirp rate (cHirP)* The CHirP function can be enabled or disabled. When disabled, it will not be displayed in the instrument menu. The RDS 80A, Configurable Parameters LAURUS Systems | Ph: (410) 465-5558 | Fax: (410) 465-5257
Activate and change background correction (bGcor)* The bGcor-function can be enabled or disabled. When enabled the background correction function can be switched on/off. Also, the new background correction level can be defined. When disabled, it will not be displayed in the instrument menu. Show and change alarm level (ALArL)* This is a configurable function with 3 options: Configuration 1: The Alarm Level is displayed and can be changed using the push button. Configuration 2: The current alarm level can be displayed but can not be changed using the instruments push button Configuration 3: Disabled Battery and display test (diAG)* The battery condition and display test can be enabled or disabled. When disabled, it will not be displayed in the instrument menu. Indication unit (Unit)* Configuration 1: CPM Configuration 2: DPM The RDS 80A, Configurable Parameters LAURUS Systems | Ph: (410) 465-5558 | Fax: (410) 465-5257
If the object is wider than the detector (such as a portion of a floor or workspace) then it is necessary to do several passes in order to effectively scan the entire surface. Start scanning along one edge then make each successive pass approximately 5 cm (2”) from the previous until all area is scanned. Isolate and label the contaminated object and/or area where contamination has been detected. The RDS 80A, General Survey Techniques Surface contamination / Leak detection: The RDS 80A will detect background radiation so always power the unit in a clean area before beginnning the survey. Hold the RDS 80A with the detector facing the object to be surveyed. Make sure the probe is within 1 cm (<1/2 inch) of the surface. Sweep the area or item at a rate of 3 to 5 cm’s (1 to 2 inches) per second. The RDS 80A will emit an audible alarm if the object/area is radiologically contaminated. Detector LAURUS Systems | Ph: (410) 465-5558 | Fax: (410) 465-5257
No specific maintenance is required except for a periodic check of the calibration. Cleaning and decontamination may be done with decontamination solutions suitable for use with ABS polymer and polycarbonate materials. Replacement of the batteries Open the battery compartment cover with a suitable screwdriver. Remove the old batteries and replace with new ones. Note the correct polarity. The use of AA alkaline batteries (IEC LR06) is recommended. Close the cover. The RDS 80A, Field Maintenance and Contamination LAURUS Systems | Ph: (410) 465-5558 | Fax: (410) 465-5257