HTML and CSS: An Introduction with Ivan Lee
Learn the basics of HTML and CSS with Ivan Lee. Explore resources, editors, and essentials of web design. Practice with examples and tips for success.

HTML and CSS: An Introduction with Ivan Lee
E N D
Presentation Transcript
HTML & CSS: an introduction Section led by Ivan Lee Reachable at ivan period lee at cs period stanford period edu
HTML/CSS Editors Mac: • TextEdit • DashCode • Komodo Edit • TextMate • Coda (editor + FTP + Terminal + CSS editor) Windows: • Notepad • Notepad++ (!!) • Adobe Dreamweaver • Microsoft Expression Web Note: do NOT be using WYSIWYG functionality – we can tell! Many of the above editors are good for auto-complete though
HTML/CSS Resources • w3schools.com • Firebug • PixelPerfect Class • http://www.piazzza.com/stanford/cs142 Misc: kuler.adobe.com
Anatomy of an HTML Document <?xml version="1.0" encoding="utf-8"?> <!DOCTYPE html PUBLIC "-//W3C//DTD XHTML 1.0 Strict//EN" "http://www.w3.org/TR/xhtml1/DTD/xhtml1-strict.dtd"> <html xmlns="http://www.w3.org/1999/xhtml" xml:lang="en" lang="en"> <head> <meta http-equiv="Content-Type" content="text/html; charset=utf-8" /> <title>Unicorns</title> <link type="text/css" rel="stylesheet" href="prettycolors.css"/> </head> <body> <h1>woooooot</h1> </body> </html>
Validation • http://validator.w3.org/
Margins vs. Paddings vs. Borders Source: http://www.iis.sinica.edu.tw/~trc/public/courses/Spring2007/week6/boxdim.png
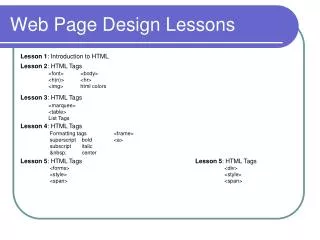
Tables • <table> • <tr> • <td> • </td> • <td> • </td> • </tr> • </table> • Table • Must have row to have a col • Can have multiple cols/row • Content generally goes in cols • But every tag can have a class • Remember to close tags
Tables (cont.) – because they’re tricky • Important attributes to remember: • border-spacing • width (remember the different units) • Pay attention to the border, padding, and margin for the table, tr, and td • Note: tr border, padding, margin does not work td margin does not work
Pseudo-classes • a:link • a:visited • a:hover • a:active • a:focus • cursor: default | auto | crosshair | text | help…
div vs. span • div: • Logical divisions within your web page • Can divide it up into sections with their own attributes • Can have own class • Covers entire horizontal width of parent, with line break before and after • span: • Just like a div, but without the line break • Doesn’t do any formatting on its own • Formatting applies within the line
display vs. visibility • display:none – as if the object were not there at all, not merely invisible • display:block – the element will be displayed as a block-level element, with a line break before and after the element • display:inline – the element will be displayed as an inline element, with no line break before or after the element • visibility:none – object just becomes invisible
Shorthand properties • padding-top: 10px; • padding-right: 12px; • padding-bottom: 5px; • padding-left: 100px; = • padding: 10px 12px 5px 100px;
Hints for Project 1 part 2 • Table method: • % • px • em • ex • in • cm • mm • pt • pc • UL method: • Relative vs. absolute positioning
Assignment 1 pointers Part 1: • Figure out what’srequired by HTML in both • Thenwork on CSS and hidingwhat’ssuperfluous in each Part 2: • Introduction to images on web pages • (hint: use background images) Part 3: • No need to validate • EasyPeasy
Steps in reconstructing an HTML Document • 1.. Create content first - HTML • 2.. Begin styling - CSS • 3.. Test - Firebug/PixelPerfect • 4.. Repeat • ... • 5.. Validate • 6.. Success!