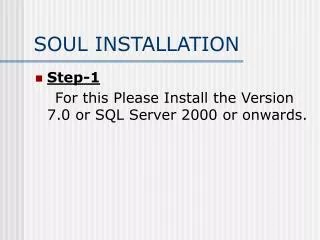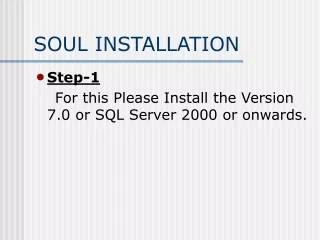
SOUL Software Installation
This comprehensive installation guide provides step-by-step instructions for installing the SOUL software from INFLIBNET Centre. It details how to insert the CD, select the appropriate installation options, share the Soulserver folder, and configure the Soul.ini file with your database and server names. Each step includes visual cues, navigation instructions, and necessary configurations to ensure a successful installation for university libraries. Follow this guide for a seamless setup process to manage library operations efficiently.


SOUL Software Installation
E N D
Presentation Transcript
SOUL Software Installation INFLIBNET Centre An IUC of UGC P B No.4116, Navrangpura Ahmedabad – 380009 soulsupport@inflibnet.ac.in
Please insert the CD inside the CD-ROM Drive=>The following Setup screen appears.Select the Install Products from the given options.Click on Next Buttons. Step-1, Choose this option Step-2, Click here
When this screen appearsSelect 32-bit long name optionClick on Next Button Step-1, Select this option Step-2, Click here
When the following setup option Screen appears,Select on CustomClick on Next Buttons Step-1, Select this option Step-2, Click here
When the above Screen appearsSelect the Software for University LibrariesClick on Details Button Select this option
When this Screen appears,Select the SOUL Application FilesSelect SOULServer FilesStep-1,Select these two optionsClick on OK Button Step-1, Select these two options Step-2, Click here
When this Setup Warning Screen appearsClick on OK Button Click Here
Step-1,Choose this OptionWhen the following Screen appears,Select the Overwrite all option.Click on Next Button. Step-1, Choose this Option Step-2, Click Here
When this Install Product Screen Appears,Select Install nowStep-1,Select this optionClick on Next Button Step-1, Select this option Step-2, Click here
When this Begin Installation Screen appears with the above message then Click OK ButtonClick Next Button Step-1, Click Here Step-2, Click Here
When following Screen appears, Please wait as Installation is In Progress…………………..
When the following completed Copying Files screen appears,Click on Next Button. Click here
When The following Setup Complete Screen appears, Click on Finish Button. Click Here
Installation… The Software for University Libraries Has been Installed Successfully…………..
Select the My computer=>right click the mouse=>select the explorer Click Here
After Installation of SOUL Software we have to do Following things… • Run install.exe file for hardware lock execution. • Share Soulserver Folder for Clients • Find Soul.ini file. • Change the database name and Server name for accessing the database...
The following screen will appear.Select the local disk(C:) then the following folder and file appears.. Double Click Here
Click HereSelect the soulserver folderyou will get install.exe file Click Here
The following screen will appear ……. Run This Install.exe file
The following screen will appear.Select install option and click on that.. Click here
So hardware lock installation part is completed… The following message will appear…Click on OK ButtonClick on Exit or close the screen. Step-1, Click here (on exit option) or close the screen. Step-2, Click here
Now we have to share the soulserver Folder for clients.For this go to the (C:) Drive and then Explore it.Select the soulserver FolderRight click the mouseClick on sharing Click Here
Select the share this folder optionClick on Apply ButtonClick on OK Button Step-1, Select this Option Step-3, Select this Option Step-2, Select this Option
=>After completing the sharing part, the soulserver folder will look like this…. Check here one hand is attached with this Soulserver Folder
Now we Find Soul.ini file and Change the database name and Server name for accessing the database…Click on Start ButtonGo to SearchClick on files and folder
The following screen will appear.Write down soul.ini at the files and folder search place.Click on Search now ButtonThe detailed path of that file will be shown to you.Then double click on that search file (that is soul.ini) . Step-3 Double Click here to open this file Step-1 Write down soul.ini Step-2 Click here
Here you have to change the following selected database. • Write down here your database name (Here is soul4)
Here you have to change the Server Name • Write down here your local server name (Here is soultr)
This will be the final out put after changing database name and server name.Close the window Click here Check both database and server name
The following message will appear…Click on Yes Button Click here
Click on StartGo to programsGo to software for university librariesClick on soul server Click here
The message will appear that Server is StartedClick on OK Button Click here
The following soul server icon will be shown to you on your status bar. Check out here that icon is there or not?
Click on that Button and find out the status of the server See here server is already started
Click on startGo to programsGo to software for university librariesClick on soul Applications Click Here
The following screen will appear.Enter the appropriate data and click on OK Button Enter Data, Here Click Here
The following screen will appear.Enter the user name as inf01Enter the password as inf01Click on login ButtonStep-1Entered user name and password hereClick on OK Button Step-1 Entered user name and password here Step-2 Click Here Step-3 Click Here
The following screen will appear … and start your application work.
Any doubts? Any Problem? If any… Mail to us root@inflibnet.ac.in T hanks