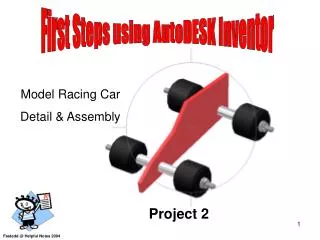
Project 2
Project 2. Creating and Editing a Web Page. Project Objectives. Create a web page (index.html) Title Header Paragraph Background color Insert an image Upload the file to your school web server. Use a browser to view a Web page. Starting Notepad. Enabling Word Wrap in Notepad.


Project 2
E N D
Presentation Transcript
Project 2 Creating and Editing a Web Page
Project Objectives • Create a web page (index.html) • Title • Header • Paragraph • Background color • Insert an image • Upload the file to your school web server. • Use a browser to view a Web page Project 2: Creating and Editing a Web Page
Starting Notepad Project 2: Creating and Editing a Web Page
Enabling Word Wrap in Notepad • Click Format on the menu bar • If the Word Wrap command does not have a check mark next to it, click Word Wrap Project 2: Creating and Editing a Web Page
Enabling Word Wrap in Notepad Project 2: Creating and Editing a Web Page
HTML Tags and Their Functions Project 2: Creating and Editing a Web Page
Entering HTML Tags to Define the Web Page Structure <!DOCTYPE html PUBLIC "-//W3C//DTD XHTML 1.0 Transitional//EN" "http://www.w3.org/TR/xhtml1/DTD/xhtml1-transitional.dtd"> <html> <head> <title>Campus Tutoring Service Home Page</title> </head> <body> </body> </html> Project 2: Creating and Editing a Web Page
Entering a Heading <!DOCTYPE html PUBLIC "-//W3C//DTD XHTML 1.0 Transitional//EN" "http://www.w3.org/TR/xhtml1/DTD/xhtml1-transitional.dtd"> <html> <head> <title>Campus Tutoring Service Home Page</title> </head> <body> <h1>We'll be open soon!</h1> </body> </html> Project 2: Creating and Editing a Web Page
Entering a Paragraph of Text <!DOCTYPE html PUBLIC "-//W3C//DTD XHTML 1.0 Transitional//EN" "http://www.w3.org/TR/xhtml1/DTD/xhtml1-transitional.dtd"> <html> <head> <title>Campus Tutoring Service Home Page</title> </head> <body> <h1>We'll be open soon!</h1> <p>The Campus Tutoring Service will be open for business soon!....</p> </body> </html> Project 2: Creating and Editing a Web Page
Creating an Unordered List <!DOCTYPE html PUBLIC "-//W3C//DTD XHTML 1.0 Transitional//EN" "http://www.w3.org/TR/xhtml1/DTD/xhtml1-transitional.dtd"> <html> <head> <title>Campus Tutoring Service Home Page</title> </head> <body> <h1>We'll be open soon!</h1> <p>The Campus Tutoring Service will be open for business soon!....</p> <h2>Our services include tutors for the following courses:</h2> <ul> <li> Math 101</li> <li> Accounting 200</li> <li> Economics 251</li> </ul> </body> </html> Project 2: Creating and Editing a Web Page
Saving an HTML File • Save as an index.html Project 2: Creating and Editing a Web Page
Starting a Browser Project 2: Creating and Editing a Web Page
Viewing a Web Page in a Browser • Type path\index.html in the Address box • Press the ENTER key Project 2: Creating and Editing a Web Page
Viewing a Web Page in a Browser Project 2: Creating and Editing a Web Page
Adding an Image <!DOCTYPE html PUBLIC "-//W3C//DTD XHTML 1.0 Transitional//EN" "http://www.w3.org/TR/xhtml1/DTD/xhtml1-transitional.dtd"> <html> <head> <title>Campus Tutoring Service Home Page</title> </head> <body> <img src="cts_clip8.gif“ width="474“ height=“128“ alt="Student Services logo" /> <h1>We'll be open soon!</h1> <p>The Campus Tutoring Service will be open for business soon!....</p> <h2>Our services include tutors for the following courses:</h2> <ul> <li> Math 101</li> <li> Accounting 200</li> <li> Economics 251</li> </ul> </body> </html> Project 2: Creating and Editing a Web Page
Adding a Background Color See the color code http://www.cs.gsu.edu/~csclxh/csc1010/ColorCodes.html Project 2: Creating and Editing a Web Page
Adding a Background Color <!DOCTYPE html PUBLIC "-//W3C//DTD XHTML 1.0 Transitional//EN" "http://www.w3.org/TR/xhtml1/DTD/xhtml1-transitional.dtd"> <html> <head> <title>Campus Tutoring Service Home Page</title> </head> <body > <img src="cts_clip8.gif“ width="474“ height=“128“ alt="Student Services logo" /> <h1>We'll be open soon!</h1> <p>The Campus Tutoring Service will be open for business soon!....</p> <h2>Our services include tutors for the following courses:</h2> <ul> <li> Math 101</li> <li> Accounting 200</li> <li> Economics 251</li> </ul> </body> </html> Project 2: Creating and Editing a Web Page
Adding a Background Color <!DOCTYPE html PUBLIC "-//W3C//DTD XHTML 1.0 Transitional//EN" "http://www.w3.org/TR/xhtml1/DTD/xhtml1-transitional.dtd"> <html> <head> <title>Campus Tutoring Service Home Page</title> </head> <body bgcolor=“#fffbc6” > <img src="cts_clip8.gif“ width="474“ height=“128“ alt="Student Services logo" /> <h1>We'll be open soon!</h1> <p>The Campus Tutoring Service will be open for business soon!....</p> <h2>Our services include tutors for the following courses:</h2> <ul> <li> Math 101</li> <li> Accounting 200</li> <li> Economics 251</li> </ul> </body> </html> Project 2: Creating and Editing a Web Page
Centering a Heading <!DOCTYPE html PUBLIC "-//W3C//DTD XHTML 1.0 Transitional//EN" "http://www.w3.org/TR/xhtml1/DTD/xhtml1-transitional.dtd"> <html> <head> <title>Campus Tutoring Service Home Page</title> </head> <body bgcolor=“#fffbc6” > <img src="cts_clip8.gif“ width="474“ height=“128“ alt="Student Services logo" /> <h1 >We'll be open soon!</h1> <p>The Campus Tutoring Service will be open for business soon!....</p> <h2>Our services include tutors for the following courses:</h2> <ul> <li> Math 101</li> <li> Accounting 200</li> <li> Economics 251</li> </ul> </body> </html> Project 2: Creating and Editing a Web Page
Centering a Heading <!DOCTYPE html PUBLIC "-//W3C//DTD XHTML 1.0 Transitional//EN" "http://www.w3.org/TR/xhtml1/DTD/xhtml1-transitional.dtd"> <html> <head> <title>Campus Tutoring Service Home Page</title> </head> <body bgcolor=“#fffbc6” > <img src="cts_clip8.gif“ width="474“ height=“128“ alt="Student Services logo" /> <h1 align=“center”>We'll be open soon!</h1> <p>The Campus Tutoring Service will be open for business soon!....</p> <h2>Our services include tutors for the following courses:</h2> <ul> <li> Math 101</li> <li> Accounting 200</li> <li> Economics 251</li> </ul> </body> </html> Project 2: Creating and Editing a Web Page
Adding a Horizontal Rule <!DOCTYPE html PUBLIC "-//W3C//DTD XHTML 1.0 Transitional//EN" "http://www.w3.org/TR/xhtml1/DTD/xhtml1-transitional.dtd"> <html> <head> <title>Campus Tutoring Service Home Page</title> </head> <body bgcolor=“#fffbc6” > <img src="cts_clip8.gif“ width="474“ height=“128“ alt="Student Services logo" /> <hr /> <h1 align=“center”>We'll be open soon!</h1> <p>The Campus Tutoring Service will be open for business soon!....</p> <h2>Our services include tutors for the following courses:</h2> <ul> <li> Math 101</li> <li> Accounting 200</li> <li> Economics 251</li> </ul> </body> </html> Project 2: Creating and Editing a Web Page
Refreshing the View in a Browser • Click the Campus Tutoring Service Home Page button on the taskbar • Click the Refresh button on the Standard toolbar Project 2: Creating and Editing a Web Page
Refreshing the View in a Browser Project 2: Creating and Editing a Web Page
Upload it to your web server Project 2: Creating and Editing a Web Page
Viewing HTML Source Code for a Web Page • Click View on the menu bar • Click Source on the View menu • Click the Close button on the Notepad title bar Project 2: Creating and Editing a Web Page
Viewing HTML Source Code for a Web Page Project 2: Creating and Editing a Web Page
Printing a Web Page and an HTML File Project 2: Creating and Editing a Web Page
Project Summary • Create your index.html file and upload it to your page. • Send the link to the TA. Project 2: Creating and Editing a Web Page
Project 2 Complete Creating and Editing a Web Page