Download
1 / 49
490 likes | 513 Vues
Learn about graphical user interfaces (GUIs), including abstract classes, polymorphism, and frame construction. Practice drawing shapes and creating interactive programs.

E N D
Graphical User InterfacesLecture 25, Thu Apr 6 2006 based on slides by Kurt Eiselt http://www.cs.ubc.ca/~tmm/courses/cpsc111-06-spr
Midterm solutions going out at end of week Assignment 3 due Friday Apr 7, 5pm CSLC will have special exam period hours Watch for review session announcement Final exam: Mon Apr 24, 3:30pm, HEBB TH News
Weekly Questions • Last one due today • Grading: full credit if did 7 or more • Check next week for grade in WebCT
Reading • This week: • Chapter 5.1, 5.2, 11.5, 12.1, 12.2, 12.3
Exam • Practice exam available under Challenge link from course page http://www.ugrad.cs.ubc.ca/~cs111/
What You Should Know Chapter 1, 2, 3, 4, Chapter 5.1, 5.2 Chapter 6, 7 Chapter 8 (but skip 8.2, 8.3, and 8.4) Chapter 9.3, 9.6, 9.7, 9.8 Chapter 11.1, 11.2, 11.3, 11.5 Chapter 12.1, 12.2, 12.3 Chapter 13 (except for 13.8.3) plus UML diagrams as you've seen in labs/tutorials go back in the powerpoint slides and review sorting
How to prepare Read everything that we told you to read on the previous slide Review lecture notes and code written in class (available from web) Practice, practice, practice -- write programs (especially using inheritance and abstract classes) If you're not getting it and want to try a different approach, run to the bookstore (or head to Amazon.ca or Indigo.ca) and get a copy of...
How to prepare Head First Java by Kathy Sierra and Bert Bates Read this book, work all the problems (there are zillions), and you should have a better grasp of what's going on with Java. (I have no financial interest in this book or any bookseller.)
A Problem The Coca-Cola Company has founded Vending University. VU has two kinds of students. The full time students pay $250.00 per credit in tuition up to a maximum of $3000.00 (12 credits), even if they enroll in more than 12 credits. Tuition for students in the executive program is computed differently; these students pay a $3000.00 "executive fee" plus $400.00 per credit, with no ceiling or cap on the total. Each student has a name and is enrolled for some integer number of credits. Write an abstract superclass called Student, and write concrete subclasses called FullTimeStudent and ExecutiveStudent. The method for computing the tuition should be called computeTuition(). Now do it again, but with an interface called Student instead of an abstract superclass. Provide a test program that uses polymorphism to test your classes and methods.
Programming Practice • Two kinds of practice, both are important! • Using computer, open book, Internet, discussing approach with friends, take as long as you need to fully understand • Closed book, write on paper, don't talk to anybody about the question, time pressure
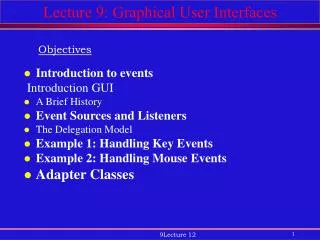
Objectives • Taste of what's under the hood with graphical programming • note: taste, not mastery!
Recap: Making a frame window Step 1: Construct an object of the JFrame class. Step 2: Set the size of the frame. Step 3: Set the title of the frame to appear in the title bar (title bar will be blank if no title is set). Step 4: Set the default close operation. When the user clicks the close button, the program stops running. Step 5: Make the frame visible.
Recap: Drawing boxes Step 1: Define RectangleComponent extending JComponent Step 2: Override paintComponent() method. Step 2.1: Create Rectangle object Step 2.2: Draw Rectangle using Graphics2D object Step 2.3: Move Rectangle, Draw Rectangle, … Step 3: In driver, construct RectangleComponent, add to JFrame
Recap: RectangleComponent code import java.awt.Graphics; // AWT is the Abstract Windowing Toolkit, import java.awt.Graphics2D; // an older graphical user interface import java.awt.Rectangle; // toolkit import javax.swing.JPanel; import javax.swing.JComponent; public class RectangleComponent extends JComponent { public void paintComponent(Graphics g) { Graphics2D g2 = (Graphics2D) g; Rectangle box = new Rectangle(5, 10, 50, 75); g2.draw(box); box.translate(80,100); g2.draw(box); } }
Recap: FrameViewer code import javax.swing.JFrame; public class FrameViewer { public static void main(String[] args) { JFrame myframe = new JFrame(); // make a new JFrame object final int F_WIDTH = 300; // 300 pixels wide final int F_HEIGHT = 400; // 400 pixels high myframe.setSize(F_WIDTH, F_HEIGHT); myframe.setTitle("My Frame"); // this is optional myframe.setDefaultCloseOperation(JFrame.EXIT_ON_CLOSE); RectangleComponent component = new RectangleComponent(); myframe.add(component); myframe.setVisible(true); } }
Recap: Here's what we drew > java FrameViewer
Graphical user interfaces (GUIs) The graphical user interface allows us to interact with our programs through mouse movements, button clicks, key presses, and so on. Your Windows or Macintosh operating system provides you with a GUI so you don't have to remember all sorts of instructions to type at the command line.
Graphical user interfaces (GUIs) The graphical user interface allows us to interact with our programs through mouse movements, button clicks, key presses, and so on. Your Windows or Macintosh operating system provides you with a GUI so you don't have to remember all sorts of instructions to type at the command line. Here's a GUI you've seen me use many times.
Event handling How do we make a GUI in Java? We install event listeners. An event listener is an object that belongs to a class which you define. The methods in your event listener contain the instructions to be executed when the events occur. Any event listener is specific to an event source. For example, you'd have one kind of event listener to respond to the click of a button on your mouse, and another to respond to the press of a key on your keyboard. When an event occurs, the event source calls the appropriate methods of all associated event listeners.
Event handling Here comes an example, straight from your book. This example is a simple program that prints a message when a button is clicked. An event listener that responds to button clicks must belong to a class that implements the ActionListener interface. That interface, supplied by the Abstract Windowing Toolkit (AWT), looks like this: public interface ActionListener { void actionPerformed(ActionEvent event); } Java uses the event parameter to pass details about the event. We don't need to worry about it.
Event handling Here's what our example class that implements the ActionListener interface looks like: import java.awt.event.ActionEvent; import java.awt.event.ActionListener; public class ClickListener implements ActionListener { public void actionPerformed(ActionEvent event) { System.out.println("I was clicked."); } } The actionPerformed() method contains the instructions we want to be executed when our button is clicked.
Event handling Next we'll see a program that tests our ClickListener class. It looks very much like the program we wrote earlier. First we create a frame window object so we have a place to put the button that we want to click.
Event handling import javax.swing.JFrame; import javax.swing.JButton; import java.awt.event.ActionListener; public class ButtonTester { public static void main(String[] args) { JFrame myframe = new JFrame(); final int F_WIDTH = 100; final int F_HEIGHT = 60; myframe.setSize(F_WIDTH, F_HEIGHT); myframe.setTitle("Button Tester"); myframe.setDefaultCloseOperation(JFrame.EXIT_ON_CLOSE); myframe.setVisible(true); } }
Event handling Next we'll see a program that tests our ClickListener class. It looks very much like the program we wrote earlier. First we create a frame window object so we have a place to put the button that we want to click. Then we create a button object and add it to the frame, just like the rectangles before.
Event handling import javax.swing.JFrame; import javax.swing.JButton; import java.awt.event.ActionListener; public class ButtonTester { public static void main(String[] args) { JFrame myframe = new JFrame(); final int F_WIDTH = 100; final int F_HEIGHT = 60; myframe.setSize(F_WIDTH, F_HEIGHT); myframe.setTitle("Button Tester"); myframe.setDefaultCloseOperation(JFrame.EXIT_ON_CLOSE); JButton button = new JButton("Click me!"); myframe.add(button); myframe.setVisible(true); } }
Event handling Next we'll see a program that tests our ClickListener class. It looks very much like the program we wrote earlier. First we create a frame window object so we have a place to put the button that we want to click. Then we create a button object and add it to the frame, just like the rectangles before. Finally we create an event listener object called ClickListener and attach it to the button we just made.
Event handling import javax.swing.JFrame; import javax.swing.JButton; import java.awt.event.ActionListener; public class ButtonTester { public static void main(String[] args) { JFrame myframe = new JFrame(); final int F_WIDTH = 100; final int F_HEIGHT = 60; myframe.setSize(F_WIDTH, F_HEIGHT); myframe.setTitle("Button Tester"); myframe.setDefaultCloseOperation(JFrame.EXIT_ON_CLOSE); JButton button = new JButton("Click me!"); myframe.add(button); ActionListener listener = new ClickListener(); button.addActionListener(listener); myframe.setVisible(true); } }
Event handling > java ButtonTester
Event handling A button listener class like ClickListener is likely to be specific to a particular button, so we don't really need it to be widely accessible. We can put the class definition inside the method or class that needs it. So we can put this class: import java.awt.event.ActionEvent; import java.awt.event.ActionListener; public class ClickListener implements ActionListener { public void actionPerformed(ActionEvent event) { System.out.println("I was clicked."); } } inside the main method of the ButtonTester class as an inner class.
Event handling import javax.swing.JFrame; import javax.swing.JButton; import java.awt.event.ActionListener; import java.awt.event.ActionEvent; // note this addition public class ButtonTester2 { public static void main(String[] args) { JFrame myframe = new JFrame(); final int F_WIDTH = 100; final int F_HEIGHT = 60; myframe.setSize(F_WIDTH, F_HEIGHT); myframe.setTitle("Button Tester"); myframe.setDefaultCloseOperation(JFrame.EXIT_ON_CLOSE); JButton button = new JButton("Click me!"); myframe.add(button);
Event handling class ClickListener implements ActionListener { public void actionPerformed(ActionEvent event) { System.out.println("I was clicked."); } } ActionListener listener = new ClickListener(); button.addActionListener(listener); myframe.setVisible(true); } }
Making buttons do more This next example is from the book too, but I've changed the BankAccount class to the BunnyFamily class. Why? Because everybody likes bunnies. Let's say we want to compute the growth in the number of bunnies in my bunny family through successive clicks of a button. (OK, it's a stretch, but it's still better than the boring bank account example.) We'd start with a BunnyFamily class, of course. It has a method for retrieving the number of bunnies in the family, and another method for increasing the number of bunnies according to the Fibonacci numbers.
Fibonacci numbers Leonardo Pisano (1170 - 1250), also known as Fibonacci, came up with a model of growth in an idealised bunny (really) population. Assuming that in the first month there is just one newly-born pair new-born pairs become fertile from their second month each month every fertile pair spawns a new pair, and the bunnies never die Then if we have A pairs of fertile and newly-born bunnies in month N and we have B pairs in month N+1, then in month N+2 we'll have A+B pairs.
Fibonacci numbers The numbers for our purposes are 2, 3, 5, 8, 13, 21, 34 and so on. Fibonacci was wrong about the growth of bunny populations, but his numbers live on in mathematical history.
Making buttons do more public class BunnyFamily { private int totalBunniesNow; private int totalBunniesLastTime; public BunnyFamily() { totalBunniesNow = 2; // first two numbers in the totalBunniesLastTime = 1; // Fibonacci sequence } public int getBunnies() { return totalBunniesNow; } public void updateBunnies() { totalBunniesNow = totalBunniesNow + totalBunniesLastTime; totalBunniesLastTime = totalBunniesNow - totalBunniesLastTime; } }
Making buttons do more We start by importing everything but the proverbial kitchen sink. Then we create our frame window.
Making buttons do more import java.awt.event.ActionEvent; import java.awt.event.ActionListener; import javax.swing.JButton; import javax.swing.JFrame; import javax.swing.JLabel; import javax.swing.JPanel; import javax.swing.JTextField; public class BunnyGrowthViewer { public static void main (String[] args) { JFrame frame = new JFrame(); frame.setSize(400, 100); frame.setDefaultCloseOperation(JFrame.EXIT_ON_CLOSE); JButton button = new JButton("Add Bunnies"); final BunnyFamily mybunnies = new BunnyFamily();
Making buttons do more We start by importing everything but the proverbial kitchen sink. Then we create our frame window. Next we create the button object.
Making buttons do more import java.awt.event.ActionEvent; import java.awt.event.ActionListener; import javax.swing.JButton; import javax.swing.JFrame; import javax.swing.JLabel; import javax.swing.JPanel; import javax.swing.JTextField; public class BunnyGrowthViewer { public static void main (String[] args) { JFrame frame = new JFrame(); frame.setSize(400, 100); frame.setDefaultCloseOperation(JFrame.EXIT_ON_CLOSE); JButton button = new JButton("Add Bunnies"); final BunnyFamily mybunnies = new BunnyFamily();
Making buttons do more We start by importing everything but the proverbial kitchen sink. Then we create our frame window. Next we create the button object. Now we instantiate a BunnyFamily and call the object mybunnies. Why is it final? Because inner classes can access local variables from the surrounding scope only if the variables are final, and we're going to want to access some local variables from the surrounding scope inside the inner class. (Note that final doesn't keep the internal state of the mybunnies object from changing...it only means that once mybunnies holds a reference to a particular BunnyFamily object, mybunnies cannot then be assigned a different reference.)
Making buttons do more import java.awt.event.ActionEvent; import java.awt.event.ActionListener; import javax.swing.JButton; import javax.swing.JFrame; import javax.swing.JLabel; import javax.swing.JPanel; import javax.swing.JTextField; public class BunnyGrowthViewer { public static void main (String[] args) { JFrame frame = new JFrame(); frame.setSize(400, 100); frame.setDefaultCloseOperation(JFrame.EXIT_ON_CLOSE); JButton button = new JButton("Add Bunnies"); final BunnyFamily mybunnies = new BunnyFamily();
Making buttons do more We need a user interface component that displays a message containing the current number of bunnies. Such a component is called a label. Here's how it's created...
Making buttons do more final JLabel label = new JLabel("bunnies = " + mybunnies.getBunnies()); JPanel panel = new JPanel(); panel.add(button); panel.add(label); frame.add(panel); class AddBunniesListener implements ActionListener { public void actionPerformed(ActionEvent event) { mybunnies.updateBunnies(); label.setText("bunnies = " + mybunnies.getBunnies()); } } ActionListener listener = new AddBunniesListener(); button.addActionListener(listener); frame.setVisible(true); } }
Making buttons do more We need a user interface component that displays a message containing the current number of bunnies. Such a component is called a label. Here's how it's created... We now want to put the button and label components in the frame, but Java will place one on top of the other. Instead, we create a panel object -- a panel is a container for other user interface components -- and then add the panel to the frame.
Making buttons do more final JLabel label = new JLabel("bunnies = " + mybunnies.getBunnies()); JPanel panel = new JPanel(); panel.add(button); panel.add(label); frame.add(panel); class AddBunniesListener implements ActionListener { public void actionPerformed(ActionEvent event) { mybunnies.updateBunnies(); label.setText("bunnies = " + mybunnies.getBunnies()); } } ActionListener listener = new AddBunniesListener(); button.addActionListener(listener); frame.setVisible(true); } }
Making buttons do more We need a user interface component that displays a message containing the current number of bunnies. Such a component is called a label. Here's how it's created... We now want to put the button and label components in the frame, but Java will place one on top of the other. Instead, we create a panel object -- a panel is a container for other user interface components -- and then add the panel to the frame. Next we define our specific event listener class.
Making buttons do more final JLabel label = new JLabel("bunnies = " + mybunnies.getBunnies()); JPanel panel = new JPanel(); panel.add(button); panel.add(label); frame.add(panel); class AddBunniesListener implements ActionListener { public void actionPerformed(ActionEvent event) { mybunnies.updateBunnies(); label.setText("bunnies = " + mybunnies.getBunnies()); } } ActionListener listener = new AddBunniesListener(); button.addActionListener(listener); frame.setVisible(true); } }
Making buttons do more We need a user interface component that displays a message containing the current number of bunnies. Such a component is called a label. Here's how it's created... We now want to put the button and label components in the frame, but Java will place one on top of the other. Instead, we create a panel object -- a panel is a container for other user interface components -- and then add the panel to the frame. Next we define our specific event listener class. Then we create an event listener object and associate it with the button. Finally, we make sure that everything is visible.
Making buttons do more final JLabel label = new JLabel("bunnies = " + mybunnies.getBunnies()); JPanel panel = new JPanel(); panel.add(button); panel.add(label); frame.add(panel); class AddBunniesListener implements ActionListener { public void actionPerformed(ActionEvent event) { mybunnies.updateBunnies(); label.setText("bunnies = " + mybunnies.getBunnies()); } } ActionListener listener = new AddBunniesListener(); button.addActionListener(listener); frame.setVisible(true); } }