Course Menu Creation Guide: Tools, Content Areas, and Organization
Learn how to create a course menu step-by-step, add tools and content areas, and organize links effectively. Start building engaging courses now!


Course Menu Creation Guide: Tools, Content Areas, and Organization
E N D
Presentation Transcript
Overview • Four Steps to Creating a Course Menu • Plan your Links • Add the Tools • Create the Content Areas • Organize the Links
Keep It Simple • Possible Starting Points
Adding Tools to the Course Menu Fast Steps In Edit Mode, click the Plus Sign (Create Item Icon) Select Create Tool Link
Adding Tools to the Course Menu Enter the name for the Link From the Type drop down list, select the tool to add Select whether the tool will be available to users Click Submit
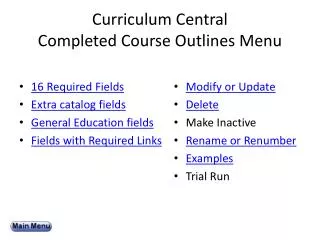
Create Content Areas • Four Sub-Steps • Determine how Content Areas will be organized • Add the Content Areas • Add items and tools to the Content Areas • Edit the items in the Content Areas
Organization of Content Area • Three approaches • Chronologically • By Content Type • By Subject Area
Chronologically In this approach, each Content Area contains a week’s worth or a chapter’s worth of material
Type of Content • Related types of content are grouped together in a Content Area
Subject Area • Each Content Area contains materials on a particular subject.
Add The Content Area Steps In the Edit Mode, click the Plus sign above the Course Menu Select Create Content Area
Add The Content Area Enter a Name for the link Select whether it will be available to users Click Submit
Hands-on ActivityAdd Content Areas • Plan Your Content Area • Consider how you will organize your course • Add Content Areas • Create two or three Content Areas • Title one of them Begin Class Here • View Content Areas • Note the Content Areas you created. Because the Content Areas created have no content in them, there is an icon of a dotted square. • Access the Begin Class Here area and note that it is empty. • Return to the Homepage using the breadcrumbs.
Add Items/Tools to Content Area • The following are examples of items that can be added to a Content Area: • Items that contain files, text, images • Individual Tool links • Folders • Tests and surveys • Assignments • External Links • Course Links • Module Pages
To Add an Item • Use the “Create Item” button on the Action Bar. • Add other materials using the “Build”, “Evaluate”, and “Collaborate” buttons
Adding an Item • In Edit Mode, access the Content Area from the Course Menu • On the Action Bar, click Create Item • On the Add Item Page, enter the Item’s Name and text • To add a file, click Browse and locate the file. To add multiple files, use the Text Editor’s Attach File function • Under Options, click Yes to make the item available to students • Click Submit
Adding a Tool to the Content Area • In Edit, access the Content Area. • From the Build Menu, select Link to Tools Area • On the Link to Tools page, select the tool and click Next • On the Add Link Page enter a link name or leave the default name • In the Text box, enter the text to appear under the Link Name • Under Options, select availability • Click Submit
Hands-on ActivityAdding Materials to Begin Class • Add an Item titled About This Course • Use the Build Menu to Create Syllabus Select the option to Create New Syllabus • Add a link to the Discussion Board • Add an External Link • Turn Edit Mode to OFF to preview your course as a Student
Editing the Items in a Content Area • After items are added to a Content Area, you may edit the following: • The Item’s Name • The Item’s Availability • The Order of the Items
Editing an Item • In Edit Mode, in the Content Area, click the Item’s Action Link • Select Edit • Edit the item’s name and/or availability
Changing the Order of Items • In Edit Mode, press the “Move” icon next to the item. The item is highlighted. • Drag the item into the new location in the Content Area.
Hands-on ActivityOrganizing Content Items • Change the order of the links in the Course Menu by using the drop and drag function. • Change the name of one of the Links. (Please do not change the name of the Tools Link) • Make one of the links unavailable to students • Turn Edit Mode OFF to view as a student.
Congratulations!! • You are well on your way to creating an engaging course for your students!