Download

1 / 24
240 likes | 521 Vues
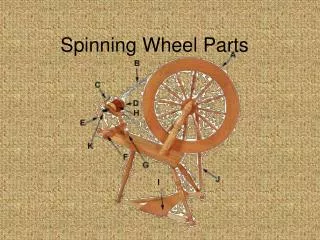
How to Construct a Dodec Spinning Wheel. Jennifer Wagner LIS 7963 July 30, 2014. Notes about the Instructions. The instructions I found and followed are available online. They are available through Spinning Daily ’s website ( http://www.spinningdaily.com/media/p/9016.aspx ).

E N D
How to Construct a Dodec Spinning Wheel Jennifer Wagner LIS 7963 July 30, 2014
Notes about the Instructions • The instructions I found and followed are available online. They are available through Spinning Daily’s website (http://www.spinningdaily.com/media/p/9016.aspx). • The instructions that follow are mostly a simplified version of those on Spinning Daily with some advice on how to make it even simpler and cheaper for anyone who may want to construct one for themselves.
Why? • Why a spinning wheel? • I am a knitter and a spinner. Currently, I spin only on spindles and it takes quite a long time to spin up a skein of yarn on a little spindle. • Commercial spinning wheels, however, usually cost $300 on up, even for a used one. I do plan to purchase a wheel someday, but for about $40 or so, I was able to construct a simple wheel to give learning to spin on a wheel a try without the big investment. • Dodec? • Short for Dodecahedron – a shape with 12 sides. The wheel part of the spinning wheel is made out of 12 small pieces of wood.
Materials and Tools Tools: • Circular saw (possible with hand saw, but not preferable) • Hand drill • Drill bits in sizes 17⁄64" and 9⁄32" (Most people will have to buy these; common bit sets only go up to ¼") • Hammer • Sandpaper (This wheel will work rough cut, but most people will want to sand it) • Protractor Materials: • (2) ¼-20UNC x 3½ full thread, hex-head bolts • (1) ¼-20UNC x 3" full thread, hex-head bolt • (2) 1" x ¼" fender washers • (3) ½" x ¼" washers • (1) 3/8" nut • (6) ¼-20UNC nuts • (2) ¼-20UNC lock nuts • (1) dowel ¼" x 12" • (1) shaker pegs (½" x 17⁄32" tenon) • (1) 1" x 4" x 10' pine board (I purchased 12 feet) • (1) hinge • (1) ball of butcher’s twine • (1) box of 18 gauge 1¼" brads • Regular ol’ hammer and nails • Paraffin wax (not grease or oil) • Wood glue
Notes on Construction • Look over the supply list and see what you may have in your home, workshop, or items your friends may have that would meet the criteria for constructing the wheel. • For example, the design I used called for brad nails. In our ignorance, we bought a box of brad nails, not realizing that they require a nail gun. We do not have a nail gun. And the size of the brads was odd, so finding a non-pneumatic nail gun was difficult. • Odd sizes became a thing while I was building this wheel. • The bolt sizes were odd; the drill bits in the plans were not in our drill bit kit; a fender washer the design called for proved impossible to find unless I wanted to order a huge box of them. • If I had to do this again, I would consult some of my engineering friends or sat down and mathed it out myself to make it easier and less expensive.
Remember this during construction From the original instructions: “Having said that, the drilling of this hole is like everything else in this project: poor craftsmanship won’t keep the wheel from working.”
Measure Twice, Cut Once Borrowed a friend’s table saw (with a laser!) and cut most of my wood pieces. Some pieces are small and fingers could be lost when using a table saw. I saved those pieces for later.
Ten feet of lumber is all it takes When you think about it, ten feet of lumber isn’t all that much. If you know someone with a work shop, they may have pieces of 1x4 that you can use. Otherwise, ten feet of pine is about $8 at Home Depot.
Label the pieces Make sure to label the pieces. It would be zero fun to try to figure out what you have later on if you can’t build your wheel immediately.
Ingenuity is important When your wood glue is the consistency of peanut butter and won’t come out of the bottle on its own (and you don’t want to buy a new bottle), a little creativity to get it out.
There is nothing wrong with Old-fashioned Don’t own a pneumatic nail gun? No need to go out and buy one (plus a compressor). A good ol’ hammer and nails works just fine for this project.
Construct the Base Glue and nail the pieces for the base (that you labeled, of course).
Power drill:essential & Beautiful Power drills make drilling the necessary holes in the wheel assembly so much easier. No need to go old-fashioned here. If you don’t have one, you probably know someone who does.
Making Angles I’m a little embarrassed to admit that I do not have a protractor in my home. At all. It helped that we had a 3D printer in the classroom. 30 minutes later and problem solved.
Wheel:Assemble! Using your handy dandy protractor, measure 30 degree angles on the pieces of the wheel in 3-piece sections.
An almost perfect circle Arrange the 4, 3-piece sections into a circle, maneuvering them into an even-as-possible circle.
Bracing Attach the wheel braces, as centered as possible.
Sanding down the stem The stem of the wheel needs to fit snuggly into the base. Initially, my fit was so snug, that the wood was creaking and groaning as I tried to wedge the stem into the base. Rather than break anything, I sanded the bottom of the stem to make the stem slide into the base snug, without cracking the wood.
It’s coming together The stem in the base with some Starbucks to help me power through the construction process.
Houston, we have a problem… The stem and the upper receiver pieces need to have hole that align. I thought it was a brilliant idea to glue the pieces together with a touch of wood glue, drill the holes, and separate the pieces. It helps if you actually remember to separate the pieces. Even a little wood glue can go a long way.
When one isn’t enough Instead of one putty knife to pry off the upper receiver, let’s try four…
Eight is enough? Added some table knives to the equation. They didn’t help a whole lot.
Attaching the hinge I temporarily gave up on my upper receiver problem (next step: handsaw) and instead attached the hinge to the treadle and the base. The screws for the hinge were a little long. Maybe no one will notice the small holes in the top of the kitchen table.
The situation, as of Monday, July 28 All of the major components are together. Once the upper receiver problem is fixed, the rest of the assembly should conclude quickly (fingers crossed) and I should have a functional wheel by Wednesday’s presentation.