Download
1 / 43
430 likes | 624 Vues
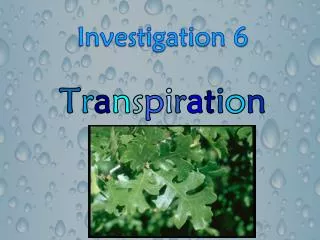
Investigation 6 T r a n s p i r a t i o n. At the end of Investigation 6 you will be able to:. Describe the structure and function of stomates and xylem. Describe the process of transpiration and explain where it fits into the water cycle. Design and run an experiment. .

E N D
At the end of Investigation 6 you will be able to: • Describe the structure and function of stomates and xylem. • Describe the process of transpiration and explain where it fits into the water cycle. • Design and run an experiment.
Investigation 6 - Part 1 What Happened to the Water?
Revisiting our Celery We set up this celery to see if a plant with no roots can take up water. What do you notice has happened? Where do you think the water went?
What happened to the Water? Brainstorm!
Your group will set up a scientific experiment to figure out where the water went.
Materials for the Celery Investigation • 1 stalk of celery • 2 vials • 1 vial holder • 1 graduated cylinder • 1 balance
Discussion points • How will you determine if water is absorbed by the celery? • What tools will you use to make measurements? • How will you determine if any water evaporates from your vials? • How can you use a second vial to set up a control for your experiment?
CONTROLLED EXPERIMENTS A control group is a standard against which an experiment is compared. The control group is set up exactly like the experimental group, except it is not subjected to the experimental variable.
CONTROLLED EXPERIMENTS In our celery investigation one possible explanation for missing water is that it evaporated. To find out if this is true, the investigator measures equal amounts of water into two vials and then puts a stalk of celery in only one of them. The vial with the celery is the experimental group, and the one with no celery is the control group. This is called a controlled experiment.
Why would a person set up a control when doing the celery investigation? To find out if a vial with water only loses the same amount of water as the vial containing water and celery.
CELERY-INVESTIGATION PLAN • Complete page 36 in your lab notebook. • Use the review column to check your plan. • Review proper use of graduated cylinders and balances so that you are prepared to run your experiment tomorrow.
We asked: “Can a plant without roots take up water?” After placing the celery in water, we noticed that some of the water was gone the next day. Now we are investigating where the water went!
I WOULD LIKE TO STANDARDIZE A FEW PARTS OF THIS EXPERIMENT: • Each group will have 2 vials and one stalk of celery to work with. • I cut all of the celery stalks so that there is 10cm of stalk before the first leaves. • Everyone should use 20ml of water in each vial.
Observe Celery Experiment • Measure the volume of liquid in each vial. OR 2. Determine the mass of the celery. Record data on data table created yesterday.
Celery Investigation Results report out Please summarize the investigation with some conclusions. In the conclusion, please describe: • What you have learned. • What you still don’t know. • How you might continue the investigation to obtain more information about the missing water.
One of the difficulties in trying to locate the missing water is the fact that we can’t see inside the plant. • What can we do to get more information? • What could we do to help us see the water in the celery? • Could we put something in the water to see it in the celery?
ADDING FOOD COLORING 1. Add water to the celery vial once again to bring the water level to the 25ml mark. (one vial per table) 2. Add 4 drops of red food coloring to the water. 3. Plunge the celery up and down a few times to distribute the dye uniformly throughout the water. 4. Return the vials to the storage area. 5. Discard any unused celery.
Investigation 6 - Part 2 Looking at Leaves
Red Water Investigation Observations What does this suggest about the movement of water in celery? Does this provide any clues about where the missing water has gone?
If the water is moving up the stems and getting out of the leaves, maybe we can find out how it escapes. Can anyone see channels for water to go through the stem and leaves. Can you see any openings or holes for water to come out? How can we look more closely for channels and leaf openings?
CELERY CROSS SECTIONS - What do you notice? - Describe the parts of the stalk that are red. - How does this observation help you to understand how water moves through the celery stalk?
XYLEM The tube like structures that carry water from the roots throughout the plants are called xylem. Xylem is made of specialized long, thin cells stuck end to end to form the water transportation system of most plants.
QUESTION TO CONSIDER If xylem is the structure that carries water throughout the plant, and the water is not collecting in the plant tissue, how does the water get out of the plant? We will search the leaves of a plant for openings.
The structures that look like little mouths on the leaves are openings called stomates. Stomates are pores or holes in the leaves that can open and close.
Stomata are minute aperture structures on plants found typically on the outer leaf skin layer, also known as the epidermis. • They consist of two specialized cells, called guard cells that surround a tiny pore called a stoma.
The word stomata means mouth in Greek because they allow communication between the internal and external environments of the plant. • Their main function is to allow gases such as carbon dioxide, water vapor and oxygen to move rapidly into and out of the leaf.
ARE STOMATES MADE OF CELLS? No, stomates are openings. The size of the opening, however, is controlled by cells. The two cells that look like lips are called guard cells. ARE THERE MORE STOMATES ON ONE SIDE OF THE LEAF THAN THE OTHER? Yes, the bottom surface of the leaf has many more stomates than the top.
Wilted vs. Crisp Leaves How are the stomata different? - The guard cells are closed on the wilted leaf What is the purpose of the stomata? -To regulate the amount of water passing out the plant Why do you think they are closed on the wilted leaf? - To prevent water loss
Investigation 6 - Part 3 Shrubs and Trees
What happened when the celery was put into water? It seems like a lot of water passes through the plant. How can we capture some of the water to confirm that it is actually passing through? I have a bunch of these clear bags and pieces of string. Could we use them to help with this problem?
Come up with a plan to test a plant growing outdoors to see if water is passing through it. Brainstorm some ideas in your journal.
INVESTIGATION • Use masking tape to label the string with the groups name. • Weigh the plastic bag and record the mass on the label. • Locate a dry branch, slip the bag over the foliage and tie it off securely with the string. • The next day, look for water in the bag, remove it and reweigh it. • Calculate the amount of water that escaped from the branch in one day.
Go Outside to Retrieve Bags • Remove carefully(bring scissors) to not lose any water then hold shut! • Come back to class. • Reweigh the bag and calculate mass • Record in the table you created in your ISN yesterday.
BAGGIE EXPERIMENT RESULTS • Why did the bag weigh more? • The leaves were dry when the bag was put over the branch. Where did the water come from? • Where is the water that came out of the other leaves in your plant?
Transpiration The process by which water passes through a plant from the root to the leaves and then out through the stomata is called transpiration. Transpiration ensures that water will be flowing to every cell in the plant at all times.
When water is scarce, the guard cells on the stomata close to decrease transpiration. When water is plentiful, the stomata will open and water will move through the plant more quickly.
WATER CYCLE Water evaporates from the sea, rises to the sky as water vapor, forms clouds, drops its moisture to the Earth as rain and snow, and flows back to the sea. Another major contributor to the water cycle is transpiration by plants. The water vapor that comes out through the stomata also rises to the sky where it joins with water vapor from other sources to form clouds.