Download
1 / 107
1.09k likes | 1.64k Vues
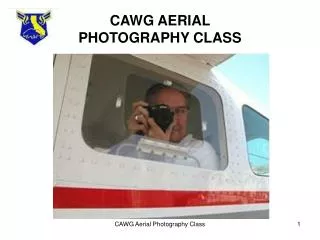
CAWG AERIAL PHOTOGRAPHY CLASS Table of Contents Section 1. Description & Scope of this Class Section 2. Digital Cameras – general information for CAWG & member owned cameras Section 3. Operation of CAWG Owned Cameras Section 4. Photo Missions – Tips & Techniques

E N D
CAWG AERIAL PHOTOGRAPHY CLASS CAWG Aerial Photography Class
Table of Contents • Section 1. Description & Scope of this Class • Section 2. Digital Cameras – general information for CAWG & member owned cameras • Section 3. Operation of CAWG Owned Cameras • Section 4. Photo Missions – Tips & Techniques • Section 5. Composing your Pictures • Section 6. Transferring & Editing your Pictures • Section 7. Sample Photographs • Section 8. Summary & Photo Tips • Camera Operating Diagrams: Exhibit A. Nikon 5700 (Nine slides) Exhibit B. Nikon D-100 (Twelve slides) Exhibit C. Nikon D-70 (Twelve slides) CAWG Aerial Photography Class
Section 1. Description & Scope of This Class • Description – This class has been designed as a guide to improving the photos taken by CAWG aircrews and hence the quality of the information we produce for our customers. It is also a prerequisite for attending the SDIS training classes. • Scope – This class is not designed to be an all encompassing class on photography so the scope has been restricted to the type of photographs that we are most commonly asked to take on our missions. CAWG Aerial Photography Class
Scope (cont.) • Most of those requests occur in the Counter Drug (CD) , Homeland Security (HLS), Satellite Digital Imaging System (SDIS), Search and Rescue (SAR), and the various Damage Assessment/Relief missions (DR). However, the techniques presented here are applicable for all of the CAWG aerial photography assignments. • While the main thrust of this class will involve currently owned CAWG cameras, there will be a discussion of using member owned cameras and how to assess the capabilities of those cameras for CAWG aerial photo missions CAWG Aerial Photography Class
Scope (cont.) • Given the varying backgrounds of the CAWG aircrew members who are called upon to fly our missions, this class is designed to use the basic features of the cameras that apply to our missions. • We have purposely avoided the multitude of advanced settings that can be achieved by professional photographers with their own cameras. Most of our members do not use these cameras on a frequent enough basis to maintain proficiency on those expert settings. CAWG Aerial Photography Class
Scope (cont.) • How to get the most out of this class • It is suggested that you read the class the first time to understand the organization of the material and to familiarize yourself with the content. • Then re-read the class to learn as much as possible. • Then review the sections as many times as necessary to pick up on the fine points of aerial photography. • Use the camera Quick Reference Guides and User Manuals to learn more about the camera you are going to use. Practice on the ground before you fly. Critique your pictures with a mentor to look for ways to improve the quality of your pictures. CAWG Aerial Photography Class
Scope (cont.) • As you will see in the Table of Contents, this course has been divided into a number of sections. Sections 1-6 cover aerial photography. Section 7 contains sample pictures presenting the good and not so good results. Section 8 is a summary and has some good photo tips. • Exhibits A, B & C show details of camera operation for the Nikon 5700, Nikon D-100 and Nikon D-70 respectively. • The Quick Reference Guides (QRGs) mentioned in this class can be accessed and printed as a one page document from the CAWG website. CAWG Aerial Photography Class
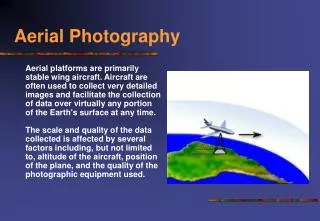
Section 2.Digital Cameras – General Information • Features & Advantages – Digital cameras are particularly handy for aerial photography since the “film” does not have to be developed. The photos may be examined immediately after shooting and if the quality is not acceptable, another picture may be taken. Also, you can readily enhance the photos after the shot is taken thereby improving the quality of the picture. • Optical zooming is done with the lens of the camera and is subject to very little distortion. This is the preferred method to zoom in on a subject. • Digital zooming is done after the pictures are transferred to a computer. This method of zooming is really just “spreading pixels apart” and soon results in distortion or blurring that is readily visible. CAWG Aerial Photography Class
Digital Cameras (cont.) • CAWG owned cameras– CAWG currently owns three different models of digital cameras • Nikon Coolpix 5700 – is used extensively in the CD program. Although, now an older model, it is light weight and easy to carry around the neck for longer missions. These cameras feature an electronic 35 mm to 280 mm (10x) built in optical zoom lens and 5 mega-pixel capability. (See Exhibit A for details about operation of this camera. CAWG Aerial Photography Class
Digital Cameras (Cont.) • Nikon digital SLR D-100 – is used for SDIS missions in So. Calif. This uses an add-on, 70 mm to 300 mm zoom lens and 6.2 mega-pixel capability. (See Exhibit B for details about operation of this camera) • Nikon digital SLR D-70 – is used for SDIS missions in No. Calif. This uses an add-on 70mm to 300 mm zoom lens and 6.2 mega-pixel capability. This is a newer model but is very similar to the D-100. (See Exhibit C for details about operation of this camera). • New Models – Manufacturers change their models very frequently so there will be newer models introduced into the CAWG inventory the future. As these are purchased, they will still need to have the same basic minimum capabilities in order to accomplish our mission of quality aerial photography for our customers. CAWG Aerial Photography Class
Digital Cameras (cont.) • Member owned cameras– These may be used effectively to produce a good product for our customers but care must be used to determine if the camera is capable of producing the quality desired. • A three mega-pixel camera is the bare minimum with 4 or 5 mega- pixel capability being a more desirable minimum. This will depend on the requirements from our customers. Considering that we are shooting most of our pictures at a minimum distance of about ¼ mile (slant range) we need cameras with greater capability to zoom in and produce quality and detail information. CAWG Aerial Photography Class
Digital Cameras (cont.) • Most zooming will be done in the 150 mm to 275 mm range. Anything less than that will produce a wider angle picture with no details. Anything more than that will usually be harder to focus and may produce a blurred picture under some conditioins. • It is very important to determine our customer’s objectives, the quality product desired, and then match the camera to those requirements. Many of our customer’s are used to seeing quality pictures from various sources. They will not be satisfied with mediocre results from cameras with lesser capabilities. CAWG Aerial Photography Class
Digital Cameras (cont.) • One technique to use to assess you camera’s capabilities is to measure ¼ mile along a city street with you car’s odometer. Use 2 ½ tenths of a mile and park you car. Take pictures of objects at the other end of your measured distance. Review these pictures in the camera and on the computer to check for adequate details and resolution. • If the results are not good, use a different camera with greater capability. CAWG Aerial Photography Class
Digital Cameras (cont.) • Useful Photographic Terms • Shutter -The part of the camera lens that opens and closes to allow the light image be recorded. • Shutter Speed – The duration that the shutter is open when taking a picture. Under “Programmed” operation pictures taken at less that 1/175th of a second may be blurred due to aircraft motion. • Aperture – The size of the lens opening while a picture is being taken usually expressed as an f/stop. Larger lens openings use a smaller number like f/3.5. Smaller lens openings use a larger number like f/11. The amount of light that enters the camera is a function of both the aperture and the shutter speed. CAWG Aerial Photography Class
Digital Cameras (cont.) • Programmed operation - This where the camera is set to automatically calculate the best combination of shutter speed and aperture. During normal sunny days, a shutter speed of around 1/250th of a second and an aperture of about f/5.6 are common. (See section on special operations for low light and movement situations.) • Browser program – a computer program furnished by the camera manufacturer that permits transferring pictures to a computer. It also includes editing capabilities. • MSL – Altitude as shown on the aircraft altimeter (mean sea level). • AGL – Altitude above ground level. CAWG Aerial Photography Class
Digital Cameras (cont.) • ISO Sensiitivity - This is the sensitivity of the camera to the light it receives. In film cameras it is known as Film Speed or sometimes ASA rating. Using the Nikon default of 200 as an ISO setting is correct. • Increasing the ISO sensitivity can help with low light situations but in digital cameras the quality of the picture degrades very rapidly and it is not a setting we should adjust. CAWG Aerial Photography Class
Digital Cameras (cont.) • Care of Cameras and related Equipment • Put the camera strap around your neck – the very first thing after you touch it. This will ensure that you do not accidentally drop the camera. Cameras are an intricate electromechanical instrument and nothing inside is made better by high g-forces. At any time, The camera should be either around your neck or in its case. • Keep the lens cap on when camera is not in use. This protects the lens from fingerprints and damage from other objects. It can be removed quickly and easily just before the next picture. • Avoid side loads on the lens tube. The lens has many parts inside and they don’t work well if damaged. CAWG Aerial Photography Class
Digital Cameras (cont.) • Keep your fingers off the lens. There is no reason to touch a lens at any time, and fingerprints are very hard to remove. • Use a squeeze bulb to blow off dust before cleaning the lens. This avoids grinding in the dust particles and damaging the coating on the precision lens. • If absolutely necessary, use soft, specially designed lens paper and solution for cleaning the lens and use a gentle touch. • Use the camera case for the camera and all related equipment. Protecting the equipment will ensure it will last for many years. CAWG Aerial Photography Class
Digital Cameras (cont.) • Compact Flash Card – This is the device where the pictures that have been taken are stored until they are transferred to a computer. The CAWG owned cameras have ample room for pictures (over 300 - 400) on one card without resorting to multiple cards. Therefore there is no reason to remove a card. The connector pins are very thin and can bend easily. Repairs are very expensive. • Maintain the “chain of custody” You are responsible for the camera from the time you receive it until you return it to the proper authority. Take the camera back to where it belongs with all of its related equipment. CAWG Aerial Photography Class
Section 3. Operation of CAWG Owned Cameras • Settings – Most digital cameras have a multitude of adjustments and settings, 95% of which we will never use in our applications. Please do not make adjustments to the settings other than those specified in the Quick Reference Guide (Q.R.G.) The next person will likely not knowhow to restore them and will have difficulty. • Check the settings when you pick up a camera and make sure they are set to the proper position according to the Quick Reference Guide (QRG) for that camera. Use the Q.R.G. and user manual to learn how to return the camera to those settings just in case they are not correct. CAWG Aerial Photography Class
Camera operation (cont.) • Shutter Release – Press this firmly using one finger while holding the camera with the same hand. Mashing down on the button with your finger, hand and arm usually results in a quick titling of the camera and can result in a blurred picture. • Sleep Mode – The Nikon 5700 cameras have a sleep mode where the camera is on, but is powered down to conserve battery power. If you are about ready to take a picture and are concerned that the camera will go into sleep mode just before the target comes into sight use a very light tap on the shutter release to prevent this situation. Please do not adjust or turn off this sleep mode, otherwise the next person may not know how to get it back and a low battery condition might occur. CAWG Aerial Photography Class
Camera operation (cont.) • Flash – Never use the flash. There is not enough light to take night or low light pictures and the flash will never carry far enough to do any good. What will happen instead is that the aircrew will lose their night vision creating a very dangerous flight situation. • Nikon 5700 – There is a setting that turns off the flash. Press the upper left button on the left side of the lens tube repeatedly until the display screen (on top) that shows the “lighting bolt” with the circle and line thru it. This means no flash. Consult the Q.R.G. or user manual for this camera. CAWG Aerial Photography Class
Camera operation (cont.) • Nikon D-100 and D70 – There is a button on the side of the flash cover that opens and closes the flash cover. Leave that closed at all times. Consult the Q.R.G. or user manual for this camera. • Focus – This is a very important. Out of focus pictures are of little value and they cannot be corrected with computer software. The Nikon software “sharpening tools” will not correct out of focus or blurred photos. (See special conditions) CAWG Aerial Photography Class
Camera operation (cont.) • Nikon 5700 – This camera has an automatic focus feature but it takes time and there is a chance that the lens will try to focus on the window or something else. Since our pictures will usually be taken at approximately ¼ mile (slant range), it is best to pre-focus on infinity. There is a button on the left side of the camera to do this. Keep pressing it until you see the mountain icon appear in the display on top. Follow the directions in the Q.R.G. or user manual for this camera. • Nikon D-100 and D-70 – The add-on zoom lenses have either an automatic or manual focus that is controlled by a switch on the front of the camera. Moving the switch to the “M” position frees the lens for a manual focus on infinity. However, be sure to recheck the focus just before taking the picture so that you get the sharpest focus possible CAWG Aerial Photography Class
Camera operation (cont.) • Picture Size or Quality – For our applications, use the JPGFINE setting. • Nikon 5700 – There is a button on the left side of the lens tube that controls this. Press this button repeatedly until the word “FINE” appears on the left side of the display on top of the camera. Refer to the QRG or user manual for this camera. • Nikon D-100 and D-70 – Check the Control Panel display on top of the camera and make sure it is set to Fine (L)arge. If not, Use the Menu button, select the SHOOTING submenu (camera icon), scroll & select Image Quality and select & set to JPG FINE . Make sure the SIZE is “L” for large. Refer to the user manual of Q.R.G. for more information. CAWG Aerial Photography Class
Camera operation (cont.) • Aperture & Shutter Speed – All CAWG owned cameras have an automatic or Programmed mode of operation. This is where the computer in the camera selects an appropriate aperture (lens opening) and shutter speed. This will be sufficient for most all of our CAP photo missions. Use the “P” or program setting. Refer to the Q.R.G. or user manual for the appropriate camera. (See section on special situations below). • Diopter Adjustment - This is a manual control that permits you to adjust the viewfinder to you particular eyes. It is a manual control located just to the left or right of the viewfinder on the Nikon cameras. CAWG Aerial Photography Class
Camera operation (cont.) • Multiple Labels For Camera Buttons – some of the buttons on the back of the D-100/D-70 cameras have more than one label shown in the user manual. Depending on what function you are performing, the button has a different label and usage – see the user manual for more information. • Special Situations – There are a few situations that may require the use of special features to get enough light to the lens or to adjust the shutter speed to stop the rapid movement of the camera due to turbulence or target movement or both. • In either situation, it is suggested to use the APERTURE priority feature to open up the lens and let the camera increase the shutter speed accordingly. CAWG Aerial Photography Class
Camera Operation (cont.) • In low light conditions (early morning or late afternoon), the camera will automatically adjust to a slower shutter speed to get more light into the lens. This will often result in a blurred picture since the shutter speed is too slow to stop the motion. Normally, photographers would use the shutter priority feature but in this case, you will run out of aperture adjustment long before you run out of shutter speed adjustment. So adjust the aperture to a smaller number (larger lens opening) until you see the shutter speed increase to an acceptable level. • In turbulent conditions or where the aircraft and/or target are moving rapidly, it is also necessary to increase the shutter speed to stop the motion. Again, use the Aperture priority setting and let the camera calculate an appropriate shutter setting. CAWG Aerial Photography Class
Camera Operation (cont.) • Please consult the Q.R.G. or user manual on how to accomplish these special settings. Please reset the camera back to the “P” or programmed mode for the next user. CAWG Aerial Photography Class
Section 4.Photo Missions • Customer Objectives – As previously mentioned, knowing and achieving the customer’s objective is very important. Also the quality of pictures and amount of detail needed should be determined before or during the briefing. Poor quality pictures or those that do not meet the expectations of the customer reflect poorly on our capabilities and are a waste of time and money. • Plan the Mission during the crew briefing: • Location & Nature of Target: Know the exact location and type of target for your photos along with the customer objectives CAWG Aerial Photography Class
Photo Missions (Cont.) • Altitude: Select an altitude that is safe but try for enough details to satisfy the customer’s objectives. At an altitude of 1000 ft. AGL (above ground level), the slant range will be about ¼ mile (or 1320 ft.). Altitudes higher than that will require additional levels of zooming (both optical and digital) to get sufficient details. • Ground Elevation Note the elevation of the ground surrounding your target and check the elevations of your planned approach. • Terrain Conditions & Obstacles Determine the safest approach to the target and still meet the customer objectives. Know where the obstacles are and other checkpoints along the approach. CAWG Aerial Photography Class
Photo Missions (Cont.) • Lighting Conditions From your briefings before the flight you should be able to predict the lighting conditions at your target. Your ideal lighting will come from behind you or over your shoulder. This will produce pictures with the most detail. Back-lighted pictures with the sun behind the subject will have the least amount of detail. Knowing that the sun will be in one of the following positions at selected times, you can select the best direction to point the camera: Morning – Sun pointing West to N/West – best camera pointing S/West to N/West Noon – Sun pointing North – best camera pointing N/West to N/East Afternoon – Sun pointing N/East to East – best camera pointing angle N/Eastto East. CAWG Aerial Photography Class
Photo Missions (Cont.) • Plan your Photo Run: At the briefing before you launch your flight, plan your direction of flight to approach yourtargets. Use the terrain details on aeronautical charts, county road maps, and the TOPO program to select the best approach. • The direction of flight will be approximately 90 degrees from the ideal direction the camera is pointing. • Example: If you are taking pictures out of the left widow, and the ideal lighting angle is determined to be pointing the camera Northeast, then the direction of flight should Southeast or 90 degrees greater than the calculated camera pointing angle. CAWG Aerial Photography Class
Photo Missions (cont.) • Discuss this at your briefing and check it before and during the flight. As you approach the target, direct your pilot to the optimum position for the photo run. • The aircraft wings should usually be level for taking photographs. 4.Review the plan at the aircraft before boarding. This will insure that the crew is fully aware of the plan and how to fly the mission. 5.Clean the windows to be used for taking photos before the flight. CAWG Aerial Photography Class
Photo Missions (cont.) • Crew Coordination during the photo session. • The observer keeps the flight log and makes entries each time the photographer takes a picture. Generally this consists of a photo number, brief description and key picture information such as latitude, longitude, camera pointing angle and altitude (MSL). • Lat/Long can be obtained from the GPS using either the Nav function or the MRK button in the SAR Map mode. • Altitude (MSL) is read directly from the Altimeter. • The camera pointing angle can be determined from the aircraft compass plus or minus 90 degrees depending on whether the photograph was taken out the left or right side window. CAWG Aerial Photography Class
Photo Missions (cont.) • Maintain extra vigilance for obstacles and other aircraft during the photo run since the photographer will be watching the target area. • Be aware that sharp turns and other maneuvers as well as turbulence can be especially hard on crew members who are looking through camera lenses or working with computers. Consider giving them a “level horizon” break from time to time. Crew performance can degrade rapidly if they are not feeling well. CAWG Aerial Photography Class
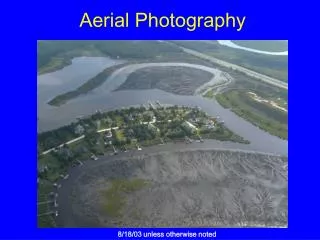
Section 5.Composing your picture • What to include and exclude: • Need details and enough surroundings to identify the target or relate the subject to its surroundings. • You can use a locating shot followed by a close up shot for more details. • Zoom In/Out: • Do not be afraid to zoom in until the subject Nearly fills the frame. • Wide angle shots do not contain enough usable detail. CAWG Aerial Photography Class
Composing your picture (cont.) • Centering and panning • Try to keep the subject in the center of the frame – use the “panning” technique to keep it centered. • Panning is allowing the camera to move with the target so that the target stays as close to the center of the picture as possible. • Focusing As previously mentioned, set the focus on infinity and adjust as necessary if you have a manual focus lens. • Direct your pilot When you are close to the target direct your pilot to the best position for the shot. If your request is unsafe, he will advise you and you can plan another approach. CAWG Aerial Photography Class
Composing your picture (cont.) • Keep all aircraft parts out of the picture • Our customers know we are in an aircraft. • Zoom in and try to nearly fill the frame with the target and try to eliminate aircraft wings struts and wheels. • A small amount of wing or strut at the edge of the picture can be cropped out during editing but don’t assume the customer will do it for you for you. CAWG Aerial Photography Class
Composing your picture (cont.) • Keep the horizon level or don’t let the water run out of your picture. • Aircrews like the heroic, high-G look because it conveys action. • Most customers do not have that experience and find it distracting while trying to rotate the picture to level the horizon. • Keep the subject perpendicular to the horizon as much as possible regardless what the aircraft is doing. • The viewfinder is a nice rectangular frame which we should use to help frame our pictures and keep them level. Practice using the viewfinder and it will become a natural tool for better photographs. CAWG Aerial Photography Class
Composing your picture (cont.) • Keep you body and the camera off the window and frame of the aircraft: • It helps to prevent a blur induced by aircraft vibration. • Your arms and body will help absorb any turbulence. • It permits you to pan the camera more easily and keep the target centered in the viewfinder. • Use caution when shooting through a camera window: • Shooting through an open window is ok. • Avoid extending the lens in to the slipstream as it causes vibrations. • Press the shutter button gently to avoid moving the camera at this moment. CAWG Aerial Photography Class
Composing your picture (cont.) • Use the “automatic” exposure settings • Let the camera calculate the best combination of shutter speed and aperture. • It is easier to use and allows you to concentrate on composing the picture. • This works for 99.9% of our photos since targets are usually stationary or are moving slowly. • See the special situations section for tips on low light or fast moving targets. • Never use a flash in aerial photography! CAWG Aerial Photography Class
Composing your picture (cont.) • Know how to review you pictures while they are still in the camera • Make sure the photo is in focus – you can’t fix it with editing • Zoom in to check for blurring – see user manual for how to do this. • Check composure for lighting and subject details. • Does the picture tell a story that is compatible with the customer’s objective? • If not, take another picture that does. CAWG Aerial Photography Class
Section 6.Transferring and Editing Your Pictures • NIKON View browser program: Permits transfer of pictures from the camera to a computer and it has good editing capabilities. It is the standard program for the CAWG owned cameras is quite satisfactory for our uses. The editor portion is not a professional level Photoshop program but it provides a great many features we can use as needed to enhance the details for our customers. • Attach one end of the transfer cable to the camera and the other (standard USB) end to the computer. • Turn on the camera and wait for the device to be recognized by the computer. • You will be prompted by windows to copy pictures – Press OK CAWG Aerial Photography Class
Transferring and Editing Your Pictures (cont.) • Nikon View will then prompt you to transfer pictures and provide a default path name and folder. In most cases use the default folder name in the MYPICTURES main folder. Click on the squiggly blue and orange arrow and the transfer process will begin. • When the transfer is complete, turn off the camera (to save the battery) and disconnect the cable. • When finished you will be left in a “Slide Sorter” window to proceed with editing. CAWG Aerial Photography Class
Transferring and Editing Your Pictures (cont.) • The Slide Sorter: This is a display of all the pictures in your most recent folder and looks like the old slide sorter light box used with film cameras. • Scroll through your pictures and review the results. • Select a picture for further review by clicking on it once. The frame around the picture will turn blue. You can double-click to get a full screen and the zoom in or out as desired to check for quality. (this step is not required) • You can give this picture a descriptive name by clicking on the FILE>rename function to the left. Pick a short name without using extra dots as separators but keep the .JPG suffix. Adding the word raw to your name will allow you to keep this picture separate from any edited versions. CAWG Aerial Photography Class
Transferring and Editing Your Pictures (cont.) • Editing: • The Nikon Coolpix 5700 cameras usually use Nikon View version 5.1.3, which has one tool palette and the other features are in drop down menus. • The Nikon D-100/D70 cameras use Nikon View version 6.0 which has two tool pallets for editing. • After selecting a picture (blue outline) from the “slide sorter,” click on the EDIT button (pencil icon) on the top row. This will open the edit program (ARC SOFT). • You can expand the temporary picture by clicking on the expansion box near the X in the upper right corner of the picture. CAWG Aerial Photography Class
Transferring and Editing Your Pictures (cont.) • Become familiar with the Tool Palette 1 and the Quick Tools palette and the features they present to improve contrast, digital zooming, and cropping. • Edit you pictures as necessary and the press FILE>Save.as and create your own new name for this picture. Note Nikon View does not handle extra data delimiters (dots) in the file name. Make sure you know the folder name that was used for the saved picture or you may need to search for it later. • Exit the editor program (ARC Soft) without closing any tool pallets. You will be left in the “slide sorter” portion of the browser program. CAWG Aerial Photography Class
Transferring and Editing Your Pictures(cont.) • The shutter speed and aperture settings that were used on your pictures may be reviewed here. • From the “slide sorter”, double-click on a picture and look for the shooting data to be displayed just above the picture. • If it is not displayed, turn on the display by clicking on the shooting data arrow on the tool bar above and to the left of the picture. CAWG Aerial Photography Class
Transferring and Editing Your Pictures (cont.) • Practice with test pictures until you become proficient. Ask a knowledgeable person to review your results. • Member owned cameras: • Become familiar with your own camera’s browser program and editing features. • Do not load your camera’s program onto a CAWG owned computer. This avoids any possibility of changed settings or controls and keeps the CAWG owned computers clean. Plan to bring your own computer and transfer the finished product to a memory stick or other recording media. CAWG Aerial Photography Class