Fingerstick Procedure
Fingerstick Procedure. For Accurate Glucose Results. Choose the finger carefully. Best locations for a finger stick is the 3rd and 4th fingers of the non-dominant hand. Avoid the 2nd and 5th fingers if possible. Perform the stick off to side of the center of the finger.

Fingerstick Procedure
E N D
Presentation Transcript
Fingerstick Procedure For Accurate Glucose Results
Choose the finger carefully • Best locations for a finger stick is the 3rd and 4th fingers of the non-dominant hand. • Avoid the 2nd and 5th fingers if possible. • Perform the stick off to side of the center of the finger. • NEVER use the tip or center of the finger.
Massage or Warm the site • Avoid fingers that are cold, cyanotic, swollen, scarred or covered with a rash. • Massage to warm the finger and increase blood flow by gently squeezing from hand to fingertip 5-6 times.
Clean and DRY the site • Cleanse fingertip with 70% isopropyl alcohol • Wipe dry with clean gauze or allow to air dry. • Caution: Alcohol can falsely elevate or lower blood glucose results.
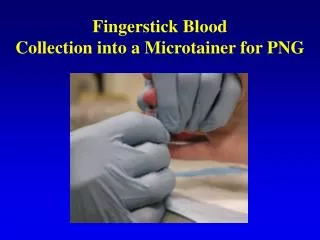
Finger Stick location • Using a sterile lancet, make a skin puncture just off the center of the finger pad. • Wipe away the first drop of blood (which tends to contain excess tissue fluid).
Do not milk finger • If necessary, apply lightpressure to the surrounding tissue until another drop of blood appears. • Avoid "milking". The drop of blood must be big enough to fill the strip completely. • NOTE: Do NOT squeeze or apply strong repetitive pressure to the site. This may result in hemolysis or increase tissue fluid in the blood causing incorrect glucose results. • Caution: Free flowing blood is necessary to obtain reliable results. Increased pressure beyond that necessary to hold the finger can result in inaccurate results.
CORRECT APPLICATION OF SAMPLE Place strip to the side of the drop of blood to allow the target area to fill by capillary action. When the hour glass appears on the meter CHECK the yellow target area to verify there is no yellow showing in the target area. ____________________ INCORRECT APPLICATION OF SAMPLE DO NOT apply sample to the top of the strip. DO NOT REPORT the glucose result, if yellow is showing in the target area of the strip and the test has begun. CORRECT APPLICATION OF SAMPLE CORRECT INCORRECT APPLICATION OF SAMPLE NO NO
Training Competency Step One • Print out the documentation showing you have passed the test. Step Two • Let your Unit POCT Trainer know you have completed this portion of your training and present him/her with the printed list. Step Three • Demonstrate your performance of a finger stick glucose for your trainer.