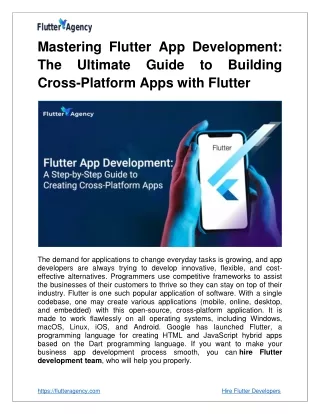
How to develop a Flutter app
Learn how to build your first app with Flutter. Introduction to our step-by-step Flutter app development tutorial for beginners.

How to develop a Flutter app
E N D
Presentation Transcript
How to Develop an App with Flutter – Introduction and project set up Introduction to your first Flutter app development Flutter Project Setup – you are reading this Flutter is one of the most demanded developing programming tools. This is all because of its large community which is handled by Google. In such a short period, it had gained immense popularity all over the world. First of all, it gets very important to know the basics of Flutter and why it is gaining attention on the internet these days. A flutter is a fantastic tool from Google for building cross-platform apps that can be delivered to the web, desktop, and mobile devices starting with the most recent stable version. Flutter is promoted by Google as a simple framework for creating high-quality, maintainable applications. Its goal is to allow developers to produce code that compiles for every platform by using the Skia engine to render its graphics layer. This blog can help you in developing a Flutter app or at least will make your most of doubts clear. whether you want to work for a Flutter development company or as a freelancer, this knowledge can help you in pursuing your goal. We must first set up the environment before we begin writing the code for our program. Make sure you have downloaded and unarchived the latest stable version of the Flutter SDK for your OS. If necessary, install dependencies so that you won't face trouble. Take a note that iOS can only be built on macOS. Let's have a look at the Flutter History to get an approximate idea of Flutter app development. All about Flutter (History) Flutter is a new SDK from Google that allows developers to build apps for both iOS and Android with a single code base. Flutter isn't a framework like other popular
solutions. Instead, it's an SDK that comes with each essential tool that is required to create a cross-platform app. Including widgets, testing APIs, and a rendering engine, Flutter has everything you need. Let's discuss some major specialties of Flutter that makes it unique and demanding in the market. Though it was only launched in 2017, it has been used by 39% of developers worldwide and quickly earned its place as the second most popular framework for developing cross-platform apps. • Dart is an object-oriented programming language for Flutter which employs advanced techniques and compiles to native code, resulting in a substantial speed boost. • Using Flutter as a canvas, developers can build an interface on top of the OS while moving services that developers typically control into the framework itself such as gestures, rendering, and animations. • Flutter has ready-made and bespoke widgets for rapid UI coding, allowing you to customize your app to any level. • Flutter has the simplest learning curve compared to the others, as well as a developing ecosystem that allows developers with no programming experience to prototype and builds apps. • Here Hot Reload feature explicitly increases the app development speed which increases the programmer's productivity and they can easily try new ideas on Flutter without any trouble. • Flutter apps are noted for their excellent performance, which is achieved through the utilization of CPU consumption, average response time, how many frames they can generate per second, and many more metrics. • It helps you to transition from any platform to Flutter and offers outstanding app portability.
Flutter Project Set up It's all about the IDE (Intelligent Design Environment). Installing an IDE is the next step in developing a Flutter application. In theory, an IDE isn't required, and development can be done with just the SDK and any text editor. IDEs, on the other hand, offer capabilities such as syntax highlighting, code completion, and a debugger that are extremely useful during the programming process. Flutter never fails to amaze its users with its features. It offers plugins for both IntelliJ and Visual Studio Code. If you use the Flutter plugins, don't forget to restart the IDE as the installed plugin will only work when you restart it. Apart from this there are chances that the Flutter plugin may not work correctly in Beta, Canary, or EAP (Early Access Preview) builds of IDEs, only stable versions are supported at this time. Now it's time to start the project which you can o by clicking on the welcome panel. Let's try to develop the app - Android – First of all open the (Alt+F12) terminal and run the doctor command. Make sure that your environment is properly configured because a slight mistake can lead to big trouble. Besides Flutter, we need a working IDE and a device (physical or simulated). It is mandatory for the smooth working of the app. If you're using an Android device, you have to connect a USB cord and USB debugging with it. If it is the case of an Android emulator then you have to create a virtual device to use it. To begin, click the AVD manager icon on the toolbar or press Ctrl+Alt+F12 (Cmd+Alt+F12 on macOS) and type the action name into the box. On the following screens, keep the default settings:
The creation of an AVD is a one-time task. It will be available until it is specifically withdrawn once it has been made. Now it's time to put our app to the test! Select the device or emulator you want to use and hit Shift+F10 (Ctrl+R on macOS) or the Run button. IOS - Click on the dropdown menu to access the iOS simulator. When installing Xcode, you may be prompted to install the missing components (if any). Then simulator will appear on the screen on which you have to click to proceed further. When it comes to a physical iOS device, things get more tricky. Assuming the device is unlocked and linked via USB connection (note the additional key prompt after attaching a cable), it gets necessary to release the iOS module in Xcode: Then add a new personal team by going to the signing and capability page. Sign in to your Apple
ID or you can also create a new one if you don't have any. Then click Done in the Accounts window for provisioning profiles to be created. If the provisioning profile on the device management is not trusted, the initial attempt will fail so you have to change its setting: If you receive an error, then it signifies that your identity is already being used by someone else. To alter this you have to change the value of the Bundle Identifier to anything else. After the completion of the signing procedure, you can test the program from the Android studio. It is important to check whether it is properly working or not. There are possibilities that your initial attempt to log in will fail. If this happens you have to visit the profile & device management setting option in the iOS and click on the trust option. Then it will definitely work. The app can be launched from the home screen once you click on the trust option in the profile & device management setting
Launch During the first launch, the emulator/simulator will take a few minutes to initialize and the SDK components to install. The following time, it should be practically instantaneous in most circumstances. You may also use the terminal window to run the flutter run command. If Linux is used with Kernel 5.5.x, your builds will hang and major Flutter issues will arise. Now it's time to start writing code. Change the blue color to something else on line #21 and use the Hot reload option (Ctrl+ or Alt+ on macOS) to apply the changes. It's worth noting that the counter value was kept. The most effective technique to source code A repository hosted on a server is a good place to keep source code. You can easily collaborate with other people while maintaining a backup in case your development machine fails. Let's start by making a repository. Go to https://github.com/new and validate your project name. Don't make a tick Because the readme file is already available in the project, initialize this repository using a README option. It's also a good idea to make an SSH keypair and register the public key on GitHub. After that, we may set up a local repository. Choose the Create Git repository option from the VCS -> VCS Operation pop-up menu (Alt+' or Ctrl+V on macOS), and confirm the location. Now you can see that some filenames had become red- It indicates that they have not yet been committed. NOw you have to check the files in the pop-up window, press Ctrl+K (or Cmd+K on macOS). Then, to confirm, type "Initial commit" and press Enter. You can also use the terminal to run git add -A and git commit. Pushing the commit to the remote server is the last step. Press Ctrl+Alt+K (Cmd+Alt+K on Mac) for new remote. The URL will be in the format: git@github.com:/.git in the case of GitHub.
It's worth noting that the SSH URL will only work if you have an SSH key. You must use the HTTPS URL if you do not want to use the HTTP URL. Push the Push- button after you've confirmed the URL. Your code will be available on the remote repo after a bit. It's available at https://github.com/user name>/repository name>. It should have the same appearance as the reference repository. Conclusion This is all about Flutter app development and how you can do your project set up with it. Hope this blog had helped you in gaining a basic understanding of the flutter development. You can approach to a mobile app development firm to get better support and assistance.