Download
1 / 12
120 likes | 256 Vues
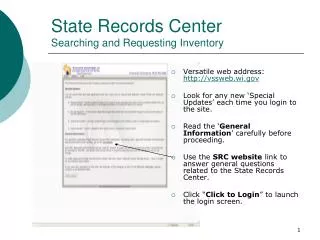
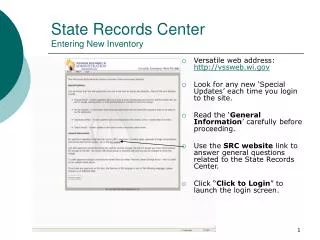
State Records Center Entering New Inventory. Versatile web address: http://vssweb.wi.gov Look for any new ‘Special Updates’ each time you login to the site. Read the ‘ General Information ’ carefully before proceeding.

E N D
State Records CenterEntering New Inventory • Versatile web address: http://vssweb.wi.gov • Look for any new ‘Special Updates’ each time you login to the site. • Read the ‘General Information’ carefully before proceeding. • Use the SRC website link to answer general questions related to the State Records Center. • Click “Click to Login” to launch the login screen.
State Records CenterEntering New Inventory • Use the drop down arrow next to ‘Company’ to choose your agency. • In the ‘User Name’ section fill in the SRC User ID you were assigned. • In the ‘Password’ section fill in the password you were given. • If you get a login error, check the company box. The company chosen should be your agency, not WIS State Records Center. • DO NOT give your User Name and password to anyone else as it is unique to you. You will be responsible for anything done when your User Name is logged in. • Contact your agency Record Officer if your name, address, or phone number changes.
State Records CenterEntering New Inventory • Main Screen Tabs allow you navigate the website easily and quickly. • Home: Special Updates, General Information, and the SRC website link. • Creation: Request labels for new inventory that will be sent to the SRC. You can also review the status of your pending requests. • Retrieval: Search, order (boxes and indexed files), and request pickup of existing inventory. Print a list of your existing inventory at any time. • Retention: Descriptions of all Records Disposition Authorization’s (RDA’s) you are authorized to use. • Security: Change your password using this tab the first time you login and as needed.
State Records CenterEntering New Inventory • Before you enter a box creation request review your RDA’s under the ‘Retention’ tab. You can only view RDA’s your Record Officer authorized for your use when they requested your access. • RDA’s may be at one of three levels. You can switch levels by clicking the ‘GO’ icon next to each one. • The three levels are: Global, which are statewide; Company, which are agency wide; and Departmental, which are specific to one department only. • Make a note of the RDA title, number, and level (global, company, or departmental) to aide you during the data entry process. • Read the entire description of the RDA. If the retention is event based (EVT), the description will tell you the event definition. The listed event determines what date should be entered in the Event Date box during the data entry process. • If you need additional guidance on choosing the appropriate RDA, contact your agency Record Officer.
State Records CenterEntering New Inventory • To enter new inventory requests choose the ‘Creation’ tab, then select ‘Box Creation Request’ from the drop down list. • Your ‘Company’ should already be selected. If not, use the drop down box to select your appropriate company. • Next, if necessary, select your ‘Department’. Click on the icon to open a pop up window that will allow you to change the department. • Then, select the ‘Record Series’ you decided to use while reviewing your RDA’s earlier. Again, you can click on the icon to open a pop up window that will allow you to choose a specific RDA. • See next slide for pop up window example.
State Records CenterEntering New Inventory • Departments and RDA’s are listed in alphabetical order by title in the pop up windows. Their corresponding numbers are noted after the title in parenthesis. • The tabs across the top of the RDA window correspond to the three levels you saw in the Retention section previously. • There is an additional tab in this window of ‘Recently Used.’ These RDA’s are ones you used the last time you entered box requests. • You can change tabs by clicking on the appropriate level name. • To select the department or RDA you want, click on it once.
State Records CenterEntering New Inventory • Fill in the REQUIRED box information fields: User Box Number, Type of Box, From Date, To Date, Event Date, and Description. • User Box Number: This number is assigned by each agency in a different way. You may need to check with your agency Record Officer for the numbering strategy your agency uses. • Type of Box: The standard box type is ‘A-Full Size Box’. • From/To Dates: These are the oldest and newest dates of the files that you have in the box. • Event Date: Often times this date is the same as the ‘To Date’, but not always. The Event date is decided by the event that was specified in the RDA you reviewed and selected earlier.
State Records CenterEntering New Inventory • The description field is unlimited in space and is full text keyword searchable. • Use the first 30 characters to give an overall box content description. This will make inventory evaluation easier. • Once you’ve entered the overall description you can list descriptors for each file contained in the box. This makes searching for specific files easier. • The key to a good description is to be extremely specific and very detailed.
State Records CenterEntering New Inventory • Whatever you type in the description should be the same information you write on the box itself. • REVIEW your entries carefully and make any updates needed before you go any further. There is no ‘oops’ button if you make a mistake! • When you have verified all the information for this box is correct, you can click ‘Submit Box’. • Do not click this more than once because you will create duplicate label requests.
State Records CenterEntering New Inventory • You will receive a request number for each box creation request you submit. You do not need to write these down. You will be able to see them when you review your pending requests (see next page). • If you have more boxes to submit, click ‘Create New Box’. All of the previous box information will automatically populate. Only change the fields you need to for the next box. Don’t forget the User Box number. • When you are done entering requests for all of your boxes you can review your pending requests or log out.
State Records CenterEntering New Inventory • To review your pending box creation requests click the ‘Creation’ tab. Then click ‘My Box Requests.’ • Next, in the center of the screen use the drop down arrow to change the status from ‘complete’ to ‘ALL’. • Then, click ‘Refresh’ on the right side of the screen. • You will be able to review your requests, but you cannot change or edit them. If you have any corrections, email the SRC general mailbox at doadeorecordscenter@wisconsin.gov. Make sure to include the creation request number and the specific correction. • Requests are processed daily. If you see a number in the SRC Box Number column, you need to contact your agency Record Officer before any changes can be made.
State Records CenterEntering New Inventory • Congrats! You have completed the process for entering new inventory. • Now what? Wait. • The requests will be processed, labels generated, and sent to you via inter-departmental mail. • The label packet will include instructions on your next steps, requesting pickup, and the Inventory Transmittal form.