Magna Quick Start for WebEx
Magna Quick Start for WebEx. Training Overview. Part 1: Online Meetings for beginners powered by Arkadin. Step 1…Logging into the WebEx portal Scheduling a WebEx meeting One-Click Meeting vs. Scheduled Meeting Send invites via Microsoft Outlook Host a web meeting Attend a web meeting

Magna Quick Start for WebEx
E N D
Presentation Transcript
Part 1: Online Meetings for beginnerspowered by Arkadin • Step 1…Logging into the WebEx portal • Scheduling a WebEx meeting • One-Click Meeting vs. Scheduled Meeting • Send invites via Microsoft Outlook • Host a web meeting • Attend a web meeting • Sync Audio + Web lines • Activate webcam • Share desktop, applications, presentation • Pass the ball (control) to an attendee • Recording your meeting (both audio + web)
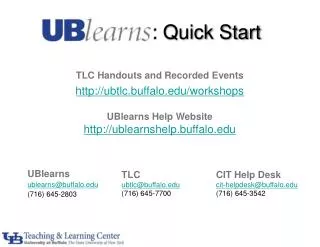
Your WebEx Login Details https://cosma.webex.com
Logging into the WebEx portal Log in to your account using the user name and password provided in the introductory email Step-by-step 1) In a web browser window, go to your company’s dedicated site (https://cosma.webex.com ) 2) In the top-right hand corner, click Host Log In 3) Enter your username (email) & WebEx password
Schedule an upcoming meeting (via portal) Step-by-step 1) Within the WebEx Portal, click Meeting Center along the top header 2) On left-hand side, select Schedule a Meeting 3) Follow the prompts to schedule your meeting (you will receive an email to forward along or copy / paste into an invite once scheduled)
One-Click Meeting vs. Scheduled MeetingsWhat’s the difference? • One-click meeting is… • …not pre-scheduled, and requires details to be sent out instantly and for the meeting to start right away • Scheduled meeting is… • …planned in advance, with an invite that is sent out well ahead of the start of the meeting to notify those invited to attend.
Starting a pre-scheduled meeting – from portal Step-by-step (from portal) 1) Login into WebEx Portal (slide 4) 2) Click My WebEx 3) Upcoming meeting will be listed in the calendar 4) ClickStart to open the meeting room
Starting a pre-scheduled meeting – from Outlook invite Step-by-step (from Outlook invite) 1) Open Outlook Invite in your calendar 2) Click on link within body of invite 3) Your WebEx Session will open
Joining a web meeting (as an attendee) Step-by-step 1) Open Outlook Invite in your calendar 2) Click on link within body of invite 3) You will join the WebEx meeting
Joining the audio conference – Dial-in Step-by-step (Dial-in) 1) Open Outlook Invite in your calendar 2) Follow the dial-in instructions within the invite 3) You will be placed in the call
Joining the audio conference – Dial-Out Step-by-step (Dial-out) 1) Join the WebEx Meeting 2) A “Teleconference” window will pop-up. If Dial-Out was enabled by the Meeting Host, you will be able to click “Call me at a new number” 3) Type in your direct phone number and click “Call Me” **NOTE – if you do not have a direct phone number, this will not work – you will need to dial into the teleconference.
Sync your audio + web connections Unsynched Synched Step-by-step 1) Once in the WebEx meeting, click on Meeting Info tab (top-left corner of screen) 2) Identify the Attendee ID (a 3 – 6 digit pin code) 3) Enter the Attendee ID followed by the # key into your telephone keypad **NOTE – if you have chosen the “Dial Out” feature to join the teleconference, your line will already be synched.
Share your webcam Webcam Selection Step-by-step 1) Once in the WebEx session, click on the Camera icon beside your name in the participant list 2) WebEx will detect the webcam you have setup for your computer 3) If manual selection is required, click the gearbox in the top left of the participant window, and then select your camera
Share your desktop Step-by-step 1) To share your desktop, ensure you have the ball beside your name 2) Go to Share (top left of screen) and then select Share Desktop 3) In this format, everything you do will be seen by everyone else in your meeting
Share an application Step-by-step • 1) To share an application, ensure you have the ball beside your name • 2) Go to Share (top left of screen) and then select Share Application • 3) Select the specific application you’d like to share with the meeting
Share a presentation, video clip etc… Step-by-step • 1) To share a presentation, ensure you have the ball beside your name • 2) Go to Share (top left of screen) and then select Share File • 3) Browse your local files to locate and then Share with the meeting
Pass the ball – change presenters Step-by-step 1) As the meeting host, you have the ability to promote attendees to Presenter status, this is done by passing them the ball 2) To pass an attendee the ball, you can click on an attendee within the participant list, and then click the Make Presenter icon at the bottom of the participant windowOR you can right-click on an attendee in the participant list and then select Change Role To and then Presenter
Record your meetingAudio + Web are captured in one synched file Step-by-step 1) There are two ways to record your meeting (both audio + web) in one synched file Option 1 – Click Meeting along the top of your meeting window, and then click Start Recording Option 2 – On the Quick Start tab within the meeting, click Record and the recording will begin
Part 2: Advanced Features for Web Meetingspowered by Arkadin • Productivity Toolbar Installation & Use • Attend meeting via smart-phone or iPad • Video conference in full-screen • Retrieve / Edit your recordings • Inviting attendees on-the-fly • View Video Participant List • Manage Panels • Assign Privileges
Download Productivity Tools Step-by-step 1) Within the WebEx Portal, click Meeting Center on the top of the screen 2) Click Support, then click Downloads along the left-hand side 3) Scroll down to Productivity Tools, and then it will download to your computer 4) Once downloaded, ensure Microsoft Outlook is closed and run the downloaded file
Send meeting invites with Microsoft Outlook Step-by-step 1) Open a new calendar invite in Microsoft Outlook 2) Add all invitees in the ‘To’ field of the invite 3) Select your time / date 4) Add your meeting agenda / notes to the body of the invite 5) Select Add WebEx Meeting from the top toolbar 6) In the pop-up window, review your settings, then click OK 7) Send the invite (the meeting details will only show up in the invite AFTER clicking send on the invite)
Join by Smartphone Integrated audio/web/video meetings on WiFi and 3G Attend WebEx meetings with full-screen view View attendee list View shared content with annotations Pinch to zoom and scan Private or group chat Control audio with mute/un-mute capabilities Step-by-step 1) Simply Click the WebEx Meeting link in the invite or email you receive 2) WebEx will open up and ask to call your phone to join the teleconference **NOTE– Mobile users cannot share content but can share their Video, and view shared content
Meet in full-screen video Step-by-step 1) Within the video window, clickthe full-screen icon in the top right-hand corner
Retrieve / Edit Your Recordings Step-by-step 1) From the portal, select My Recording Meetings 2) There will be a list of all recorded meetings that you have recorded 3) Select the recording you’d like to download / share and follow on-screen instructions
Invite attendees on the fly Step-by-step 1) Within the meeting, click Participant along the top of the meeting window 2) ClickInvite and Remind 3) Send invites via email, dial-out to participants, or remind them
Attendee List in Video View Step-by-step 1) Click the icon at the bottom of the participant list, then select Thumbnails 2) Each attendee will have to do this to get this view within their meeting window
Manage Panels Step-by-step 1) Within the meeting window, click on the drop down in the top-right hand corner of the screen 2) Select Manage Panels, and choose which panels to utilize
Assign Privileges • Host • Presenter • Note Taker • Closed Captionist Step-by-step 1) Right-Click the attendee name that you wish to change roles for 2) SelectChange Role To, and then choose the role
Description of Roles / Privileges • Attendee / Participant • Joins and attends meeting • Uses chat, annotation, polling and other interactive features allowed by the presenter • Host • Schedule, start and control a meeting • Invites attendees to the meeting • Assign meeting roles to others • Initially, the host is also the presenter • A host role can be transferred to others. • Ends the meeting Presenter • Shares and delivers meeting content • Presentations & documents • Applications • Web content & web browsers • Desktop • Whiteboard • Initiates file transfers • There can only be one presenter at a time
In-Call & Ongoing Support In a Meeting Audio/Web/Video Press *0 on your telephone keypad Outside of a Meeting Helpdesk Telephone: North America +1 616.786.5611 NA Toll-Free +1 888.567.5611 Europe +49 6093.9942.7820 Asia Pacific +86 21 6165.1699 Helpdesk E-Mail: Global: Magna.Helpdesk@magna.com Europe HelpdeskEU@magna.com Helpdesk Sametime: Global Magna Helpdesk/IT/Magna Europe Europe Helpdesk/IT/Magna