Download
1 / 4
40 likes | 120 Vues
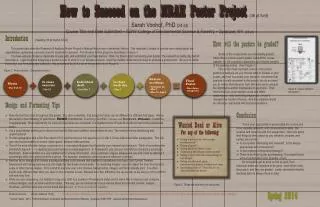
This poster provides detailed guidelines and tips for the Research & Analysis Poster Project in Natural Resources in American History at SUNY College of Environmental Science & Forestry. It covers design and formatting tips, emphasizing the importance of analysis and scholarly presentation. Students are advised on font sizes, paragraph formatting, conceptual diagrams, color schemes, and visual elements. The poster encourages creativity, thorough analysis, professionalism, and attention to detail. It highlights the significance of personalizing the course and developing research and communication skills, urging students to engage actively in the project from the outset. Proofreading, avoiding common pitfalls, and seeking assistance from the teaching team are also emphasized. The poster aims to support students in creating engaging and informative research posters that meet the grading criteria effectively.

E N D
How will the posters be graded? • Some of the components are individually graded, while others receive a team grade. Consult the course website for the complete explanation and relative weights of the grading criteria. (See Figure 3.) • One of the most important criteria in the poster grading is analysis. As you choose what to include in your poster, and how to present your research, remember that analysis is really important in this project: we do not want you to simply describe your topic We want you to analyze the importance and/or implications of your topic. That means that you must explain cause and effect relationships– why something happened, or how it changed the course of history. And this analysis should be scholarly– supported with historical evidence. Figure 1: Project timeline. (Compiled by author.) Figure 3: Course Website Information.1 How to Succeed on the NRAH Poster Project(36 pt font)Sarah Vonhof, PhD (24 pt)Course Title and Date Submitted ~ SUNY College of Environmental Science & Forestry ~ Syracuse, NY (18 pt) Design and Formatting Tips • Note the text font sizes throughout this poster. But, also remember, that actual font sizes can be different for different font types. Notice the variety in the following 12 point fonts: Bernard; Arial Narrow; Century Gothic, Garamond; Rockwell; Britannic, Cambria,Copperplate. Most importantly, be sure your font sizes are consistent. It is helpful to turn off auto-fit or auto-format in the preferences menu. • It is a good design technique to choose one font for titles and subtitles, and another for text. Too many fonts are distracting and unprofessional. • Format paragraphs with a first line indent of 0.3; and format your line spacing at 1.0 with 0.0 lines before and after paragraphs. This will give you the best ability to control “white space” between titles and text. • One of the most effective design components is a conceptual diagram that illustrates your research and analysis. Think of something like Diamond’s figure 4.1 – it captures and summarizes his entire argument. In Powerpoint, you can use SmartArt to construct a schematic illustration. Even a timeline is a very helpful tool to convey information. If you compose a figure, please give yourself credit by labeling it accordingly while also giving credit to sources. For example: created by author based on whatever source(s). • Another tip for design is to choose a background and color scheme that capture or accentuate your topic. Use Format Themes. Experiment with transparencies and soft edges for text boxes and pictures. Try recoloring images– you can adjust the tone of pictures to sepia or other theme shades. Print a draft to see how your color choices, backgrounds, images, and fonts actually print. It is often significantly different than what you view on the computer screen. Borders are often difficult to line up exactly, so be sure to print a draft to see how they look. • While you are composing, it is helpful to copy your draft to a number of Powerpoint slides (in the same file) so that you can compare various designs, such as colors and font styles. This way, you can include all of your various ideas for potential content, images, timelines– and then later and choose those that are best, or those that best fit together. Conclusion • This is your opportunity to personalize the course and hone valuable research, and communication skills. Be creative and have fun with this assignment. Here are some final things to think about as you research, prepare, and perfect your poster: • Is your poster interesting and relevant? Is the design appropriate and professional? • Is your analysis critical and thorough? • There is no short-cut for proofreading. Even spell-check will not perfect all of your possible errors. • Do not wait to get to work on this project. Your individual drafts are intended to be good, solid efforts at for the project, and they are graded. Lastly, remember that the teaching team is always there to help. Wanted Dead or Alive For any of the following: • Using a picture for the poster background • Using clip art • Using the font Comic Sans • Trimming the edges of the poster • Using colors that are nauseating or too bright • Using cardboard, glue, construction paper, scissors or tape • Including a list of “Fun Facts” or other irrelevant trivia Introduction(heading 16 pt; text in 12 pt) This poster describes the Research & Analysis Poster Project in Natural Resources in American History. This template is meant to provide more detail about the expectations, guidelines, and resources for students to succeed. The timeline for the project is illustrated in Figure 1. You have already chosen a classmate to work with, and submitted your topic memos. Now it is time to start composing your poster. The research is really only half of the project– organizing and designing a poster is a lot of work. It is an iterative process, requiring multiple drafts and printings to produce a good poster. Be sure to follow the design and formatting tips outlined in this poster and avoid the list of things not to do in Figure 2. Figure 2: Things you must not do in your poster. Spring 2014 References (12 pt; citations 10 pt)>>> Be sure your references are in proper format! You may use footnotes or parenthetical formats, but you must follow an established style guide (APA, MLA, Chicago). 1Vonhof, Sarah. 2014. FOR 203 Western Civilization and the Environment Website. Syracuse: SUNY-ESF. www.esf.edu/for/vohof/courses/wce/
How will the posters be graded? • Some of the components are individually graded, while others receive a team grade. Consult the course website for the complete explanation and relative weights of the grading criteria. (See Figure 3.) • One of the most important criteria in the poster grading is analysis. As you choose what to include in your poster, and how to present your research, remember that analysis is really important in this project: we do not want you to simply describe your topic We want you to analyze the importance and/or implications of your topic. That means that you must explain cause and effect relationships– why something happened, or how it changed the course of history. And this analysis should be scholarly– supported with historical evidence. Figure 1: Project timeline. (Compiled by author.) Figure 3: Course Website Information.1 How to Succeed on the NRAH Poster Project(36 pt font)Sarah Vonhof, PhD (24 pt)Course Title and Date Submitted ~ SUNY College of Environmental Science & Forestry ~ Syracuse, NY (18 pt) Design and Formatting Tips • Note the text font sizes throughout this poster. But, also remember, that actual font sizes can be different for different font types. Notice the variety in the following 12 point fonts: Bernard; Arial Narrow; Century Gothic, Garamond; Rockwell; Britannic, Cambria,Copperplate. Most importantly, be sure your font sizes are consistent. It is helpful to turn off auto-fit or auto-format in the preferences menu. • It is a good design technique to choose one font for titles and subtitles, and another for text. Too many fonts are distracting and unprofessional. • Format paragraphs with a first line indent of 0.3; and format your line spacing at 1.0 with 0.0 lines before and after paragraphs. This will give you the best ability to control “white space” between titles and text. • One of the most effective design components is a conceptual diagram that illustrates your research and analysis. Think of something like Diamond’s figure 4.1 – it captures and summarizes his entire argument. In Powerpoint, you can use SmartArt to construct a schematic illustration. Even a timeline is a very helpful tool to convey information. If you compose a figure, please give yourself credit by labeling it accordingly while also giving credit to sources. For example: created by author based on whatever source(s). • Another tip for design is to choose a background and color scheme that capture or accentuate your topic. Use Format Themes. Experiment with transparencies and soft edges for text boxes and pictures. Try recoloring images– you can adjust the tone of pictures to sepia or other theme shades. Print a draft to see how your color choices, backgrounds, images, and fonts actually print. It is often significantly different than what you view on the computer screen. Borders are often difficult to line up exactly, so be sure to print a draft to see how they look. • While you are composing, it is helpful to copy your draft to a number of Powerpoint slides (in the same file) so that you can compare various designs, such as colors and font styles. This way, you can include all of your various ideas for potential content, images, timelines– and then later and choose those that are best, or those that best fit together. Conclusion • This is your opportunity to personalize the course and hone valuable research, and communication skills. Be creative and have fun with this assignment. Here are some final things to think about as you research, prepare, and perfect your poster: • Is your poster interesting and relevant? Is the design appropriate and professional? • Is your analysis critical and thorough? • There is no short-cut for proofreading. Even spell-check will not perfect all of your possible errors. • Do not wait to get to work on this project. Your individual drafts are intended to be good, solid efforts at for the project, and they are graded. Lastly, remember that the teaching team is always there to help. Wanted Dead or Alive For any of the following: • Using a picture for the poster background • Using clip art • Using the font Comic Sans • Trimming the edges of the poster • Using colors that are nauseating or too bright • Using cardboard, glue, construction paper, scissors or tape • Including a list of “Fun Facts” or other irrelevant trivia Introduction(heading 16 pt; text in 12 pt) This poster describes the Research & Analysis Poster Project in Natural Resources in American History. This template is meant to provide more detail about the expectations, guidelines, and resources for students to succeed. The timeline for the project is illustrated in Figure 1. You have already chosen a classmate to work with, and submitted your topic memos. Now it is time to start composing your poster. The research is really only half of the project– organizing and designing a poster is a lot of work. It is an iterative process, requiring multiple drafts and printings to produce a good poster. Be sure to follow the design and formatting tips outlined in this poster and avoid the list of things not to do in Figure 2. Figure 2: Things you must not do in your poster. Spring 2014 References (12 pt; citations 10 pt)>>> Be sure your references are in proper format! You may use footnotes or parenthetical formats, but you must follow an established style guide (APA, MLA, Chicago). 1Vonhof, Sarah. 2014. FOR 203 Western Civilization and the Environment Website. Syracuse: SUNY-ESF. www.esf.edu/for/vohof/courses/wce/
How will the posters be graded? • Some of the components are individually graded, while others receive a team grade. Consult the course website for the complete explanation and relative weights of the grading criteria. (See Figure 3.) • One of the most important criteria in the poster grading is analysis. As you choose what to include in your poster, and how to present your research, remember that analysis is really important in this project: we do not want you to simply describe your topic We want you to analyze the importance and/or implications of your topic. That means that you must explain cause and effect relationships– why something happened, or how it changed the course of history. And this analysis should be scholarly– supported with historical evidence. Figure 1: Project timeline. (Compiled by author.) Figure 3: Course Website Information.1 How to Succeed on the NRAH Poster Project(36 pt font)Sarah Vonhof, PhD (24 pt)Course Title and Date Submitted ~ SUNY College of Environmental Science & Forestry ~ Syracuse, NY (18 pt) Design and Formatting Tips • Note the text font sizes throughout this poster. But, also remember, that actual font sizes can be different for different font types. Notice the variety in the following 12 point fonts: Bernard; Arial Narrow; Century Gothic, Garamond; Rockwell; Britannic, Cambria,Copperplate. Most importantly, be sure your font sizes are consistent. It is helpful to turn off auto-fit or auto-format in the preferences menu. • It is a good design technique to choose one font for titles and subtitles, and another for text. Too many fonts are distracting and unprofessional. • Format paragraphs with a first line indent of 0.3; and format your line spacing at 1.0 with 0.0 lines before and after paragraphs. This will give you the best ability to control “white space” between titles and text. • One of the most effective design components is a conceptual diagram that illustrates your research and analysis. Think of something like Diamond’s figure 4.1 – it captures and summarizes his entire argument. In Powerpoint, you can use SmartArt to construct a schematic illustration. Even a timeline is a very helpful tool to convey information. If you compose a figure, please give yourself credit by labeling it accordingly while also giving credit to sources. For example: created by author based on whatever source(s). • Another tip for design is to choose a background and color scheme that capture or accentuate your topic. Use Format Themes. Experiment with transparencies and soft edges for text boxes and pictures. Try recoloring images– you can adjust the tone of pictures to sepia or other theme shades. Print a draft to see how your color choices, backgrounds, images, and fonts actually print. It is often significantly different than what you view on the computer screen. Borders are often difficult to line up exactly, so be sure to print a draft to see how they look. • While you are composing, it is helpful to copy your draft to a number of Powerpoint slides (in the same file) so that you can compare various designs, such as colors and font styles. This way, you can include all of your various ideas for potential content, images, timelines– and then later and choose those that are best, or those that best fit together. Wanted Dead or Alive For any of the following: • Using a picture for the poster background • Using clip art • Using the font Comic Sans • Trimming the edges of the poster • Using colors that are nauseating or too bright • Using cardboard, glue, construction paper, scissors or tape • Including a list of “Fun Facts” or other irrelevant trivia Conclusion • This is your opportunity to personalize the course and hone valuable research, and communication skills. Be creative and have fun with this assignment. Here are some final things to think about as you research, prepare, and perfect your poster: • Is your poster interesting and relevant? Is the design appropriate and professional? • Is your analysis critical and thorough? • There is no short-cut for proofreading. Even spell-check will not perfect all of your possible errors. • Do not wait to get to work on this project. Your individual drafts are intended to be good, solid efforts at for the project, and they are graded. Lastly, remember that the teaching team is always there to help. Introduction(heading 16 pt; text in 12 pt) This poster describes the Research & Analysis Poster Project in Natural Resources in American History. This template is meant to provide more detail about the expectations, guidelines, and resources for students to succeed. The timeline for the project is illustrated in Figure 1. You have already chosen a classmate to work with, and submitted your topic memos. Now it is time to start composing your poster. The research is really only half of the project– organizing and designing a poster is a lot of work. It is an iterative process, requiring multiple drafts and printings to produce a good poster. Be sure to follow the design and formatting tips outlined in this poster and avoid the list of things not to do in Figure 2. Figure 2: Things you must not do in your poster. Spring 2014 References (12 pt; citations 10 pt)>>> Be sure your references are in proper format! You may use footnotes or parenthetical formats, but you must follow an established style guide (APA, MLA, Chicago). 1Vonhof, Sarah. 2014. FOR 203 Western Civilization and the Environment Website. Syracuse: SUNY-ESF. www.esf.edu/for/vohof/courses/wce/
How will the posters be graded? • Some of the components are individually graded, while others receive a team grade. Consult the course website for the complete explanation and relative weights of the grading criteria. (See Figure 3.) • One of the most important criteria in the poster grading is analysis. As you choose what to include in your poster, and how to present your research, remember that analysis is really important in this project: we do not want you to simply describe your topic We want you to analyze the importance and/or implications of your topic. That means that you must explain cause and effect relationships– why something happened, or how it changed the course of history. And this analysis should be scholarly– supported with historical evidence. Figure 1: Project timeline. (Compiled by author.) Figure 3: Course Website Information.1 How to Succeed on the NRAH Poster Project(36 pt font)Sarah Vonhof, PhD (24 pt)Course Title and Date Submitted ~ SUNY College of Environmental Science & Forestry ~ Syracuse, NY (18 pt) Design and Formatting Tips • Note the text font sizes throughout this poster. But, also remember, that actual font sizes can be different for different font types. Notice the variety in the following 12 point fonts: Bernard; Arial Narrow; Century Gothic, Garamond; Rockwell; Britannic, Cambria,Copperplate. Most importantly, be sure your font sizes are consistent. It is helpful to turn off auto-fit or auto-format in the preferences menu. • It is a good design technique to choose one font for titles and subtitles, and another for text. Too many fonts are distracting and unprofessional. • Format paragraphs with a first line indent of 0.3; and format your line spacing at 1.0 with 0.0 lines before and after paragraphs. This will give you the best ability to control “white space” between titles and text. • One of the most effective design components is a conceptual diagram that illustrates your research and analysis. Think of something like Diamond’s figure 4.1 – it captures and summarizes his entire argument. In Powerpoint, you can use SmartArt to construct a schematic illustration. Even a timeline is a very helpful tool to convey information. If you compose a figure, please give yourself credit by labeling it accordingly while also giving credit to sources. For example: created by author based on whatever source(s). • Another tip for design is to choose a background and color scheme that capture or accentuate your topic. Use Format Themes. Experiment with transparencies and soft edges for text boxes and pictures. Try recoloring images– you can adjust the tone of pictures to sepia or other theme shades. Print a draft to see how your color choices, backgrounds, images, and fonts actually print. It is often significantly different than what you view on the computer screen. Borders are often difficult to line up exactly, so be sure to print a draft to see how they look. • While you are composing, it is helpful to copy your draft to a number of Powerpoint slides (in the same file) so that you can compare various designs, such as colors and font styles. This way, you can include all of your various ideas for potential content, images, timelines– and then later and choose those that are best, or those that best fit together. Conclusion • This is your opportunity to personalize the course and hone valuable research, and communication skills. Be creative and have fun with this assignment. Here are some final things to think about as you research, prepare, and perfect your poster: • Is your poster interesting and relevant? Is the design appropriate and professional? • Is your analysis critical and thorough? • There is no short-cut for proofreading. Even spell-check will not perfect all of your possible errors. • Do not wait to get to work on this project. Your individual drafts are intended to be good, solid efforts at for the project, and they are graded. Lastly, remember that the teaching team is always there to help. Wanted Dead or Alive For any of the following: • Using a picture for the poster background • Using clip art • Using the font Comic Sans • Trimming the edges of the poster • Using colors that are nauseating or too bright • Using cardboard, glue, construction paper, scissors or tape • Including a list of “Fun Facts” or other irrelevant trivia Introduction(heading 16 pt; text in 12 pt) This poster describes the Research & Analysis Poster Project in Natural Resources in American History. This template is meant to provide more detail about the expectations, guidelines, and resources for students to succeed. The timeline for the project is illustrated in Figure 1. You have already chosen a classmate to work with, and submitted your topic memos. Now it is time to start composing your poster. The research is really only half of the project– organizing and designing a poster is a lot of work. It is an iterative process, requiring multiple drafts and printings to produce a good poster. Be sure to follow the design and formatting tips outlined in this poster and avoid the list of things not to do in Figure 2. Figure 2: Things you must not do in your poster. Spring 2014 References (12 pt; citations 10 pt)>>> Be sure your references are in proper format! You may use footnotes or parenthetical formats, but you must follow an established style guide (APA, MLA, Chicago). 1Vonhof, Sarah. 2014. FOR 203 Western Civilization and the Environment Website. Syracuse: SUNY-ESF. www.esf.edu/for/vohof/courses/wce/