Using the Web1000
Using the Web1000. PACS. Haifa, Israel. UCSD. VA fully PACS UCSD/Thornton in first phase of conversion from film to fully digital system Agfa PAC system IMPAX diagnostic display stations Web1000 webserver. Web1000.

Using the Web1000
E N D
Presentation Transcript
PACS Haifa, Israel
UCSD • VA fully PACS • UCSD/Thornton in first phase of conversion from film to fully digital system • Agfa PAC system • IMPAX diagnostic display stations • Web1000 webserver
Web1000 • Allows you to view digital imaging from any computer that has internet access
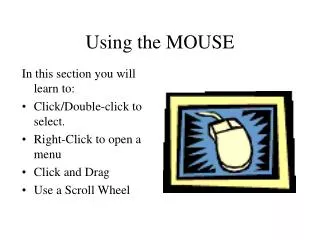
Starting up • You need a PC with at least 64 megabytes RAM (124 or higher recommended) • You need internet access via cable, ISDN, DSL, ethernet network, or T1 line • Minimum 1024x768 resolution • Minimum 16 bit color
You need a 6 digit provider number for UCSD and a password If you already have a password for the UCSD IMPAX workstations, the same password will work for the webserver Contact person Ms. Kim van Leeuwen at 619-543-6760 Option 1 Use internet from any computer without installing any new software Option 2 Install ZAC software on your computer (faster startup and load times) Starting up UCSD
Direct web log-on UCSD • Web address is http://pacs.ucsd.edu
Scary messages • You will get a series of scary messages the first time • You have to hit the “grant” button or it will not work • Use the “remember” button so you don’t get them again
UCSD Option 2: Zac software • Type http://132.239.48.200/zac.html in address bar of your internet browser • Download ZAC installation program by scrolling down to the line “Zac executable…” and clicking it
Zac software • Save zac installer program to desktop (preferred) or to a temp file • Close all open programs, including internet • Double click on the zac icon to install (should be on your desktop) • Program will self-install, default install is to C:\zac • Upon successful install, a new icon appears on your desktop called “webserver” • Rename if you want, delete the install program from your desktop
ZAC login screen • Enter your 6 digit user ID and password • If ID area is not accepting, enter password first and come back to user ID • Hit login button
You need a VA provider number and password This provider number is different than the one you use for UCSD If you have a password for the VA IMPAX workstations, the same password will work for their webserver Contact person is Mr. Mike Olds VA x7576 Only 1 option Install VISTA software and VPN client on your computer No direct web logon across VA firewall Starting up VA
Installing VA software • Install software on the CD given to you by Mike Olds • Will install VPN software automatically to c:/program files • You will have 2 new directories called VPN and VISTA • You will have an icon to start VA VPN on your desktop
VA VPN client • Start up VPN client • You will be prompted for username and password • VPN client must be connected in order to continue • VPN screen will disappear but there will be an icon in your system tray indicating you are connected
Web log-on VA • Once VPN client is connected you can use your web browser (Netscape or Explorer) to access the VA images • Web address is http://vahsdcweb1000
Same scary messages • You will get a series of scary messages the first time • You have to hit the “grant” button or it will not work • Use the “remember” button so you don’t get them again
Other buttons • “Proxy settings” allows you to specify additional proxy servers • “Test pattern” allows you to test your monitor calibration (display properties/ settings/ advanced) • “Password” allows you to change password
Successful log in What do I do now?
First things first • The left button specifies patient location • Default is web cache, this is not a good choice
First things first • Click on location button • Make sure you have “All locations” selected • “Web cache” only holds cases for 60 days • Occasionally, new cases are not in the cache • You can modify the default in preferences so “All locations” is default
First things first • Make sure the “enable lossy compression” button is highlighted • This makes image loading and viewing much faster • It should be highlighted by default, can modify in prefernces
Decide what you want to see • Specific patient, specific modality, specific date? • Narrow search by using either the quick access buttons or the search criteria boxes
Quick access buttons These buttons are on the UCSD system but not on the VA system. They will pull all the digital studies for that patient.
Using search criterion boxes • Use these to look for specific range of exams • Must use these if you can not remember the patient’s name or ID number
Search criteria • You can search in a variety of other ways
You know patient’s info • You can enter name or id number • Parts of the name and initials do not work!! • Last name alone is fine • No advantage over quick access buttons
Specific date or modality • Useful for restricting your search
All your patients • Pull your name from the referring physician list • Restrict the date if you use this option or all your patients, ever, will show up on the list!
Would be useful, but it does not work properly Useless criteria ? Criteria that do not work
How to start search • Once you have selected criteria, click the search button
Wait… The more you restrict your search, the faster this will be!!
Example • Dr. Meyers searches for a recent pelvic CT, too tired to remember patient’s name
Example • Dr. Brage looks for a recent foot CT, but finds out that the “body part” button does not work perfectly
Example • Dr. Pedowitz remembers the patient’s name but can not remember what he ordered
Example • Dr. Garfin searches for his patients that had studies done today (and finds exactly what he wanted) • That is why he is the chairman
Select patient from list • Single click name of the patient to highlight it • Then click thumbnail, image, or report buttons on top
Select patient from list • Right click name to access choices • Double-click name to go straight to images
Older studies • Studies >60 days old go to a separate cache • Inexplicably, a few new studies also go to this cache • Select yes and wait for study to appear, may take a few minutes
Folders • Some patients with multiple exams done at the same time will be listed as a folder • Hit the + to the left of the folder to view study details • Do not double click the name or it will try to load everything, which takes forever...
Open folder • After you hit the + sign, the study details become visible immediately
Blue box • Blue box is the series you have selected for viewing • Name of series listed above on MR exams • Can select one or all series • Hit OK button to view series you have selected
View series • Sometimes the OK button does not appear • Just select your series and hit this button again and the series you want will show up
Moving through the images • Use sliding number bar to look at images
Cine Start Stop Loop Speed
Cine mode Cine mode loads all the images into your local memory Once loaded (takes a minute or two), viewing images in the regular image mode is much faster
Image formats Single 4 on 1 format