
Uploaded by
swain
0 SLIDES
237 VUES
40LIKES
Correspondence
DESCRIPTION
Correspondence. Word Lesson 2 Task 1. Set Margins. Margin – blank space around the edges of a page Portrait orientation - Standard paper, when positioned vertically and measuring 8.5” wide by 11” long To create margins other than those shown, click Custom Margins . How Page Layout tab
Download

1 / 0
Télécharger la présentation 
Correspondence
An Image/Link below is provided (as is) to download presentation
Download Policy: Content on the Website is provided to you AS IS for your information and personal use and may not be sold / licensed / shared on other websites without getting consent from its author.
Content is provided to you AS IS for your information and personal use only.
Download presentation by click this link.
While downloading, if for some reason you are not able to download a presentation, the publisher may have deleted the file from their server.
During download, if you can't get a presentation, the file might be deleted by the publisher.
E N D
Presentation Transcript
-
Correspondence
Word Lesson 2 Task 1 - Set Margins Margin – blank space around the edges of a page Portrait orientation - Standard paper, when positioned vertically and measuring 8.5” wide by 11” long To create margins other than those shown, click Custom Margins. How Page Layout tab Page Setup group Margin button Select Margins
- Insert the Date and Time Allows you to insert the current date and/or time into a document How Type the current month followed by a space. A screen tip displays Press Enter Or Insert Tab Text group Date and Time button
- Use Quick Parts Allows you to save and quickly insert frequently used text and graphics How Select text Insert tab Text group Quick Part button Save Selection to Quick Part Gallery OK
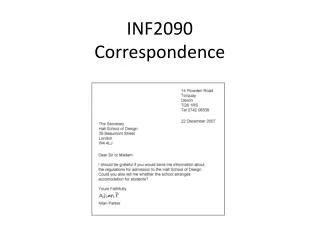
- Letters Block business Letters – all parts begin at the left margin Letterhead – heading that includes the contact information of an individual or company that is printed at the top, side, or bottom of stationery Date generally begins about 2.5” down from the top of the page Enclosure Notation – indicates that something in addition to the letter is included in the envelope
-
Word Lesson 2
Task 2 - Create Envelopes and Labels Envelopes Feature Allows you to print a delivery address directly on the envelope Delivery address indicates to whom the letter is going and is the same as the inside address on a letter Return address is the address of the sender Do not enter a return address if you are using a preprinted address
- Create Envelopes How Mailing tab Create group Envelopes button Enter the address Insert envelope Print
- Create Envelope s and Labels Label Feature Allows you to create labels for mailings, file folders, business cards, or name badges How Mailing tab Create group Label button Options Select vendor and product number Ok New Document
-
Word Lesson 2
Task 3 - Use Templates A template is a document that contains a predefined page layout, fonts, formatting, pictures, or text, which may be used as the structure for a new document After opening a Word template, you fill in the information that is specific to your document, then save it.
- Templates Templates are typically designed with a theme and a style Templates contains placeholders (boxes that identify the placement and location of text) To delete a placeholder, click to select it, then press Delete
- Create Your Own Templates You can create your own template by customizing an existing one or by creating a new one from scratch. You can customize an existing template by changing the fonts, font colors, font sizes, themes, and line and paragraph spacing
- Templates How to Make Adjustment to an existing Select placeholder Page Layout Paragraph Make selection How to save a document as a template Office button Save As Word template Enter filename Save
- Resume and Cover Letter Resume is a summary of your background and qualification and is use to gain employment Some resume template contain a picture placeholder Typically enclosed with a cover letter Cover Letter (application Letter) Purpose to provide a summary of what you have to offer a prospective employer and to gain an interview
-
Word Lesson 2
Task 4 - Use Basic Mail Merge Feature allows you to mass-produce letter, envelopes, mailing labels, and other document The merge process combines two documents: a main document and a data source document Main document contains information that does not change as well as merge codes A merge field code act as a placeholder for the variable information
- Use Basic Mail Merge When you insert a mail merge field into the main document, the field name is always surrounded by chevrons (<< >>) The AddressBlock is a combination of several fields A data source document contains variable information which is inserted into the main document during the merge process
- Step to Activate Mail Merge Wizard Mail tab Start Mail Merge group Start Mail Merge button Step-by-Step Mail Merge Wizard Follow steps on the Mail Merge task pane
- Four Steps to the Mail Merge Process Step 1: Create the main document Step 2: Create or identify a data source document Step 3: Insert merge field placeholder in the main document. Step 4: Merge the main document and data source to create new document


More Related