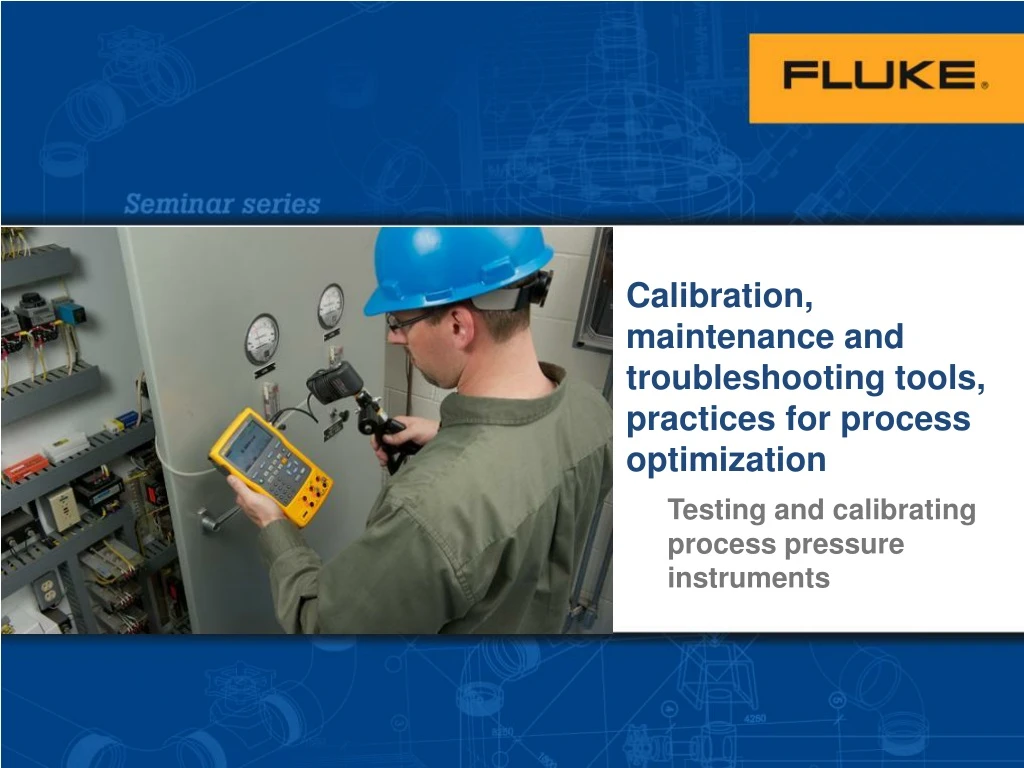
Calibration, maintenance and troubleshooting tools, practices for process optimization
310 likes | 361 Vues
Learn about pressure units, measurement concepts, and calibration tools for optimizing process performance. Understand pressure devices, troubleshooting techniques, and accuracy calculations for reliable results. Practice testing pressure transmitters with step-by-step instructions.

Calibration, maintenance and troubleshooting tools, practices for process optimization
E N D
Presentation Transcript
Calibration, maintenance and troubleshooting tools, practices for process optimization Testing and calibrating process pressure instruments
Pressure is… The force that the molecules apply to the walls of the cylinder divided by the surface of any part of the cylinder Mechanical forceor weight applied on the piston
Pressure units • Pressure = Force / Area • SI units: newton/square meter = Pa (Pascal) • kg/cm2 is based upon SI units, but Pa is the officiallyrecognized unit • Most common, USA: pounds/square inch = psi • Many units are based upon the pressure exerted by the weightof a column of liquid • inHg, mmHg, inH2O, etc. • Converting between units is easily done by multiplying by an appropriate factor
Pressure units, conversion factors to obtain multiply factor by number of in H2O @ 60F torr (mm Hg)
Definition of pressures • Gage • Pressure relative to atmospheric pressure “psig” indicate this type of pressure • Differential • Pressure difference “psid” indicate this type of pressure • Absolute • Pressure relative to a perfect vacuum “psia” indicate this type of pressure Gage pressure is measured relative to ambient pressure Absolute pressure is measured relative to a perfect vacuum
Process pressure devices • Transmitters • Gage, differential and absolute pressure • Pressure switches • Solid state or dry contacts switches • I to P, current to pressure converters • 4 mA to 20 mA input, 3 psi to 15 psi or other output pressure ranges • Control valves • Pressure input controls open/close of valve • Pressure often measured on input and output • Pressure gauges • Analog or digital, local indicators • Flow computers • Static and DP pressure measurement combined with temperature to make volumetric flow measurements
Pressure troubleshooting tools • Pressure measurement tool • Calibrator, reference gauge • Pressure source • Hand pump • Pneumatic or hydraulic • Pressurized nitrogen tank with regulator • Connection hoses • DMM, loop calibrator or other mA test device
Calculating and comparing pressure accuracies • Pressure transmitters and most pressure measurement test tools are specified as % of input full scale. • When pressure transmitters and most pressure test tools measure at a fraction of full scale it impacts measurement accuracy proportionately • At 1/10th of full scale a pressure transmitter and pressure module are 1/10th as accurate as full scale. • A pressure transmitter scaled at 1/10th full scale is referred to have a “turndown ratio” of 10:1 • Multiply the turn down ratio times the accuracy specification for expected accuracy
Testing a pressure transmitter • Verify the input range of the transmitter • Verify transmitter accuracy specification • Total performance, not reference accuracy • Reference accuracy does not account for time, temperature andother real world performance factors • Don’t forget to consider mA accuracies • Don’t forget the turn down ratio • Find the right test tool • Accuracy and measurement range at the required measurement point • Compare the total performance specification of the calibrator to the transmitter and calculate the Test Uncertainty Ratio (TUR) • The calibrator should have a TUR of >4:1, 4X more accurate than the transmitter
Is a pressure calibrator’s accuracy adequate Ideal TUR is > 4:1, 3:1 acceptable in some instances
Is a pressure calibrator’s accuracy adequate TUR Changes with transmitter % of full scale 719 TUR = 6.7:1 700P TUR = 6.14:1
Measure a mA signal with the 789 (or 709H) Lift Loop Power Fuse. Disconnect wire at terminal block connection #6, Connect + (red) measure mA test lead to the wire connected to #10 Connect – (black) mA test lead to terminal block connection #6 Reconnect loop power fuse (push down) Compare measured value and mA % to indicator mA % of span Leave setup connected for next test. Connect 789 to measure mA
Pressure Transmitter Test • Connect the hand pump and gauge using tee fitting as shown. Close vent valve gently (circled) • Change the input pressure with the hand pump and Note the relationship between applied pressure and mA value, % of span on the 789 display • Apply the pressure input values below and verify the mA reading and the % value on the span indicator • PSI and % values should agree
Pressure transmitter test • Use the 719 to generate pressure with Electric pump • Power transmitter with 24V loop and measure mA • Test transmitter in 25% steps • 0 PSI to 100 PSI
Electric pump button (bump the pump!) Fine adjust vernier Centered in its’ range Vent valve (closed) + or – pressure (+) Pressure calibrator operation 4 3 3 4 3 4
Disconnect the wires connected to #6 and #7 Connect + (red) mA test lead #6 Connect – (black) mA test lead to #7 Connect pressure hose from 719 to the pressure transmitter. Configure the lower display to mA mA, Menu (F1), then CONFIG (F1) until mA is displayed (F2) NEXT to configure mA mode (F1) SELECT to configure mA mode for MEAS/24V. Press (F3) DONE Upper display pressure, lower display measured mA output Test the transmitter at 0, 25, 75 and 100 PSI, press the pump button, fine adjust with vernier Notice % of span indicator with pressure applied. Deviation from expected value is error 719Pro - Testing Pressure Transmitters
Testing a HART pressure transmitter video • As-Found test, documented • Smart transmitter Adjust: • Input Block A/D • Output block D/A • As-Left test, documented
Hands-on pressure switch test • Generate pressure with Electric pump and Monitor switch contacts for state change, record pressure • Set point and reset point captured (continuity test) • Deadband calculated (difference between set and reset) • Reset state is the relaxed condition of the switch • Normally open/closed • Set state occurs in response to measured variable, pressure or temperature PV
Electric pump button (bump the pump!) Fine adjust vernier Centered in its’ range Vent valve (closed) + or – pressure (+) Pressure calibrator operation 4 3 3 4 3 4
719Pro - Testing Pressure Switches Testing a Pressure Switch with a 719Pro • Connect+ (red) test lead from the 719Pro to #5on the terminal block. • Connect – (black) test lead from the 719Pro to #4on the terminal block • Connect pressure hose from 719Pro to the pressure switch. • Power up the 719Pro (green button). • With the vent valve open, press the “Zero” button to zero out the psi measurement.
719Pro - Testing Pressure Switches • Press (F2) to select Lower Display. • Press F1 twice (Menu and config). Press Select (F1) until [P1] ST is displayed. Then press Done (F3). • The lower display will show the pressure and switch contact open/closed position. • Close the vent valve. Press (tap slowly) the pump button or increase the pressure with the vernieruntil the switch indication changes from OPEN to CLOSE.
719Pro - Testing Pressure Switches • Slowly release the pressure with the vernier or vent valve until the test completes as shown • The 719Pro has captured the pressure where the switch set (closed), resets(open), and has calculated the deadband. • Cycle the NEXT button (F2) to review the results. • Press the NEW TEST button (F1) to reset or restart the test. • Repeatability is the key to a good test
Pressure Switch test with the 754 Connect + (red) test lead to #5 on the terminal block. Connect – (black) test lead to #4 on the terminal block. Connect the Pressure Switch hoses to pump and pressure module. Connect the test leads to the ohms measurement connection of the 754 754 Documented Pressure Switch Test
754 Documented pressure switch test • Hand pump to generate pressure • Pressure measured with pressure module • Monitor switch contacts for state change (resistance) • Set point and reset point captured • Dry contact (continuity) test • Live contacts AC or DC voltage • Deadband calculated • Pass/fail • Follow the Video or application note (Optional)
Pressure Switch Adjustment with the 754 Connect Pressure Module cable to the 754. Power up the 754 (green button). Select Measure Ohms Select MEAS/SOURCE Select Source pressure. Select Measure/Source for split screen Documented Pressure Switch Test 1 1 3 5 4 3 4-6 5 6
Documented Pressure Switch Test • Select the As Found softkey (F1) • Select : Press Enter to configure the setpoint • “10 PSI” setpoint, “high” setpoint type, “Short” for set state. • Press Done (F4) Test setup High
Documented Pressure Switch Test • Enter the remainder of test setup parameters as shown: • Press Done (F4) Test setup
Documented Pressure Switch Test • Select Manual Test and Continue • Slowly apply pressure until switch closes and “Set” is displayed. Setpoint capture
Documented Pressure Switch Test • Slowly release pressure until “Reset is displayed. • Set and reset points are displayed in the top Window • Repeat the test until you have repeatable results. Reset capture
Documented Pressure Switch Test • Press done to review the documented results. • The 754 documents the pressure where the switch sets and resets, and deadband results. Documented result
More information on pressure calibration: • Pressure calibration application notes: • Analog and HART pressure transmitter calibration • Pressure switch testing • Pressure Calibration • Pressure calibration videos: • 75X Analog Transmitter test • 75X HART Transmitter test • 75X Switch test • 719 Transmitter and switch test • Pressure calibration webinar Available at www.Fluke.com