Download
1 / 11
110 likes | 247 Vues
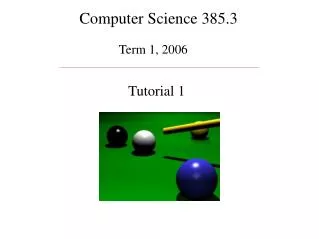
Computer Science 385.3. Term 1, 2006. Tutorial 2. Assignment 3 – The Virtual World. Assignment 3 – The Virtual World. Some Assignment Requirements: -Use of a cube to contain the world. -Interactive controls. -Use of the three-term lighting model. -Some extra geometry.

E N D
Computer Science 385.3 Term 1, 2006 Tutorial 2 Assignment 3 – The Virtual World
Assignment 3 – The Virtual World Some Assignment Requirements: -Use of a cube to contain the world. -Interactive controls. -Use of the three-term lighting model. -Some extra geometry. -Some texture mapping.
Assignment 3 – The Virtual World World Cube Your virtual world will be inside the World Cube, so make sure that the sides of the cube are pointing inwards – if the vertices are written counter-clockwise, you are looking at the front of the polygon. Also, remember that you are required to use glFrustum(), not any of the utility routines such as gluPerspective, etc. glFrustum(Left, Right, Bottom, Top, Near, Far);
Assignment 3 – The Virtual World Interactive Controls -The user should be able to wander through your world freely using some key or mouse commands. -You should usethe ModelView matrix to accomplish this. A series of rotatations and translations can be applied to the world in order to show the user's perspective.
Assignment 3 – The Virtual World Interactive Controls Remember: The rotation and translation matrix multiplications are applied in reverse order. GLfloat direction; // can be modified when user inputs commands. Vector position; // the user's position in the scene. display (void){ ... glPushMatrix(); glLoadIdentity(); glTranslatef(position.x, position.y, position.z); glRotatef(direction,0,1,0); // Rotation should go after renderScene(); // translation! glPopMatrix(); ...}
Assignment 3 – The Virtual World Interactive Controls The multiplication matrix used on the ModelView is similar to a stack – hence, the glPushMatrix() and glPopMatrix() commands. These can be used to save and load a previous matrix, which is very useful when you only want to transform specific parts of the scene (such as a spotlight moving through the scene.) Arrow keys can be captured using: void handleKeystroke(int key, int x, int y) { if (key == GLUT_KEY_LEFT) { … } }
Assignment 3 – The Virtual World 3-Term Lighting Model Lightpoint = Ambientpoint + Diffusepoint + Specularpoint OpenGL does these calculations for you, if you set up the lighting properly. To use OpenGL lighting, the programmer is expected to define: -Surface normals (normalized). -Material properties. -Light information.
Assignment 3 – The Virtual World 3-Term Lighting Model Each light can have: -Position in the world -Ambient, diffuse and specular components. -Direction and spotlight variables. -Attenuation variables – best made small in OpenGL. Setting up the lighting: glEnable(GL_LIGHTING); glShadeModel(GL_SMOOTH); glEnable(GL_LIGHT1);
Assignment 3 – The Virtual World Texture Mapping Can add precious detail to flat polygons. Can simulate some aspects of complicated geometry without the cost. Must have a texture to map. Must load texture into the program. Must provide a mapping between texture coordinates and surface coordinates – trivial for square shapes.
Assignment 3 – The Virtual World Texture Mapping Setting up the textures for mapping: glTexParameteri(GL_TEXTURE_2D, GL_TEXTURE_WRAP_S, GL_REPEAT); glTexParameteri(GL_TEXTURE_2D, GL_TEXTURE_WRAP_T, GL_REPEAT); glTexParameteri(GL_TEXTURE_2D, GL_TEXTURE_MAG_FILTER, GL_NEAREST); glTexParameteri(GL_TEXTURE_2D, GL_TEXTURE_MIN_FILTER, GL_NEAREST); glEnable(GL_TEXTURE_2D); Texture Mapping: glTexImage2D(GL_TEXTURE_2D, 0, 0, dimension, dimension, 0, GL_BGR_EXT, GL_UNSIGNED_BYTE, x); glBegin(GL_POLYGON); glTexCoord2f( 0, 0 ); glVertex3f( -50, -50, -50 ); glTexCoord2f( 1, 0 ); glVertex3f( 50, -50, -50 ); glTexCoord2f( 1, 1 ); glVertex3f( 50, 50, -50 ); glTexCoord2f( 0, 1 ); glVertex3f( -50, 50, -50 ); glEnd();